MainServlet
ActionServlet
HttpServlet
GenericServlet
Object
PortalRequestProcessor
PortletRequestProcessor
TilesRequestProcessor
RequestProcessor
Object
StrutsPortlet
JSPPortlet
LiferayPortlet
VelocityPortlet
GenericPortlet
Object
Liferay web 應用的文件結構
html
common
error.jsp
forward_common.jsp
forward_js.jsp
init.jsp
themes
bottom.jsp
portal.jsp
portlet.jsp
portlet_content.jspf
top_head.jsp
top_js.jspf
top_messages.jsp
....
js
everthing_unpacked.js
jquery
cookie.js
dimentions.js
hover_intent.js
jeditable.js
jquery.js
json.js
...
liferay
ajax.js
animate.js
auto_field.js
browser.js
column.js
dock.js
layout.js
layout_configuration.js
ldrag.js
liferay.js
navigation.js
popup.js
portal.js
portlet.js
service_unpacked.js
session.js
util.js
...
portal
change_password.jsp
css_cached.jsp
error.jsp
expire_session.jsp
flash.jsp
init.jsp
layout.jsp
load_render_portlet.jsp
login.jsp
render_portlet.jsp
terms_of_use.jsp
...
portlet
...
taglib
portlet
theme
ui
init.jsp
themes
_styled
_unstyled
brochure
classic
desktop
genesis
_diffs
css
base.css
custom.css
everthing_unpacked.css
layout.css
main.css
portlet.css
...
images
javascript
javascript.js
templates
dock.vm
init_custom.vm
navigation.vm
portal_normal.vm
portal_pop_up.vm
portlet.vm
Trackback: http://tb.blog.csdn.net/TrackBack.aspx?PostId=2177431
]]>
1. 定義新的JSP Portlet
a) 首先到 ...\portlet\ext中去加入自己要創建的portlet文件夾,例如myappletportlet,在文件夾中創建一個view.jsp,其中的內容可最簡單為:
Hello JSPPortlet world!
最好的起始學習方法應該是照葫蘆畫瓢吧,找一個已有的portlet,看它的結構和代碼。
b) 到 ...\WEB-INF\portlet-ext.xml 中加入
<portlet>
<portlet-name>EXT_2</portlet-name>
<!-- portlet 的最關鍵ID -->
<display-name>My AppletPortlet</display-name>
<portlet-class>com.liferay.portlet.JSPPortlet</portlet-class>
<!-- portlet 所屬的類 -->
<init-param>
<name>view-jsp</name>
<value>/portlet/ext/myappletportlet/view.jsp</value>
<!-- MVC中會直接傳遞到view.jsp -->
</init-param>
<expiration-cache>300</expiration-cache>
<supports>
<mime-type>text/html</mime-type>
</supports>
<portlet-info>
<title>PENG Portlet</title>
<!-- Portlet上顯示的名字 -->
</portlet-info>
<security-role-ref>
<role-name>Power User</role-name>
</security-role-ref>
<security-role-ref>
<role-name>User</role-name>
</security-role-ref>
</portlet>
c) 到 ...\WEB-INF\liferay-portlet-ext.xml 中加入
<portlet>
<portlet-name>EXT_2</portlet-name>
</portlet>
d) 到...\WEB-INF\liferay-display.xml 中加入以下代碼,以將EXT_2加入sample分類,到時候在Add Content時可以在這個sample組找到,否則在undefined中找。
<category name="category.sample">
<portlet id="47"/>
......
<portlet id="EXT_2"/>
</category>
e) 測試。如果上述的修改是直接在tomcat目錄中進行的話,重新啟動tomcat。如果是在前面提到的自己創建的EXT環境下進行的話,先用ant一下,再啟動tomcat。然后http://localhost:8080/,用test@liferay.com/test進去,選擇Add Content,應該可以在sample目錄下找到前面創建的那個portlet了:PENG Portlet。
2. 定義新的StrutsPortlet。過程要略微復雜一些,誰叫我們要用傳說中的MVC呢。先列出幾個關鍵的配置文件:
portlet-ext.xml: 定義portlet(JSR-168 attributes)
liferay-portlet-ext.xml: 注冊portlet(Liferay attributes)
struts-config.xml: 定義 page-flow (action mapping)
tiles-defs.xml: 定義 the page layout
更詳細的信息可從Liferay的官方網站上獲得。
a) 在ext中增加一個叫做Tiles的portlet文件夾,在其中創建一個view.jsp。內容可以簡單為:
Hello StrutsPortlet world!
b) Portlet-ext.xml 中加入
<portlet>
<portlet-name>EXT_3</portlet-name>
<display-name>Tiles</display-name>
<portlet-class>
com.liferay.portlet.StrutsPortlet
<!—實現JSR-168規范的類 -->
</portlet-class>
<init-param>
<name>view-action</name>
<value>/ext/tiles/view</value>
<!-- portal會到struts-config.xml中去尋找/ext/tiles/view -->
</init-param>
<expiration-cache>0</expiration-cache>
<supports>
<mime-type>text/html</mime-type>
</supports>
<resource-bundle>
com.liferay.portlet.StrutsResourceBundle
</resource-bundle>
<security-role-ref>
<role-name>user</role-name>
</security-role-ref>
</portlet>
c) liferay-portlet-ext.xml中加入
<portlet>
<portlet-name>EXT_3</portlet-name>
<struts-path>ext/tiles</struts-path>
<!-- 告訴portal所有帶有ext/tiles/*路徑的請求可以認為是這個portlet的范圍 -->
<use-default-template>false</use-default-template>
<!-- 因為將采用別的template,所以設置為false。將要使用的template在tiles-defs.xml中定義。-->
</portlet>
d) struts-config-ext.xml中加入
<action path="/ext/tiles/view"
forward="portlet.ext.tiles.view" />
<!-- Struts 將會在 tiles-defs.xml 中尋找 portlet.ext.tiles.view -->
e) 在tiles-defs-ext.xml 中加入
<definition name="portlet.ext.tiles.view" extends="portlet">
<!-- 定義了哪個 template 將被使用,這里是portlet template。這個template 定義了portlet的borders和buttons(例如minimize, maximize, close 等等)。 -->
<put name="portlet_content" value="/portlet/ext/tiles/view.jsp" />
<!-- portlet_content 是一個liferay的變量,portal可以使用這個變量來決定在portlet中會呈現什么內容。這里portlet的內容就是view.jsp。 -->
</definition>
f) 測試。
Trackback: http://tb.blog.csdn.net/TrackBack.aspx?PostId=2177436
]]>
前面提到在Add Content中點擊某個portlet的"Add"按鈕,其實就是調用了addPortlet(...)方法。
top_js.jspf
------------------
function addPortlet(plid, portletId, doAsUserId) {
var refreshPortletList = getRefreshPortletList();
if (refreshPortletList["_" + portletId]) {
self.location = "<%= themeDisplay.getPathMain() %>/portal/update_layout?p_l_id=" + plid + "&p_p_id=" + portletId + "&doAsUserId=" + doAsUserId + "&<%=
Constants.CMD %>=<%= Constants.ADD %>&referer=<%= HttpUtil.encodeURL(currentURL) %>&refresh=1";
}
else {
var loadingDiv = document.createElement("div");
var container = document.getElementById("layout-column_column-1");
if (container == null) {
return;
}
loadingDiv.className = "loading-animation";
container.appendChild(loadingDiv);
var queryString = "<%= themeDisplay.getPathMain() %>/portal/update_layout?p_l_id=" + plid + "&p_p_id=" + portletId + "&doAsUserId=" + doAsUserId + "&<%=
Constants.CMD %>=<%= Constants.ADD %>¤tURL=<%= HttpUtil.encodeURL(currentURL) %>";
/* queryString = /c/portal/update_layout?p_l_id=10102&p_p_id=reports&doAsUserId=&cmd=add¤tURL=%2Fweb%2Fguest%2Fhome */
/* 這就是最終發送往服務器端的數據了,剛好可以與前面所分析的服務器端收到/c/portal/update_layout后的處理流程對應起來了。*/
addPortletHTML(queryString, loadingDiv);
}
}
portlet_js.jspf
--------------------
function getRefreshPortletList() {
<%
List allPortlets = PortletLocalServiceUtil.getPortlets(company.getCompanyId(), false, false);
List nonAjaxPortlets = new ArrayList();
for (int i = 0; i < allPortlets.size(); i++) {
Portlet portlet = (Portlet)allPortlets.get(i);
if (!portlet.isAjaxable()) {
nonAjaxPortlets.add(portlet.getPortletId());
}
}
StringMaker portletList = new StringMaker();
for (int i = 0; i < nonAjaxPortlets.size(); i++) {
portletList.append("_");
portletList.append(nonAjaxPortlets.get(i));
portletList.append(":true");
portletList.append((i < nonAjaxPortlets.size() - 1) ? "," : "");
}
%>
var refreshPortletList = { <%= portletList.toString() %> };
return refreshPortletList;
}
function addPortletHTML(url, placeHolder) {
var addPortletReturn = function(html) {
var container = placeHolder.parentNode;
var addDiv = document.createElement("div");
addDiv.style.display = "none";
addDiv.innerHTML = html;
var portletBound = jQuery(".portlet-boundary:first", addDiv).get(0);
portletBound.parentNode.removeChild(portletBound);
var portletId = portletBound.id;
portletId = portletId.replace(/^p_p_id_/,"");
portletId = portletId.replace(/_$/,"");
portletBound.portletId = portletId;
Liferay.Portlet.flagAjax(portletId);
container.replaceChild(portletBound, placeHolder);
Liferay.Util.evalScripts(addDiv);
if (!jQuery.browser.firefox) {
Liferay.Util.evalScripts(portletBound);
}
<c:if test="<%= (layout != null) && (LayoutPermissionUtil.contains(permissionChecker, layout, ActionKeys.UPDATE)) %>">
if (!portletBound.isStatic) {
if (themeDisplay.isFreeformLayout()) {
Liferay.Freeform.add(portletBound);
}
else {
Liferay.Columns.add(portletBound);
}
}
</c:if>
if (jQuery.browser.firefox) {
setTimeout("Liferay.Portlet.process(\"" + portletId + "\")", 0);
}
else {
Liferay.Portlet.process(portletId);
}
Liferay.Util.addInputType(portletBound.id);
Liferay.Util.addInputFocus(portletBound.id);
if (window.location.hash) {
window.location.hash = "p_" + portletId;
}
return portletId;
};
/* addPortletHTML()生成一個Ajax Request,收到Ajax Response后調用addPortletReturn。*/
AjaxUtil.request(url, {
onComplete: function(xmlHttpReq){
addPortletReturn(xmlHttpReq.responseText);
}
});
}
/* xmlHttpReq.responseText的內容就是該portlet要嵌入portal中的的HTML代碼片段,如下圖所示。在經過addPortletReturn()處理后完成portlet的添加工作*/

Trackback: http://tb.blog.csdn.net/TrackBack.aspx?PostId=2177414
]]>
增加一個portlet
請求:
Hypertext Transfer Protocol
POST /c/portal/update_layout HTTP/1.1\r\n
Referer: http://10.108.10.205:8080/web/guest/home?p_p_id=EXT_1&p_p_action=0&p_p_state=normal&\r\n
method: POST /c/portal/update_layout HTTP/1.1\r\n
Content-Type: application/x-www-form-urlencoded\r\n
Accept-Encoding: gzip, deflate\r\n
Host: 10.108.10.205:8080\r\n
Content-Length: 136
Connection: Keep-Alive\r\n
Cache-Control: no-cache\r\n
Cookie: COOKIE_SUPPORT=true; LOGIN=test@liferay.com; SCREEN_NAME=DkOc2AWkcEQ=; GUEST_LANGUAGE_ID=en_US; JSESSIONID=2DFE59B64996E95DE0C64BA609CF79D1\r\n
\r\n
Line-based text data: application/x-www-form-urlencoded
p_l_id=10102&p_p_id=EXT_1&doAsUserId=&cmd=add¤tURL=%2Fweb%2Fguest%2Fhome%3Fp_p_id%3DEXT_1%26p_p_action%3D0%26p_p_state%3Dnormal%26
響應:
Hypertext Transfer Protocol
HTTP/1.1 200 OK\r\n
Server: Apache-Coyote/1.1\r\n
Set-Cookie: COOKIE_SUPPORT=true; Expires=Thu, 05-Mar-2009 07:53:59 GMT; Path=/\r\n
Liferay-Portal: Liferay Enterprise Portal 4.3.3 (Owen / Build 4303 / October 9, 2007)\r\n
Content-Encoding: gzip\r\n
Content-Type: text/html;charset=UTF-8\r\n
Content-Length: 924
Date: Wed, 05 Mar 2008 07:54:00 GMT\r\n
\r\n
Content-encoded entity body (gzip): 924 bytes -> 2534 bytes
Line-based text data: text/html
<div id="p_p_id_EXT_1_" class="portlet-boundary portlet-boundary_EXT_1_" >\r
<a name="p_EXT_1"></a>\r
<div class="portlet" id="portlet-wrapper-EXT_1">\n
<div class="portlet-topper">\n
<span class="portlet-title">\n
Reports\n
</span>\n
<div class="portlet-icons" id="portlet-small-icon-bar_EXT_1">\n
\r
<a href="javascript: Liferay.PortletCSS.init('EXT_1');" target="_self"><img align="absmiddle" border="0"
src="/html/themes/genesis/images/common/../portlet/portlet_css.png" title="Look and Feel" /></a>\r
<a href="javascript: self.location = 'http%3A%2F%2F10.108.10.205%3A8080%2Fweb%2Fguest%2Fhome%3Fp_p_id%3D86%26p_p_action%3D0%26p_p_state%3Dmaximized%
26_86_struts_action%3D%252Fportlet_configuration%252Fedit_permissions%26_86_redirect%3D%252
<span id="p_p_body_EXT_1_min_buttons">\r
<a href="javascript: minimizePortlet('10102', 'EXT_1', false, '');"><img align="absmiddle" border="0"
src="/html/themes/genesis/images/portlet/minimize.png" title="Minimize" /></a>\r src="/html/themes/genesis/images/common/../portlet/maximize.png" title="Maximize" /></a>\r src="/html/themes/genesis/images/common/../portlet/close.png" title="Remove" /></a>\r 請求: 響應: 恢復一個portlet(從最小化) 請求: 響應: 請求: shockwave-flash, */*\r\n JSESSIONID=2DFE59B64996E95DE0C64BA609CF79D1\r\n 響應: 請求: shockwave-flash, */*\r\n JSESSIONID=2DFE59B64996E95DE0C64BA609CF79D1\r\n 響應: 請求: 響應: 請求: 響應: Trackback: http://tb.blog.csdn.net/TrackBack.aspx?PostId=2177424
</span>\r
<a href="
<a href="javascript: closePortlet('10102', 'EXT_1', '');" target="_self"><img align="absmiddle" border="0"
</div>\n
</div>\n
<div class="portlet-content">\n
<div class="portlet-content-container" style="">\r
<div>\r
<a href=" 123</a>\r
</div>\r
</div>\r
</div>\n
</div>\r
</div>\r
<script type="text/javascript">\r
document.getElementById("p_p_id_EXT_1_").portletId = "EXT_1";\r
document.getElementById("p_p_id_EXT_1_").columnPos = 0;\r
if (!Liferay.Portlet.isAjax("EXT_1")) {\r
Liferay.Portlet.process("EXT_1");\r
}\r
jQuery(\r
function() {\r
Liferay.Util.portletTitleEdit(\r
{\r
obj: jQuery("#p_p_id_EXT_1_"),\r
plid: "10102",\r
doAsUserId: "",\r
portletId: "EXT_1"\r
}\r
);\r
}\r
);\r
</script>\r
最小化一個portlet
Hypertext Transfer Protocol
POST /c/portal/update_layout HTTP/1.1\r\n
Referer: http://10.108.10.205:8080/web/guest/home\r\n
method: POST /c/portal/update_layout HTTP/1.1\r\n
Content-Type: application/x-www-form-urlencoded\r\n
Accept-Encoding: gzip, deflate\r\n
User-Agent: Mozilla/4.0 (compatible; MSIE 6.0; Windows NT 5.0; Maxthon; .NET CLR 1.1.4322; .NET CLR 2.0.50727)\r\n
Host: 10.108.10.205:8080\r\n
Content-Length: 68
Connection: Keep-Alive\r\n
Cache-Control: no-cache\r\n
Cookie: COOKIE_SUPPORT=true; LOGIN=test@liferay.com; SCREEN_NAME=DkOc2AWkcEQ=; GUEST_LANGUAGE_ID=en_US; JSESSIONID=2DFE59B64996E95DE0C64BA609CF79D1\r\n
\r\n
Line-based text data: application/x-www-form-urlencoded
p_l_id=10102&p_p_id=EXT_1&p_p_restore=false&doAsUserId=&cmd=minimize
Hypertext Transfer Protocol
HTTP/1.1 200 OK\r\n
Server: Apache-Coyote/1.1\r\n
Set-Cookie: COOKIE_SUPPORT=true; Expires=Thu, 05-Mar-2009 07:57:17 GMT; Path=/\r\n
Liferay-Portal: Liferay Enterprise Portal 4.3.3 (Owen / Build 4303 / October 9, 2007)\r\n
Content-Type: text/html;charset=UTF-8\r\n
Content-Length: 0
Date: Wed, 05 Mar 2008 07:57:17 GMT\r\n
\r\n
Hypertext Transfer Protocol
POST /c/portal/update_layout HTTP/1.1\r\n
Accept: */*\r\n
Accept-Language: en-us\r\n
Referer: http://10.108.10.205:8080/web/guest/home\r\n
method: POST /c/portal/update_layout HTTP/1.1\r\n
Content-Type: application/x-www-form-urlencoded\r\n
Accept-Encoding: gzip, deflate\r\n
User-Agent: Mozilla/4.0 (compatible; MSIE 6.0; Windows NT 5.0; Maxthon; .NET CLR 1.1.4322; .NET CLR 2.0.50727)\r\n
Host: 10.108.10.205:8080\r\n
Content-Length: 67
Connection: Keep-Alive\r\n
Cache-Control: no-cache\r\n
Cookie: COOKIE_SUPPORT=true; LOGIN=test@liferay.com; SCREEN_NAME=DkOc2AWkcEQ=; GUEST_LANGUAGE_ID=en_US; JSESSIONID=2DFE59B64996E95DE0C64BA609CF79D1\r\n
\r\n
Line-based text data: application/x-www-form-urlencoded
p_l_id=10102&p_p_id=EXT_1&p_p_restore=true&doAsUserId=&cmd=minimize
Hypertext Transfer Protocol
HTTP/1.1 200 OK\r\n
Server: Apache-Coyote/1.1\r\n
Set-Cookie: COOKIE_SUPPORT=true; Expires=Thu, 05-Mar-2009 07:57:17 GMT; Path=/\r\n
Liferay-Portal: Liferay Enterprise Portal 4.3.3 (Owen / Build 4303 / October 9, 2007)\r\n
Content-Type: text/html;charset=UTF-8\r\n
Content-Length: 0
Date: Wed, 05 Mar 2008 07:57:17 GMT\r\n
\r\n
最大化一個portlet
Hypertext Transfer Protocol
GET /web/guest/home?p_p_id=EXT_1&p_p_action=0&p_p_state=maximized& HTTP/1.1\r\n
Accept: image/gif, image/x-xbitmap, image/jpeg, image/pjpeg, application/vnd.ms-excel, application/vnd.ms-powerpoint, application/msword, application/x-
Referer: http://10.108.10.205:8080/web/guest/home\r\n
Accept-Language: en-us\r\n
Accept-Encoding: gzip, deflate\r\n
User-Agent: Mozilla/4.0 (compatible; MSIE 6.0; Windows NT 5.0; Maxthon; .NET CLR 1.1.4322; .NET CLR 2.0.50727)\r\n
Host: 10.108.10.205:8080\r\n
Connection: Keep-Alive\r\n
Cookie: LFR_SESSION_STATE_10111=1204702463265; COOKIE_SUPPORT=true; LOGIN=test@liferay.com; SCREEN_NAME=DkOc2AWkcEQ=; GUEST_LANGUAGE_ID=en_US;
\r\n
Hypertext Transfer Protocol
HTTP/1.1 200 OK\r\n
Server: Apache-Coyote/1.1\r\n
Set-Cookie: COOKIE_SUPPORT=true; Expires=Thu, 05-Mar-2009 07:39:37 GMT; Path=/\r\n
Liferay-Portal: Liferay Enterprise Portal 4.3.3 (Owen / Build 4303 / October 9, 2007)\r\n
Content-Encoding: gzip\r\n
Content-Type: text/html;charset=UTF-8\r\n
Content-Length: 4473
Date: Wed, 05 Mar 2008 07:39:47 GMT\r\n
\r\n
Content-encoded entity body (gzip): 4473 bytes -> 19199 bytes
Line-based text data: text/html
<!DOCTYPE html PUBLIC "-//W3C//DTD XHTML 1.0 Transitional//EN" "
<html dir="ltr">\r
<head>\r
<title>liferay.com - Welcome</title>\r
<meta content="text/html; charset=UTF-8" http-equiv="content-type" />\r
<link rel="Shortcut Icon" href="/html/themes/genesis/images/liferay.ico" _fcksavedurl=""/html/themes/genesis/images/liferay.ico"" />\r
<link href="/c/portal/css_cached?themeId=genesis&colorSchemeId=01&t=1204702034813" type="text/css" rel="stylesheet" />\r
<style type="text/css">\r
</style>\r
<script type="text/javascript">\r
var themeDisplay = {\r
getCompanyId: function() {\r
return "10094";\r
},\r
getDoAsUserIdEncoded: function() {\r
return "";\r
},\r
................................(省略了整個頁面的代碼)
恢復一個portle(從全屏)
Hypertext Transfer Protocol
GET /web/guest/home?p_p_id=EXT_1&p_p_action=0&p_p_state=normal& HTTP/1.1\r\n
Accept: image/gif, image/x-xbitmap, image/jpeg, image/pjpeg, application/vnd.ms-excel, application/vnd.ms-powerpoint, application/msword, application/x-
Referer: http://10.108.10.205:8080/web/guest/home?p_p_id=EXT_1&p_p_action=0&p_p_state=maximized&\r\n
Accept-Language: en-us\r\n
Accept-Encoding: gzip, deflate\r\n
User-Agent: Mozilla/4.0 (compatible; MSIE 6.0; Windows NT 5.0; Maxthon; .NET CLR 1.1.4322; .NET CLR 2.0.50727)\r\n
Host: 10.108.10.205:8080\r\n
Connection: Keep-Alive\r\n
Cookie: LFR_SESSION_STATE_10111=1204702790765; COOKIE_SUPPORT=true; LOGIN=test@liferay.com; SCREEN_NAME=DkOc2AWkcEQ=; GUEST_LANGUAGE_ID=en_US;
\r\n
Hypertext Transfer Protocol
HTTP/1.1 200 OK\r\n
Server: Apache-Coyote/1.1\r\n
Set-Cookie: COOKIE_SUPPORT=true; Expires=Thu, 05-Mar-2009 07:39:37 GMT; Path=/\r\n
Liferay-Portal: Liferay Enterprise Portal 4.3.3 (Owen / Build 4303 / October 9, 2007)\r\n
Content-Encoding: gzip\r\n
Content-Type: text/html;charset=UTF-8\r\n
Content-Length: 4473
Date: Wed, 05 Mar 2008 07:39:47 GMT\r\n
\r\n
Content-encoded entity body (gzip): 4473 bytes -> 19199 bytes
Line-based text data: text/html
<!DOCTYPE html PUBLIC "-//W3C//DTD XHTML 1.0 Transitional//EN" "
<html dir="ltr">\r
<head>\r
<title>liferay.com - Welcome</title>\r
<meta content="text/html; charset=UTF-8" http-equiv="content-type" />\r
<link rel="Shortcut Icon" href="/html/themes/genesis/images/liferay.ico" _fcksavedurl=""/html/themes/genesis/images/liferay.ico"" />\r
<link href="/c/portal/css_cached?themeId=genesis&colorSchemeId=01&t=1204702034813" type="text/css" rel="stylesheet" />\r
<style type="text/css">\r
</style>\r
<script type="text/javascript">\r
var themeDisplay = {\r
getCompanyId: function() {\r
return "10094";\r
},\r
getDoAsUserIdEncoded: function() {\r
return "";\r
},\r
................................(省略了整個頁面的代碼)
拖動一個portlet
Hypertext Transfer Protocol
POST /c/portal/update_layout HTTP/1.1\r\n
Accept: */*\r\n
Accept-Language: en-us\r\n
Referer: http://10.108.10.205:8080/web/guest/home?p_p_id=EXT_1&p_p_action=0&p_p_state=normal&\r\n
method: POST /c/portal/update_layout HTTP/1.1\r\n
Content-Type: application/x-www-form-urlencoded\r\n
Accept-Encoding: gzip, deflate\r\n
User-Agent: Mozilla/4.0 (compatible; MSIE 6.0; Windows NT 5.0; Maxthon; .NET CLR 1.1.4322; .NET CLR 2.0.50727)\r\n
Host: 10.108.10.205:8080\r\n
Content-Length: 80
Connection: Keep-Alive\r\n
Cache-Control: no-cache\r\n
Cookie: COOKIE_SUPPORT=true; LOGIN=test@liferay.com; SCREEN_NAME=DkOc2AWkcEQ=; GUEST_LANGUAGE_ID=en_US; JSESSIONID=2DFE59B64996E95DE0C64BA609CF79D1\r\n
\r\n
Line-based text data: application/x-www-form-urlencoded
p_l_id=10102&p_p_id=EXT_1&p_p_col_id=column-2&p_p_col_pos=0&doAsUserId=&cmd=move
Hypertext Transfer Protocol
HTTP/1.1 200 OK\r\n
Server: Apache-Coyote/1.1\r\n
Set-Cookie: COOKIE_SUPPORT=true; Expires=Thu, 05-Mar-2009 07:49:39 GMT; Path=/\r\n
Liferay-Portal: Liferay Enterprise Portal 4.3.3 (Owen / Build 4303 / October 9, 2007)\r\n
Content-Type: text/html;charset=UTF-8\r\n
Content-Length: 0
Date: Wed, 05 Mar 2008 07:49:39 GMT\r\n
\r\n
刪除一個portlet
Hypertext Transfer Protocol
POST /c/portal/update_layout HTTP/1.1\r\n
Accept: */*\r\n
Accept-Language: en-us\r\n
Referer: http://10.108.10.205:8080/web/guest/home?p_p_id=EXT_1&p_p_action=0&p_p_state=normal&\r\n
method: POST /c/portal/update_layout HTTP/1.1\r\n
Content-Type: application/x-www-form-urlencoded\r\n
Accept-Encoding: gzip, deflate\r\n
User-Agent: Mozilla/4.0 (compatible; MSIE 6.0; Windows NT 5.0; Maxthon; .NET CLR 1.1.4322; .NET CLR 2.0.50727)\r\n
Host: 10.108.10.205:8080\r\n
Content-Length: 48
Connection: Keep-Alive\r\n
Cache-Control: no-cache\r\n
Cookie: COOKIE_SUPPORT=true; LOGIN=test@liferay.com; SCREEN_NAME=DkOc2AWkcEQ=; GUEST_LANGUAGE_ID=en_US; JSESSIONID=2DFE59B64996E95DE0C64BA609CF79D1\r\n
\r\n
Line-based text data: application/x-www-form-urlencoded
p_l_id=10102&p_p_id=EXT_1&doAsUserId=&cmd=delete
Hypertext Transfer Protocol
HTTP/1.1 200 OK\r\n
Server: Apache-Coyote/1.1\r\n
Set-Cookie: COOKIE_SUPPORT=true; Expires=Thu, 05-Mar-2009 07:52:25 GMT; Path=/\r\n
Liferay-Portal: Liferay Enterprise Portal 4.3.3 (Owen / Build 4303 / October 9, 2007)\r\n
Content-Type: text/html;charset=UTF-8\r\n
Content-Length: 0
Date: Wed, 05 Mar 2008 07:52:25 GMT\r\n
\r\n
]]>
通過分析知道,在Add Content中點擊某個portlet的add按鈕后,服務器會收到一個/c/portal/update_layout...的請求(這里與生成 Add Content Portlet有區別,在前面文章中提到,那時的請求是一個/c/portal/render_portlet...),服務器在收到請求后前面的步驟同上面分析add content portlet的過程一樣。
PortalRequestProcess.process()
String path = processPath(request, response);
//這里path = “/portal/update_layout”.
ActionMapping mapping = processMapping(request, response, path);
//這里找到在struts-config.xml中定義的關于上面path的mapping.
Action action = processActionCreate(request, response, mapping);
//這里生成了UpdateLayoutAction.
ActionForward forward = processActionPerform(request, response, action, form, mapping);
processForwardConfig(request, response, forward);
在struts-config.xml中有定義:
<action path="/portal/update_layout" type="com.liferay.portal.action.UpdateLayoutAction" />
UpdateLayoutAction.execute()
LayoutTypePortlet layoutTypePortlet = themeDisplay.getLayoutTypePortlet();
String cmd = ParamUtil.getString(req, Constants.CMD);
String portletId = ParamUtil.getString(req, "p_p_id");
if (cmd.equals(Constants.ADD))
{ portletId = layoutTypePortlet.addPortletId(userId, portletId); }
else if (cmd.equals(Constants.DELETE)) { layoutTypePortlet.removePortletId(portletId); }
else if (cmd.equals("drag")) { }
else if (cmd.equals("minimize")) { }
else if (cmd.equals("move")) { layoutTypePortlet.movePortletId(userId, portletId, columnId, columnPos); }
else if (cmd.equals("template")) { }
if (ParamUtil.getBoolen(req, "refresh")) {}
else {
if (cmd.equals(Constants.ADD) && (portletId != null)) {
Action renderPortletAction = (Action)InstancePool.get(RenderPortletAction.class.getName());
renderPortletAction.execute(mapping, form, dynamicReq, res);
}
因為cmd=add,所以調用LayoutTypePortlet.addPortletId()來將portletId加入到Layout中,而且最后調用RenderPortletAction.execute()來將這個portlet最終render出來,具體過程如上面關于content portlet的分析。
Trackback: http://tb.blog.csdn.net/TrackBack.aspx?PostId=2177387
]]>
------------------
<definition name="portal" path="/common/themes/portal.jsp">
<put name="title" value="" />
<put name="selectable" value="false" />
</definition>
portal.jsp
--------------
<c:choose>
<c:when test="<%= themeDisplay.isStateExclusive() %>">
<%= request.getAttribute(WebKeys.LAYOUT_CONTENT) %>
</c:when>
<c:when test="<%= themeDisplay.isStatePopUp() %>">
<liferay-theme:include page="portal_pop_up.jsp" />
</c:when>
<c:otherwise>
<liferay-theme:include page="portal_normal.jsp" />
</c:otherwise>
</c:choose>
portal_normal.vm
--------------------------
<html dir="#language ("lang.dir")">
$theme.include($top_head_include)
#css ($css_main_file)
#js ($js_main_file)
$theme.include($bottom_ext_include)
$theme.include($session_timeout_include)
$theme.include($sound_alerts_include)
init.vm
---------
#set ($bottom_ext_include = "$dir_include/common/themes/bottom.jsp")
#set ($content_include = "$dir_include$tilesContent")
#set ($session_timeout_include = "$dir_include/common/themes/session_timeout.jsp")
#set ($sound_alerts_include = "$dir_include/common/themes/sound_alerts.jsp")
#set ($top_head_include = "$dir_include/common/themes/top_head.jsp")
#set ($top_messages_include = "$dir_include/common/themes/top_messages.jsp")
top_head.jsp
------------------
<%@ include file="/html/common/themes/top_js.jspf" %>
<%@ include file="/html/common/themes/top_js-ext.jsp" %>
top_js.jspf
------------
<%
String[] javaScriptFiles = PropsUtil.getArray(PropsUtil.JAVASCRIPT_FILES);
for (int i = 0; i < javaScriptFiles.length; i++) {
%>
<script src="<%= themeDisplay.getPathJavaScript() %>/<%= javaScriptFiles[i] %>" type="text/javascript"></script>
<%
}
%>
portal.properties
-------------------
##
## JavaScript
##
#
# Set a list of JavaScript files that will be loaded programmatically in
# /html/common/themes/top_js.jsp.
#
# The ordering of the JavaScript files is important. Specifically, all
# JQuery scripts should go first.
#
# The Liferay scripts are grouped in such a way, that the first grouping
# denotes utility scripts that are used by the second and third groups. The
# second grouping denotes utility classes that rely on the first group, but
# does not rely on the second or third group. The third grouping denotes
# modules that rely on the first and second group.
#
javascript.files=\
\
#
# JQuery scripts
#
\
jquery/jquery.js,\
jquery/cookie.js,\
jquery/dimensions.js,\
jquery/hover_intent.js,\
jquery/interface.js,\
jquery/interface.patch.js,\
jquery/j2browse.js,\
jquery/jeditable.js,\
jquery/json.js,\
jquery/media.js,\
jquery/tabs.js,\
\
#
# Miscellaneous scripts
#
\
misc/class.js,\
misc/swfobject.js,\
\
#
# Liferay base utility scripts
#
\
liferay/liferay.js,\
liferay/browser.js,\
liferay/util.js,\
liferay/language.js,\
liferay/layout.js,\
\
#
# Liferay utility scripts
#
\
liferay/ajax.js,\
liferay/animate.js,\
liferay/coordinates.js,\
liferay/ldrag.js,\
#liferay/leditable.js,\
liferay/lresize.js,\
liferay/popup.js,\
liferay/portal.js,\
liferay/portlet.js,\
liferay/publisher.js,\
\
#
# Liferay modules
#
\
liferay/auto_fields.js,\
liferay/color_picker.js,\
liferay/columns.js,\
liferay/dock.js,\
liferay/dynamic_select.js,\
liferay/freeform.js,\
liferay/layout_configuration.js,\
liferay/messaging.js,\
liferay/notice.js,\
liferay/navigation.js,\
liferay/session.js,\
liferay/tags_selector.js
Trackback: http://tb.blog.csdn.net/TrackBack.aspx?PostId=2177411
]]>
下面以顯示 Add Content 為例進行分析,Add Content 窗口其實是一個在 portlet-custom.xml 中定義的名為87的portlet。點擊Add Content鏈接會產生一個Reqest,開始整個處理的流程。

1. Request的生成。
當時頁面的源文件中有關的代碼為:
<li class="add-content">
<a href="javascript: void(0);" onclick="LayoutConfiguration.toggle('10102', '87', '');">Add Content</a>
</li>
點擊add content調用的是LayoutConfiguration.toogle()。
layout_configuratioin.js
var LayoutConfiguration = {
toggle : function (plid, ppid, doAsUserId) {
var url = themeDisplay.getPathMain() + "/portal/render_portlet?p_l_id=" + plid + "&p_p_id=" +ppid + "&doAsUserId=" + doAsUserId + "&p_p_state=exclusive";
AjaxUtil.update(url, popup, {onComplete: function(){
LayoutConfiguration.init();
Liferay.Util.addInputType();
Liferay.Util.addInputFocus();}
});};
/*總之是會生成一個Ajax請求發送到服務器,過程以后可以分析 */
用Wireshark捕捉到的Request數據如下,知道請求中含有/c/portal/render_portlet字段,那自然會送入 MainServlet處理了。

2. MainServlet.service()
/* 這里是Request首先到達的地方*/
ServletContext ctx = getServletContext();
req.setAttribute(WebKeys.CTX, ctx);
PortletRequestProcessor portletReqProcessor = PortletRequestProcessor.getInstance(this, moduleConfig);
ctx.setAttribute(WebKeys.PORTLET_STRUTS_PROCESSOR, portletReqProcessor);
callParentService(req, res);
/* 調用ActionServlet.service(),由于在ActionServlet中沒有覆蓋service方法,所以 MainServlet 的super.service() 追溯到HttpServlet 的service方法 */
3. HttpServlet.service()
if (method.equals(METHOD_GET)) { ,,,
} else if (method.equals(METHOD_POST)) {
doPost(req, resp);
} else if (method.equals(METHOD_PUT)) {
doPut(req, resp);
} else if (method.equals(METHOD_DELETE)) {
doDelete(req, resp);
} else if (method.equals(METHOD_OPTIONS)) {
doOptions(req,resp);
} else if (method.equals(METHOD_TRACE)) {
doTrace(req,resp);
}
/* 在 service 中,根據http的類型,分別調用 doPost, doGet, doPut, ...,由于ActionServlet中實現了doPost等方法,所以MainServlet.service()方法會傳遞到 ActionServlet中的doPost等方法。*/
4. ActionServlet.doPost()
process(request, response);
/* 在另外ActionServlet的不同方法中,例如doGet(),doPut(),都調用了process()方法。*/
5. ActionServlet.process()
ModuleConfig config = getModuleConfig(request);
RequestProcessor processor = getProcessorForModule(config);
if (processor == null) {
processor = getRequestProcessor(config);
}
processor.process(request, response);
/* 最終傳遞到對應的Request Processor 的process()方法中去,也就是PortalRequestProcessor.process() */
6. PortalRequestProcessor.process()
public void process(HttpServletRequest req, HttpServletResponse res)
throws IOException, ServletException {
String path = super.processPath(req, res); //path = “/portal/render_portlet”
ActionMapping mapping = (ActionMapping)moduleConfig.findActionconfig(path);
super.process(req, res);
/*由于TilesRequestProcessor中沒有定義process()方法,所以調用 RequestProcessor.process() */
}
7. RequestProcessor.process()
public void process(HttpServletRequest request, HttpServletResponse response)
throws IOException, ServletException {
String path = processPath(request, response);
//這里path = “/portal/render_portlet”.
ActionMapping mapping = processMapping(request, response, path);
//這里找到在struts-config.xml中定義的關于上面path的mapping.
Action action = processActionCreate(request, response, mapping);
//這里生成了RenderPortletAction.
ActionForward forward = processActionPerform(request, response, action, form, mapping);
processForwardConfig(request, response, forward);
}
至此,每個由 MainServlet 傳遞來的 Request 都能到達對應的 Action,例如 LayoutAction,RenderPortletAction,UpdateLayoutAction,由這些 Action 最終完成 Layout 和 Portlet 的呈現。這里對應的action是RenderPortletAction(由下面的struts-config.xml中定義)。
下面以RenderPortletAction為例說明進一步的action過程。在struts-config.xml這個文件中定義了action class, forward path。
<action path="/portal/layout" type="com.liferay.portal.action.LayoutAction">
<forward name="portal.layout" path="portal.layout" />
</action>
<action path="/portal/update_layout" type="com.liferay.portal.action.UpdateLayoutAction" />
<action path=“/portal/render_portlet” type=“com.liferay.portal.action.RenderPortletAction”>
<forward name=“/portal/render_portlet” path=“/portal/render_portlet.jsp”/>
</action>
<!-- 這里定義了由RenderPortletAction來處理”/portal/render_portlet”,而且最后要forward到” /portal/render_portlet.jsp”。所以最后會把render_portlet.jsp包含到response的頁面當中-- >
那render_portlet.jsp又是如何實現最終把add content這個portlet顯示出來的呢,下回接著分析。
Trackback: http://tb.blog.csdn.net/TrackBack.aspx?PostId=2177383
]]>
render_portlet.jsp
-------------------------
Portlet portlet = (Portlet)request.getAttribute(WebKeys.RENDER_PORTLET);
cachePortlet = PortletInstanceFactory.create(portlet, application);
cachePortlet.render(renderRequestImpl, renderResponseImpl);
CachePortlet.render()
_invoke(req, res, false);
CachePortlet._invoke()
if (action)
_portlet.processAction(...)
else
_portlet.render(...);
// 因為87 portlet是一個StrutsPortlet,在這里會調用StrutsPortlet.render()方法,由于StrutsPortlet和 LiferayPortlet中都沒有定義render()方法,最終調用的是GenericPortlet.render()方法。
GenericPortlet.render()
response.setTitle(getTitle(request));
doDispatch(request, response);
//由于LiferayPortlet中覆蓋了doDispatch()方法,所以調用的是LiferayPortlet.doDispatch()
LiferayPortlet.doDispatch()
if (mode.equals(PortletMode.VIEW)) {
doView(req, res);
}
else if (mode.equals(LiferayPortletMode.ABOUT)) {
doAbout(req, res);
}
else if (mode.equals(LiferayPortletMode.CONFIG)) {
doConfig(req, res);
}
.......
//由于StrutsPortlet中重載了doView, doAbout等方法,所以調用的是StrutsPortlet中的各種doXXX()方法,下面以doView()為例
// 另外有可能會有別的類型的portlet,例如liferay的JSPPortlet,從而會調用JSPPortlet.doXXX()方法。在 JSPPortlet.doView中,調用include(viewJSP, req, res);而viewJSP = getInitParameter("view-jsp");所以在這個地方就可以把該JSPPortlet定義好的view.jsp直接include 進來,沒有如同StrutsPortlet的后續工作。
StrutsPortlet.doView()
include(req, res);
//StrutsPortlet中其他的doXXX()方法都會最后調用include()方法。
StrutsPortlet.include()
PortletRequestProcessor processor = _getPortletRequestProcessor(req);
processor.process(req, res);
PortletRequestProcessor.process(RenderRequest req, RenderResponse res)
//這里PortletRequestProcessor有兩個process方法,一個處理RenderRequest,另一個處理ActionRequest。
HttpServletRequest httpReq = PortalUtil.getHttpServletRequest(req);
HttpServletResponse httpRes = PortalUtil.getHttpServletResponse(res);
process(httpReq, httpRes);
// 由于PortletRequestProcessor和TilesRequestProcessor中都沒有重載process (HttpServletReq, HttpServletRes),調用的是RequestProcessor的process()方法。
RequestProcessor.process(HttpServletRequest, HttpServletResponse)
String path = processPath(request, response); //這里是/layout_configuration/view
ActionMapping mapping = processMapping(request, response, path);
processForward(request, response, mapping)
processInclude(request, response, mapping)
ActionForward forward = processActionPerform(request, response, action, form, mapping);
……
protected void doInclude( String uri, HttpServletRequest request, HttpServletResponse response)
{
RequestDispatcher rd = getServletContext().getRequestDispatcher(uri);
rd.include(request, response);
}
portlet-custom.xml中定義了:
<portlet>
<portlet-name>87</portlet-name>
<display-name>Layout Configuration</display-name>
<portlet-class>com.liferay.portlet.StrutsPortlet</portlet-class>
<init-param>
<name>view-action</name>
<value>/layout_configuration/view</value>
</init-param>
.....
</portlet>
struts-config.xml中定義了action:
<action path="/layout_configuration/view" forward="portlet.layout_configuration.view" />
tiles-def.xml中定義了view.jsp:
<definition name="portlet.layout_configuration.view" extends="portlet.layout_configuration">
<put name="portlet_content" value="/portlet/layout_configuration/view.jsp" />
</definition>
最后完成了萬里長征,到達了/layout_configuration/view.jsp。
/layouot_configuration/view.jsp
-------------------------------------------
<%
PortletCategory portletCategory = (PortletCategory)WebAppPool.get(String.valueOf(company.getCompanyId()), WebKeys.PORTLET_CATEGORY);
List categories = ListUtil.fromCollection(portletCategory.getCategories());
Collections.sort(categories, new PortletCategoryComparator(company.getCompanyId(), locale));
Iterator itr = categories.iterator();
while (itr.hasNext()) {
request.setAttribute(WebKeys.PORTLET_CATEGORY, itr.next());
%>
<liferay-util:include page="/html/portlet/layout_configuration/view_category.jsp" />
<%
}
%>
/layouot_configuration/view_category.jsp
-----------------------------------------------------------
<%
itr2 = portlets.iterator();
while (itr2.hasNext()) {
Portlet portlet = (Portlet)itr2.next();
divId = new StringMaker();
divId.append(newCategoryPath);
divId.append(":");
matcher = pattern.matcher(PortalUtil.getPortletTitle(portlet, application, locale));
while (matcher.find()) {
divId.append(matcher.group());
}
%>
<div class="layout_configuration_portlet" id="<%= divId %>">
<table border="0" cellpadding="2" cellspacing="0" width="100%">
<tr>
<td width="99%">
<%= PortalUtil.getPortletTitle(portlet, application, locale) %>
</td>
<td align="right">
<input type="button" value="<liferay-ui:message key="add" />"
onClick="addPortlet('<%= plid%>', '<%= portlet.getPortletId() %>', '<%= themeDisplay.getDoAsUserId() %>');
if (<%= !portlet.isInstanceable() %>) {
var div = document.getElementById('<%= divId %>');
div.parentNode.removeChild(div);
};"
>
</td>
</tr>
</table>
</div>
<%
}
%>
在view_category.jsp 中列出了每個category中所包含的portlet列表,一旦點擊了"add"按鈕,會調用addPortlet()方法在頁面上增加一個 portlet。在view_category.jsp中還實現了輸入關鍵字對portlet進行過濾的功能。
Trackback: http://tb.blog.csdn.net/TrackBack.aspx?PostId=2177386
]]>
1. 第一步,生成 http://localhost:8080/c
Request: GET/HTTP/1.1
Response:
狀態:HTTP/1.1 200 OK
內容:... <body onload="javascript:location.replace('/c')"> ...
解釋:
在web.xml中有關于首頁的定義如下,也就是說當用戶敲入http://localhost:8080/所調用的頁面。
web.xml
--------
<welcome-file-list>
<welcome-file>index.html</welcome-file>
<welcome-file>index.jsp</welcome-file>
</welcome-file-list>
在index.jsp中有如下內容,所以可以知道Response的內容如何得來。
index.jsp
----------
<%@ page import="com.liferay.portal.util.PortalUtil" %>
<html>
<head>
<title></title>
<meta content="0; url=<%= PortalUtil.getPathMain() %>" http-equiv="refresh">
</head>
<body onload="javascript:location.replace('<%= PortalUtil.getPathMain() %>')">
</body>
</html>
2. 第二步,生成 http://localhost:8080/c/portal/layout
Request: GET/c HTTP/1.1
Response:
狀態:HTTP/1.1 302 Moved Temporarily
頭部:Location: http://10.108.10.205:8080/c/portal/layout
解釋:
當服務器收到"GET/c"請求后,根據web.xml中的定義,請求會送入MainServlet進行處理。如何生成"/c/portal/layout"有待分析,以后補充,還好不影響大局。
web.xml
--------
<servlet-mapping>
<servlet-name>MainServlet</servlet-name>
<url-pattern>/c/*</url-pattern>
</servlet-mapping>
3. 第三步,生成 http://10.108.10.205:8080/web/guest/home
Request: GET/c/portal/layout HTTP/1.1
Response:
狀態:HTTP/1.1 302 Moved Temporarily
頭部:Location: http://10.108.10.205:8080/web/guest/home
解釋:
當服務器收到請求后,同樣會送到MainServlet處理,然后會傳遞到LayoutAction, layout.jsp, portlet.jsp, TemplateProcessor, PortletColumnLogic, load_render_portlet.jsp, portlet_js.jspf,等等,很漫長的,也很有確的一個過程,后面會有單獨的分析,中間仍有一些不明朗的地方,仍有待挖掘。不過不妨礙理清 Liferay的大致經絡。
4. 第四步,生成網頁
Request: GET /web/guest/home HTTP/1.1
Response:
狀態:HTTP/1.1 200 OK
內容:
<!DOCTYPE html PUBLIC "-//W3C//DTD XHTML 1.0 Transitional//EN" "
<html dir="ltr">\n
<head>\n
<title>liferay.com - Welcome</title>\n
<meta content="text/html; charset=UTF-8" http-equiv="content-type" />\r
<link rel="Shortcut Icon" href="/html/themes/classic/images/liferay.ico" _fcksavedurl=""/html/themes/classic/images/liferay.ico"" />\r
<link href="/c/portal/css_cached?themeId=classic&colorSchemeId=01&t=1203549390654" type="text/css"
rel="stylesheet" />\r
<style type="text/css">\r
</style>\r
<script type="text/javascript">\r
var themeDisplay = {\r
getCompanyId: function() {\r
return "10094";\r
},\r
......
解釋:
在web.xml中有定義,所以"GET /web/guest/home"請求會由FriendlyURLServlet處理。
web.xml
--------
<servlet>
<servlet-name>FriendlyURLPublicServlet</servlet-name>
<servlet-class>com.liferay.portal.servlet.FriendlyURLServlet</servlet-class>
<init-param>
<param-name>private</param-name>
<param-value>false</param-value>
</init-param>
<load-on-startup>4</load-on-startup>
</servlet>
<servlet-mapping>
<servlet-name>FriendlyURLPublicServlet</servlet-name>
<url-pattern>/web/*</url-pattern>
</servlet-mapping>
在FriendlyURLServlet.service()方法中,再次將請求傳遞到/c/portal/layout,由LayoutAction進行后續處理。
FriendlyURLServlet.service()
-----------------------------
ServletContext ctx = getServletContext();
String mainPath = PortalUtil.PATH_MAIN;
String redirect = mainPath; //redirect = "/c/portal/layout..."
......
RequestDispatcher rd = ctx.getRequestDispatcher(redirect);
rd.forward(req, res);
Trackback: http://tb.blog.csdn.net/TrackBack.aspx?PostId=2177392
]]>
1. 首先MainServlet接收這個請求,然后傳遞到LayoutAction。(具體怎么傳遞后續會介紹到)
在struts-config.xml中有定義,表明有關"/portal/layout"的請求是由LayoutAction來處理的。而在tiles-def.xml中定義"/portal/layout"最終傳遞到"/portal/layout.jsp"。
struts-config.xml
------------------------
<action path="/portal/layout" type="com.liferay.portal.action.LayoutAction">
<forward name="portal.layout" path="portal.layout" />
</action>
tiles-def.xml
------------------
<definition name="portal.layout" extends="portal">
<put name="content" value="/portal/layout.jsp" />
<put name="selectable" value="true" />
</definition>
2. 下面分析LayoutAction的簡要流程
LayoutAction.execute()
--------------------------------
ThemeDisplay themeDisplay = (ThemeDisplay)req.getAttribute(WebKeys.THEME_DISPLAY);
Layout layout = themeDisplay.getLayout();
/* 加入/html/portal/layout/view/portlet.jsp 到網頁*/
incluldeLayoutContent(req, res, themeDisplay, layout);
/* 加入/html/portal/layout.jsp 到網頁,先portlet.jsp,后layout.jsp*/
return mapping.findForward("portal.layout");
LayoutAction.includeLayoutContent()
-----------------------------------------------------
String path = StrutsUtil.TEXT_HTML_DIR;
/* path = "/html" */
path += PortalUtil.getLayoutViewPage(layout);
/* path = "/html/portal/layout/view/portlet.jsp" */
RequestDispatcher rd = ctx.getRequestDispatcher(path);
rd.include(req, stringServletRes);
可見兩個jsp文件是頁面的關鍵所在。
/portal/layout/view/portlet.jsp
-----------------------------------------
<%
String content = LayoutTemplateLocalUtil.getContent(layoutTypePortlet.getLayoutTemplateId(),
false, theme.getThemeId());
%>
<%= RuntimePortletUtil.processTemplate(application, request, response, pageContext, content) %>
/*****************************************************
其中content的內容通過斷點調試可以知道(是什么時候生成的呢?)
<div class="columns-2" id="content-wrapper">
<table id="layout-grid">
<tr>
<td class="lfr-column thirty" id="column-1" valign="top">
$processor.processColumn("column-1")
</td>
<td class="lfr-column seventy" id="column-2" valign="top">
$processor.processColumn("column-2")
</td>
</tr>
</table>
</div>
*****************************************************/
/* RuntimePortletUtil.processTemplate()函數返回的是一個很長很長的字符串,就是最終用于顯示頁面上各個portlet的代碼,下面有分析 */
RuntimePortletUtil.processTemplate()
------------------------------------------------------
TemplateProcessor processor = new TemplateProcessor(ctx, req, res, portletId);
VelocityContext vc = new VelocityContext();
vc.put("processor", processor);
// Velocity variables
VelocityVariables.insertVariables(vc, req);
vc.put("taglibLiferay", velocityTaglib);
vc.put("theme", velocityTaglib);
StringWriter sw = new StringWriter();
Velocity.evaluate(vc, sw, RuntimePortletUtil.class.getName(), content);
String output = sw.toString();
/*****************************************************
output的初始內容為:
<div class="columns-3" id="content-wrapper">
<table id="layout-grid">
<tr>
<td class="lfr-column thirty" id="column-1" valign="top">
[$TEMPLATE_COLUMN_column-1$]
</td>
<td class="lfr-column thirty" id="column-2" valign="top">
[$TEMPLATE_COLUMN_column-2$]
</td>
<td class="lfr-column thirty" id="column-3" valign="top">
[$TEMPLATE_COLUMN_column-3$]
</td>
</tr>
</table>
</div>
*****************************************************/
Map columnsMap = processor.getColumnsMap();
while (itr.hasNext()) {
Map.Entry entry = (Map.Entry)itr.next();
String key = (String)entry.getKey();
String value = (String)entry.getValue();
output = StringUtil.replace(output, key, value);
}
/*****************************************************
如果首頁面上有四個portlet,名字為A,B,C,D,其中A在左邊一列上,B,C同在中間一列,D在右邊一列。則output的內容為:
<div class="columns-3" id="content-wrapper">
<table id="layout-grid">
<tr>
<td class="lfr-column thirty" id="column-1" valign="top">
<div class="lfr-portlet-column" id="layout-column_column-1">
[$TEMPLATE_PORTLET_A$]
</div>
</td>
<td class="lfr-column thirty" id="column-2" valign="top">
<div class="lfr-portlet-column" id="layout-column_column-2">
[$TEMPLATE_PORTLET_B$]
[$TEMPLATE_PORTLET_C$]
</div>
</td>
<td class="lfr-column thirty" id="column-3" valign="top">
<div class="lfr-portlet-column" id="layout-column_column-3">
[$TEMPLATE_PORTLET_D$]
</div>
</td>
</tr>
</table>
</div>
*****************************************************/
Map portletsMap = processor.getPortletsMap();
itr = portletsMap.entrySet().iterator();
while (itr.hasNext()) {
StringMaker sm = new StringMaker();
processPortlet(sm, ctx, req, res, portlet, queryString, columnId, columnPos,columnCount, null);
output = StringUtil.replace(output, "[$TEMPLATE_PORTLET_" + portlet.getPortletId() + "$]", sm.toString());
/*****************************************************
這里每迭代一個portlet,output的內容中就添加了該portlet的view.jsp代碼段落,而且還會增加portlet的標準頭部和邊框,如最小化,關閉等按鈕及其對應的JavaScript代碼。
*****************************************************/
}
return output;
/* 這個output就是在portlet.jsp中要顯示的內容 */
portal.jsp
------------
<c:choose>
<c:when test="<%= themeDisplay.isStateExclusive() %>">
<%= request.getAttribute(WebKeys.LAYOUT_CONTENT) %>
</c:when>
<c:when test="<%= themeDisplay.isStatePopUp() %>">
<liferay-theme:include page="portal_pop_up.jsp" />
</c:when>
<c:otherwise>
<liferay-theme:include page="portal_normal.jsp" />
</c:otherwise>
</c:choose>
在Liferay中沒有發現portal_normal.jsp的蹤影,發現portal_normal.vm似乎有點相關。portal_normal粉墨登場。
portal_normal.vm
-------------------------
#parse ($init)
<html dir="#language ("lang.dir")">
<head>
<title>$company_name - $the_title</title>
$theme.include($top_head_include)
#css ($css_main_file)
#js ($js_main_file)
#if ($company_logo != "")
<style type="text/css">
#banner .logo {background: url($company_logo) no-repeat;
height: ${company_logo_height}px;
width: ${company_logo_width}px; }
</style>
#end
</head>
<body class="$css_class">
$theme.include($top_messages_include)
<div id="wrapper">
<div id="banner">
<div id="banner-inner">
<h1 class="logo">
<a href="$company_url">$company_name</a>
</h1>
<div id="page-search">
$theme.journalContentSearch()
</div>
#parse ("$full_templates_path/dock.vm")
#if ($update_available_url)
<div class="popup-alert-notice">
<a class="update-available" href="$update_available_url">#language("updates-are-available-for-liferay")</a>
</div>
#end
#if ($has_navigation)
#parse ("$full_templates_path/navigation.vm")
#end
</div>
</div>
#if ($selectable)
$theme.include($content_include)
#else
<div id="content-wrapper" class="login">
$portletDisplay.recycle()
$portletDisplay.setTitle($the_title)
$theme.wrapPortlet("portlet.vm", $content_include)
</div>
#end
<div id="footer">
<p class="language">$theme.language()</p>
</div>
</div>
$theme.include($bottom_ext_include)
$theme.include($session_timeout_include)
$theme.include($sound_alerts_include)
</body>
</html>
可見關鍵是一些Velocity變量的值,例如$top_head_include。
init.vm
----------
#set ($bottom_ext_include = "$dir_include/common/themes/bottom.jsp")
#set ($content_include = "$dir_include$tilesContent")
#set ($session_timeout_include = "$dir_include/common/themes/session_timeout.jsp")
#set ($sound_alerts_include = "$dir_include/common/themes/sound_alerts.jsp")
#set ($top_head_include = "$dir_include/common/themes/top_head.jsp")
#set ($top_messages_include = "$dir_include/common/themes/top_messages.jsp")
可見$top_head_include就是top_head.jsp。
top_head.jsp
-------------------
<%@ include file="/html/common/themes/top_js.jspf" %>
<%@ include file="/html/common/themes/top_js-ext.jsp" %>
portal/portal-web/docroot/html/common/themes/top_js.jspf
<%
String[] javaScriptFiles = PropsUtil.getArray(PropsUtil.JAVASCRIPT_FILES);
for (int i = 0; i < javaScriptFiles.length; i++) {
%>
<script src="<%= themeDisplay.getPathJavaScript() %>/<%= javaScriptFiles[i] %>" type="text/javascript"></script>
<%
}
%>
那javascriptFiles又如何得到的呢?
portal.properties
------------------------
javascript.files=\
jquery/jquery.js,\
jquery/cookie.js,\
jquery/tabs.js,\
\
liferay/liferay.js,\
liferay/browser.js,\
liferay/util.js,\
liferay/language.js,\
liferay/layout.js,\
\
liferay/ajax.js,\
liferay/animate.js,\
liferay/auto_fields.js,\
liferay/color_picker.js,\
liferay/columns.js,\
liferay/dock.js,\
liferay/dynamic_select.js,\
liferay/freeform.js,\
liferay/layout_configuration.js,......
另外還有一個很重要的properties文件值得關注:language.properties。好累啊,還有很多細節可以繼續挖掘,還涉及到Velocity的一些變量的操作,休息下先。
Trackback: http://tb.blog.csdn.net/TrackBack.aspx?PostId=2177391
]]>
第 5 步 安裝 Liferay Tomcat bundle
將 liferay-portal-tomcat-5.5-jdk5-4.3.4.zip 解壓到指定目錄,如“D:\liferay\tomcat”,運行 bin 中的 startup.bat 就可以開啟 tomcat 服務器,并且運行 liferay portal web 應用。 在瀏覽器中輸入 http://localhost:8080/,用戶名為:test@liferay.com,密碼為:test。
第 6 步 創建 Liferay Portal EXT 環境
通過 EXT 環境,開發者可以將自己的代碼和 liferay 源代碼分離開來。
將 liferay-portal-src-4.3.3.zip 解壓到指定目錄,例如"D:\liferay\portal"。在其根目錄下創建一個新的文件 release.xbpeng.properties。其中 xbpeng 是該 windows 系統的目前用戶名。文件的內容為:
--------------------------------
##
## 指定所創建的 EXT 環境目錄所在
## 注意為正斜杠 /
lp.ext.dir=D:/liferay/ext
--------------------------------
進入 portal 目錄,運行 ant clean start build-ext。經過若干分鐘后,則會在 D:\liferay\ 中生成一個 ext 目錄。該目錄中包含了配置和開發 liferay portal 所需要的所有文件,以后可以在這個 EXT 環境中進行開發工作,然后配置到 tomcat 服務器。
第7步 配置在EXT中開發好的新的portal系統到tomcat服務器
進入 EXT 環境目錄,創建 app.server.xbpeng.properties,同樣 xbpeng 為 windows 用戶名。該文件內容為:
---------------------------------------------------
##
## 指定 server 的類型為 tomcat,server 的安裝路徑
## 注意為正斜杠 /
app.server.type=tomcat
app.server.tomcat.dir=D:/liferay/tomcat
---------------------------------------------------
在 EXT 根目錄運行 ant clean deploy,若干分鐘后,則會把 EXT 的 web 應用拷貝配置到 tomcat 服務器。
第8步 搭建 Eclipse 環境用于開發portal
創建一個新的Java Project,例如名為EXT,選擇從已有資源中創建,加入先前生成的ext 目錄,這個項目用于自己定制portal之用。
點擊菜單Window | Show View | Other | Ant,可以將Ant界面打開,然后將EXT項目中的build.xml拖至Ant,可有包括Clean,Deploy等各種動作可以執行。雙擊 Deploy則開始如上一步:將EXT的web應用配置到tomcat服務器。
創建另一個新的Java Project,例如名為Portal Source,同樣選擇從已有資源中創建,加入先前生成的 portal 目錄,這樣項目包含Liferay的所有源代碼,可用于調試。
第9步 創建Liferay Portal調試環境
點擊菜單 Run | Run...,出現配置運行對話框。
在Main頁面:
新建一個Java Application,命名為Tomcat,Project選擇為ext,Main class輸入為org.apache.catalina.startup.Bootstrap。
在Arguments頁面:
Program arguments為start。VM arguments如下(注意修改對應的目錄):
-Xms128m
-Xmx512m
-Dfile.encoding=UTF8
-Duser.timezone=GMT
-Djava.security.auth.login.config=D:/liferay/tomcat/conf/jaas.config
-Djava.endorsed.dirs=D:/liferay/tomcat/common/endorsed
-Dcatalina.base=D:/liferay/tomcat
-Dcatalina.home=D:/liferay/tomcat
-Djava.io.tmpdir=D:/liferay/tomcat/temp
輸入Working directory 為D:/liferay/tomcat。
在JRE頁面:
選擇Project JRE;
在Classpath頁面:
中Bootstrap Entries為JRE System Library,User Entries為D:\liferay\tomcat\bin\中的bootstrap.jar。
在Source頁面:
加入EXT和Portal兩個查詢路徑。
配置好后,運行Run或者Debug,則可以開始對Liferay Portal系統進行斷點調試了。
第10步 最后強烈推薦Wireshark網絡協議分析軟件(Ethereal的前世今生)
下載地址:http://www.wireshark.org/download.html,免費。
最開始很傻,沒想起來要用,對于Liferay的處理過程經常是一團霧水,有了Wireshark,那簡直是豁然開朗,很好,很強大。
]]>
安裝文件及版本
* JDK: jdk-1_5_0_14-windows-i586-p.exe
* JIKES: jikes-1.22-1.windows.zip
* ANT: apache-ant-1.7.0-bin.zip (在liferay portal 的 build-common.xml 中說明了要 1.7.0 以上)
* LIFERAY: liferay-portal-tomcat-5.5-jdk5-4.3.4.zip
* LIFERAY SOURCES: liferay-portal-src-4.3.3.zip
* ECLIPSE: Eclipse wtp-all-in-one-sdk-R-1.0.2-200604280245-win32.zip
(將新安裝的 ant1.7.0 拷貝到 Eclipse 的 plug-in 中,覆蓋老的 ant1.6.5, 解決無法在Eclipse中啟用 ANT 的問題)
第 1 步 安裝 JDK
運行 jdk-1_5_0_14-windows-i586-p.exe,安裝完成后創建一個新的系統環境變量 JAVA_HOME,值為 JDK 安裝所在目錄,例如 "D:\Program Files\Java\jdk1.5.0_14". 在 PATH 系統環境變量中增加 JDK 的 bin 所在位置:%JAVA_HOME%\bin;
(右鍵點擊我的電腦,選擇:屬性 | 高級 | 環境變量 | 新建)
第 2 步 安裝 ANT
將 apache-ant-1.7.0-bin.zip 文件解壓到目的地,例如 "D:\liferay\apache-ant-1.7.0",創建環境變量 ANT_HOME,為 ANT 的安裝目錄。在 PATH 環境變量中增加 ANT 的 bin 所在位置:%ANT_HOME%\bin
第 3 步 安裝 JIKES
將 jikes-1.22-1.windows.zip文件解壓到目的地,例如 "D:\liferay\jikes-1.22",創建環境變量 JIKES_HOME,為 JIKES 的安裝目錄,在 PATH 環境變量中增加 JIKES 的 bin 所在位置:%JIKES_HOME%\bin
第 4 步 驗證
在 command line 中分別運行 java –version,ant –version,jikes –version,如果輸出結果正確,則說明安裝配置正確。
]]>
首先訪問liferay的官方網站http://www.liferay.com下載portal服務器,我們可以選擇它的tomcat集成版下載,這樣可以省去一些麻煩。
然后啟動bin目錄下的statup.bat就啟動了tomcat服務,然后通過http://localhost:8080訪問就可以,默認的用戶名和密碼是 test@liferay.com/test。
登錄以后可以通過左方面的連接進入相關的操作:
“我的帳戶”里可以進行個人信息,歡迎信息,語言等基本信息的設置。
“我的地方”可以分別進行個人,公開,gust,cms,suport等環境的設置,其實就相當于幾個不同的虛擬站點。
針對“我的地方“的每個站點可以進行”頁設置“,即站點頁面和級次的設置
”增加內容“則是對當前所在的頁面進行內容的添加或改變頁面模版(但目前感覺它的范本設置還存在問題),如果要刪除的話直接點擊每個portlet的刪除按鈕就可以了。
另外在我的私人空間首頁,即登錄后默認的首頁里,在”管理者“的portlet里我們可以進行相應的設置,像企業里可以改變站點的語言,banner圖片等基本信息,portlets里可以進行目前的所有portlet的管理。
這個里面基本上都是一些設置的熟悉和使用,相信每個地方都試一試就會有所了解了。
二、簡單的開發自己的portlet
做portlet開發通常首先也要建立一個獨立的工程(避免和系統的混在一起不便于管理)。建立工程的時候不管是用jbuilder還是eclipse,和我們建立普通的web工程并沒有什么不同。測試的例子以前網上有一篇介紹3.6.1的開發的寫的很不錯,我只是指出其中的一些不同和做一些補充,避免大家在多花去一些不必要的時間,我也是多花了幾個小時才找出來的。
1、portlet程序編寫
其中HelloWorldPortlet和HelloJSPPortlet 是兩個獨立的portlet測試,只不過前面一個類似servlet直接輸出,而后者使用了jsp頁面的顯示。
package com.lyj.portal;
import java.io.IOException;
import javax.portlet.GenericPortlet;
import javax.portlet.PortletException;
import javax.portlet.RenderRequest;
import javax.portlet.RenderResponse;
public class HelloWorldPortlet extends GenericPortlet {
public void doView(RenderRequest req, RenderResponse res)
throws IOException, PortletException {
res.setContentType("text/html");
res.getWriter().println("HelloWorld liuyujun test one! 中文測試一");
}
public void doEdit(RenderRequest req, RenderResponse res)
throws IOException, PortletException {
res.setContentType("text/html");
res.getWriter().println("HelloWorld liuyujun test two! 中文測試二");
}
}
package com.lyj.portal;
import java.io.IOException;
import javax.portlet.GenericPortlet;
import javax.portlet.PortletException;
import javax.portlet.PortletRequestDispatcher;
import javax.portlet.RenderRequest;
import javax.portlet.RenderResponse;
import javax.portlet.PortletPreferences;
import javax.portlet.ActionRequest;
import javax.portlet.ActionResponse;
public class HelloJSPPortlet extends GenericPortlet {
public void doView(RenderRequest req, RenderResponse res) throws
IOException, PortletException {
res.setContentType("text/html");
String jspName = getPortletConfig().getInitParameter("view-jsp");
PortletRequestDispatcher rd = getPortletContext().getRequestDispatcher(
jspName);
rd.include(req, res);
}
public void doEdit(RenderRequest req, RenderResponse res) throws
IOException, PortletException {
res.setContentType("text/html");
String jspName = getPortletConfig().getInitParameter("edit-jsp");
PortletRequestDispatcher rd = getPortletContext().getRequestDispatcher(
jspName);
rd.include(req, res);
}
}
2、我們在工程的web的根目錄下再增加HelloJSPPortlet需要用到的兩個jsp文件
view.jsp
<%@ page language="java" contentType="text/html;charset=GBK"%>
<table cellpadding="8" cellspacing="0" width="100%">
<tr>
<td>
<font class="Portlet-font" style="font-size: x-small;">
This is a <b>Sample JSP Portlet</b> used in viewing model。 Use this as a quick
wayy to include JSPs。 view 成功
</td>
</tr>
</table>
edit.jsp
<%@ page language="java" contentType="text/html;charset=GBK"%>
<table cellpadding="8" cellspacing="0" width="100%">
<tr>
<td>
<font class="Portlet-font" style="font-size: x-small;">
This is a <b>Sample JSP Portlet</b> used in viewing model。 Use this as a quick
wayy to include JSPs。edit 萬歲
</td>
</tr>
</table>
注意橙色背景的內容一定要加上,不然會有中文亂碼問題
3、web.xml配置
<?xml version="1.0"?>
<!DOCTYPE web-app PUBLIC "-//Sun Microsystems, Inc.//DTD Web Application2.3//EN" "http://java.sun.com/dtd/web-app_2_3.dtd">
<web-app id="TestPortal">
<display-name>TestPortal</display-name>
<context-param>
<param-name>company_id</param-name>
<param-value>liferay.com</param-value>
</context-param>
<listener>
<listener-class>com.liferay.portal.shared.servlet.PortletContextListener</listener-class>
</listener>
<servlet>
<servlet-name>HelloWorldPortlet</servlet-name>
<servlet-class>com.liferay.portal.servlet.PortletServlet</servlet-class>
<init-param>
<param-name>portlet-class</param-name>
<param-value>com.lyj.portal.HelloWorldPortlet</param-value>
</init-param>
<load-on-startup>0</load-on-startup>
</servlet>
<servlet-mapping>
<servlet-name>HelloWorldPortlet</servlet-name>
<url-pattern>/HelloWorldPortlet/*</url-pattern>
</servlet-mapping>
<servlet>
<servlet-name>HelloJSPPortlet</servlet-name>
<servlet-class>com.liferay.portal.servlet.PortletServlet</servlet-class>
<init-param>
<param-name>Portlet-class</param-name>
<param-value>com.lyj.portal.HelloJSPPortlet</param-value>
</init-param>
<load-on-startup>0</load-on-startup>
</servlet>
<servlet-mapping>
<servlet-name>HelloJSPPortlet</servlet-name>
<url-pattern>/HelloJSPPortlet/*</url-pattern>
</servlet-mapping>
<taglib>
<taglib-uri>http://java.sun.com/portlet</taglib-uri>
<taglib-location>/WEB-INF/tld/liferay-portlet.tld</taglib-location>
</taglib>
</web-app>
其中紅色字體和藍色字體的內容,如果以前使用3.6.1的一定要注意,藍色部分以前是不需要加的,但是現在是必須的,如果不加的話,在portal管理列表里能列出我們開發的portlet,但在添加內容時無法找到我們自己的portlet。紅色字體的部分相對原來多了shared,也就是它的類包進行了一定的調整,注意一下就可以了。
4、另外增加WEB-INF下增加portlet的私有配置文件
portlet.xml
<?xml version="1.0"?>
<portlet-app xmlns="http://java.sun.com/xml/ns/portlet/portlet-app_1_0.xsd" version="1.0" xmlns:xsi="http://www.w3.org/2001/XMLSchema-instance" xsi:schemaLocation="http://java.sun.com/xml/ns/portlet/portlet-app_1_0.xsd">
<portlet>
<portlet-name>HelloWorldPortlet</portlet-name>
<display-name>HelloWorldPortlet</display-name>
<portlet-class>com.lyj.portal.HelloWorldPortlet</portlet-class>
<expiration-cache>0</expiration-cache>
<supports>
<mime-type>text/html</mime-type>
</supports>
<supports>
<mime-type>text/html</mime-type>
<portlet-mode>edit</portlet-mode>
</supports>
<portlet-info>
<title>HelloWorldPortlet</title>
<short-title>HelloWorldPortlet</short-title>
<keywords>HelloWorldPortlet</keywords>
</portlet-info>
<portlet-preferences>
<preference>
<name>portlet-title</name>
<value></value>
</preference>
<preference>
<name>show-portlet-borders</name>
<value>true</value>
</preference>
</portlet-preferences>
<security-role-ref>
<role-name>guest</role-name>
</security-role-ref>
<security-role-ref>
<role-name>power user</role-name>
</security-role-ref>
<security-role-ref>
<role-name>user</role-name>
</security-role-ref>
</portlet>
<portlet>
<portlet-name>HelloJSPPortlet</portlet-name>
<display-name>HelloJSPPortlet</display-name>
<portlet-class>com.lyj.portal.HelloJSPPortlet</portlet-class>
<init-param>
<name>view-jsp</name>
<value>/view.jsp</value>
</init-param>
<init-param>
<name>edit-jsp</name>
<value>/edit.jsp</value>
</init-param>
<expiration-cache>0</expiration-cache>
<supports>
<mime-type>text/html</mime-type>
</supports>
<supports>
<mime-type>text/html</mime-type>
<portlet-mode>edit</portlet-mode>
</supports>
<portlet-info>
<title>HelloJSPPortlet</title>
<short-title>HelloJSPPortlet</short-title>
<keywords>HelloJSPPortlet</keywords>
</portlet-info>
<security-role-ref>
<role-name>guest</role-name>
</security-role-ref>
<security-role-ref>
<role-name>power user</role-name>
</security-role-ref>
<security-role-ref>
<role-name>user</role-name>
</security-role-ref>
</portlet>
</portlet-app>
liferay-portlet.xml
<?xml version="1.0"?>
<!DOCTYPE liferay-portlet-app PUBLIC "-//Liferay//DTD Portlet Application 3.5.0//EN" "http://www.liferay.com/dtd/liferay-portlet-app_3_5_0.dtd">
<liferay-portlet-app>
<portlet>
<portlet-name>HelloWorldPortlet</portlet-name>
<struts-path>HelloWorldPortlet</struts-path>
<use-default-template>true</use-default-template>
<instanceable>true</instanceable>
</portlet>
<portlet>
<portlet-name>HelloJSPPortlet</portlet-name>
<struts-path>HelloJSPPortlet</struts-path>
<use-default-template>true</use-default-template>
<instanceable>true</instanceable>
</portlet>
<role-mapper>
<role-name>administrator</role-name>
<role-link>Administrator</role-link>
</role-mapper>
<role-mapper>
<role-name>guest</role-name>
<role-link>Guest</role-link>
</role-mapper>
<role-mapper>
<role-name>power user</role-name>
<role-link>Power User</role-link>
</role-mapper>
<role-mapper>
<role-name>user</role-name>
<role-link>User</role-link>
</role-mapper>
</liferay-portlet-app>
liferay-display.xml
<?xml version="1.0"?>
<!DOCTYPE display PUBLIC "-//Liferay//DTD Display 3.5.0//EN" "http://www.liferay.com/dtd/liferay-display_3_5_0.dtd">
<display>
<category name="category.test">
<portlet id="HelloWorldPortlet"/>
<portlet id="HelloJSPPortlet"/>
</category>
</display>
5、在WEB-INF下新建一個tld目錄,把 tomcat\liferay\WEB-INF\tld\liferay-portlet.tld 復制過來就可以了
6、編譯完成后,像我們正常的發布web的方式發布就可以了,比如修改tomcat的配置文件,直接用一個虛擬目錄TestPortal指向我們工程的web 目錄;或者把我們的web目錄打包成TestPortal.war放到tomcat的webapps目錄下就可以了。重新啟動tomcat,登錄后,我們會在portlet管理中發現增加了HelloWorldPortlet,HelloJSPPortlet兩個portlet,在增加內容的時候在彈出的內容頁面 測試(test)中多了上述的兩個portlet。并且可以增加到我們的頁面中看看效果吧。
]]>
]]>
]]>
當我們再對 liferay 源代碼進行研究或者對某個類進行修改的時候很不方便,所以我們需要搭建一個開發環境,這樣在修改 liferay 源代碼的時候就更加方便。下面我們會一步步搭建 liferay 的開發環境。
一、 準備工作
1 、下載下列文件,下載步驟這里省略:
jdk-1_5_0_06-windows-i586-p.exe
liferay-portal-tomcat-jdk5-4.0.0.zip
liferay-portal-src-4.0.0.zip
liferay-portal-sql-4.0.0.zip
2 、安裝 JDK ,具體的安裝及配置過程這里省略。
3 、我們假定 Eclipse 及 Tomcat 插件都已安裝,若還沒有安裝,請參考相關文檔準備好開發工具,這里省略該步驟。
4 、如果對 liferay 安裝過程有疑問,可參考作者的另一篇文章。
二、 搭建開發環境
1、 在 Eclipse 中新建項目 liferayPortal ,并設置源文件夾為 src ,輸入文件夾名為 liferay/WEB-INF/classes 。
2、 將 liferay-portal-tomcat-jdk5-4.0.0.zip 解壓縮后并拷貝到項目 liferayPortal 根目錄下,然后改名為 tomcat 。
3、 將 liferayPortal/tomcat 目錄下的 liferay 目錄剪切到項目 liferayPortal 根目錄下覆蓋原目錄。
4、 將 liferay-portal-src-4.0.0.zip 解壓縮,然后將 liferay-4.0.0-src/portal-ejb/src 目錄下的 com 文件夾拷貝到項目 liferayPortal/src 目錄下。
5、 將 liferay-4.0.0-src/util-jsf/src/com/liferay 目錄下的 util 文件夾拷貝到項目 liferayPortal/src/com/liferay/ 目錄下。
6、 拷貝 liferay-4.0.0-src/portal-ejb/classes 目錄下除 com 文件夾外其他全部的文件夾及文件到項目 liferayPortal/src 目錄下。
7、 拷貝 liferay-4.0.0-src/portal-ejb/classes/com/liferay/portal 下的 definitions 文件夾到項目 liferayPortal/src/com/liferay/portal 目錄下。
8、 修改 liferayPortal/tomcat/conf/Catalina/localhost 目錄下的 ROOT.xml 文件中的 docBase 路徑,指向 liferayPortal/liferay 目錄。
9、 將 liferay-4.0.0-src/lib 目錄下的所有 jar 包全部添加到項目 liferayPortal 中。
10、 將 liferayPortal/liferay/WEB-INF/lib 下的 compression-filter.jar 、 counter-ejb.jar 、 documentlibrary-ejb.jar 、 ext-ejb.jar 、 lock-ejb.jar 、 mail-ejb.jar 、 secure- filter.jar 、 strip-filter.jar 、 util-java.jar 、 util-taglib.jar 、 util-wsrp.jar 共 11 個包加到項目中。
11、 將 liferayPortal/tomcat/common/lib/ext 目錄下的 portal-shared.jar 包加到項目中。
12、 在 liferayPortal/src 目錄下新建文件 portal-ext.properties ,內容為:
portal.release=professional
13、
在“首選項-
>Java
—
>
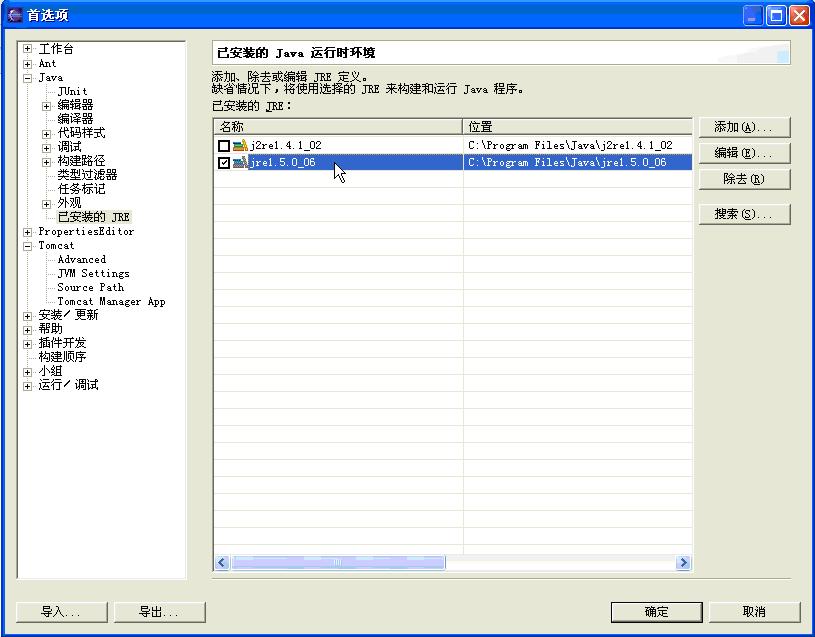
已安裝的
JRE
”里選擇之前安裝的
jre1.5.0_06
。
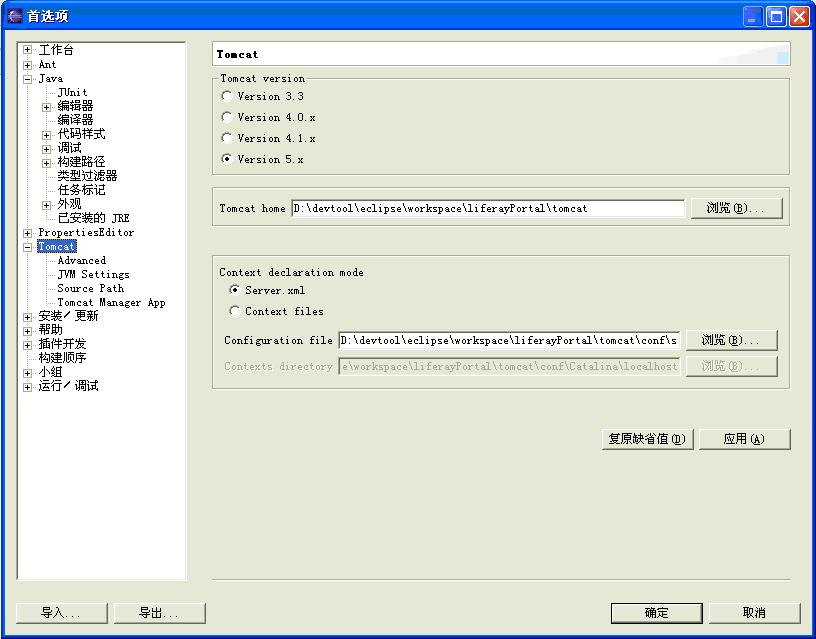
14、
在“首選項-
>Tomcat
”項中指定
tomcat
的版本為
Version 5.x
,并且指定“
Tomcat home
”路徑為項目
liferayPortal/tomcat
目錄。
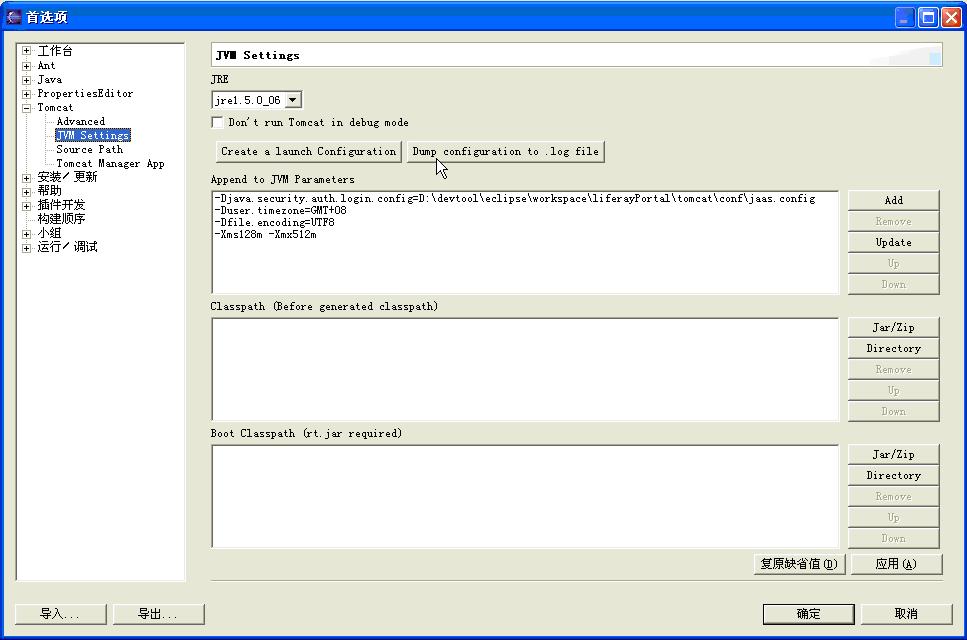
15、 在“首選項- >Tomcat - >JVM Settings ”項,設定 JRE 的版本為“ jre1.5.0_06”,并且添加如下幾個JVM Parameters :
-Xms128m
-Xmx512m
-Dfile.encoding=UTF8
-Duser.timezone=GMT+08
-Djava.security.auth.login.config=D:"devtool"eclipse"workspace"liferayPortal"tomcat"conf"jaas.config
這里最后一個參數一定要指明
jaas.config
文件的路徑
三、創建數據庫
1 、本例中我們已 SQL Server 數據庫為例,介紹怎樣連接數據庫。
2 、解壓縮 liferay-portal-sql-4.0.0.zip 文件后,導入目錄 liferay-portal-sql-4.0.0/create 下的 create-sql-server.sql 文件即可建立 liferay 應用在 SQL Server 上的數據庫,數據庫名為 lportal 。
(導入 sql 文件命令參見 C:"Program Files"Microsoft SQL Server"80"Tools"Binn"osql.exe )
3 、修改 liferayPortal/tomcat/conf/Catalina/localhost 目錄下的 ROOT.xml 文件,指定連接 SQLServer 的驅動類名稱、數據庫 URL 及用戶和密碼,修改結果如下:
|
<Resource name="jdbc/LiferayPool" auth="Container" type="javax.sql.DataSource" driverClassName="net.sourceforge.jtds.jdbc.Driver" url="jdbc:jtds:sqlserver://localhost:1433;DatabaseName=lportal" username="sa" password="sa" maxActive="100" /> |
4 、拷貝 liferay-4.0.0-src/lib 目錄下的 jtds.jar 包到 liferayPortal/tomcat/common/lib/ext 目錄下。
四、啟動服務器
在
Eclipse
中啟動
Tomcat
,當出現如下畫面時,表示
Tomcat
啟動成功。

到此,我們的開發環境已經搭建完成。
]]>
我們將開發一個具有下圖風格的頁面布局,該布局中我們指定了7個區域來分別裝配portlet實現獨特的頁面風格。

一、編寫模板文件
我們將該頁面風格名稱定義為1_2_3_2 Columns,在Liferay/html/layouttpl/custom目錄下新建1_2_3_2_columns.tpl文件,內容如下:
 <div id="layout-content-outer-decoration"><div id="layout-content-inner-decoration"> <div id="layout-content-container"> <table border="0" cellpadding="0" cellspacing="0" width="100%"> <tr> <td colspan="3" valign="top"> $processor.processColumn("column-1") td> tr> <tr> <td width="79%" valign="top"> <table border="0" cellpadding="0" cellspacing="0" width="100%"> <tr> <td width="26%" valign="top"> $processor.processColumn("column-2") td><td class="layout-column-spacer" width="1%"> <div> div> td> <td width="26%" valign="top"> $processor.processColumn("column-3") td> <td class="layout-column-spacer" width="1%"> <div> div> td> <td width="26%" valign="top"> $processor.processColumn("column-4") td> tr> table> td> <td class="layout-column-spacer" width="1%"> <div> div> td> <td width="20%" rowspan="2" valign="top"> $processor.processColumn("column-5") td> tr> <tr> <td colspan="2"> <table border="0" cellpadding="0" cellspacing="0" width="100%"> <tr> <td width="50%" valign="top"> $processor.processColumn("column-6") td> <td width="50%" valign="top"> $processor.processColumn("column-7") td> tr> table> td> tr> table> div>div>div>
 文件中前三行定義的
二、編寫屬性文件
我們需要在 liferay-layout-templates.xml 文件中配置我們自定義的頁面布局文件 1_2_3_2_columns.tpl ,為了和系統自帶的布局文件區分開,我們創建擴展文件 liferay-layout-templates-ext.xml ,在該文件中指定我們的頁面布局文件,當然也可以在 liferay-layout-templates.xml 文件直接增加定義。
liferay-layout-templates-ext.xml :
xml version = " 1.0 " ?> DOCTYPE layout - templates PUBLIC " -//Liferay//DTD Layout Templates 4.0.0//EN " " http://www.liferay.com/dtd/liferay-layout-templates_4_0_0.dtd " > < layout - templates > < custom > < layout - template id = " 1_2_3_2_columns " name = " 1-2-3-2 Columns " > < template - path >/ html / layouttpl / custom / 1_2_3_2_columns.tpl template - path > layout - template > custom > layout - templates > 參數 id 定義該 template 的 ID 號, name 定義該 template 在 Add Content 中顯示的名稱, template-path 定義該 template 的路徑名。
三、定制頁面
定制好頁面風格后,需要重新啟動TOMCAT,登陸系統,進入GUEST頻道,點擊Add Content ,在Template中將會顯示我們自定義的頁面布局名稱1-2-3-2 Columns,選擇該Template,然后在頁面中添加Journal Content,按照我們自定義的布局將portlet拖拉到合適的位置,再為每個Journal Content指定Article,最后就完成了各種風格頁面的定制過程。使用這個的方法,我們可以定制各種滿足不同需求的頁面。
]]>
Liferay Portal的CMS功能是通過Journal Portlet實現的,在介紹怎樣使用Journal Portlet之前,有必要理解structures、templates和articles的概念,它們是Journal portlet功能的基礎。
l Structures:定于了content的類型和數量,content的類型包括text、text area、images、selection lists等
l Templates:確定content怎樣排列或擺放
l Articles:確定每個content包含的實際的text和images
我們以下圖為例定義一個content,分為三個步驟:

第一步、創建Structure,包含一下元素:一個text元素名為“headline”(對應圖片1區域)、三個text area元素為名稱分別為“body-text”(對應4區域)“caption-1”(對應2區域)“caption-2”(對應6區域)、兩個image元素名稱分別為“image-1”(對應3區域)和“image-2”(對應5區域)
添加完這些元素后的界面如下:
點擊Launch Editor按鈕,可以看到XML定義,也可以在此增刪或修改元素及類型,內容如下:
<root> <dynamic-element name='headline' type='text'>dynamic-element> <dynamic-element name='body-text' type='text_area'>dynamic-element> <dynamic-element name='caption-1' type='text_area'>dynamic-element> <dynamic-element name='caption-2' type='text_area'>dynamic-element> <dynamic-element name='image-1' type='image'>dynamic-element> <dynamic-element name='image-2' type='image'>dynamic-element>root> 第二步、創建 Template ,添入 ID 、 Name 、 Description 信息后,在 Structure 一欄選擇上一步創建的 Structure (這里為 test )

然后點擊 Launch Editor 按鈕,打開 Template 編輯窗口,按照所需要的格式定義 Template ,如下:
xml version = " 1.0 " ?> < xsl:stylesheet xmlns:xsl = " http://www.w3.org/1999/XSL/Transform " version = " 1.0 " > < xsl:output method = " html " omit - xml - declaration = " yes " /> < xsl:template match = " / " > < table cellpadding = " 0 " cellspacing = " 0 " border = " 0 " width = " 100% " > < tr > < td colspan = " 2 " > < xsl:value - of disable - output - escaping = " yes " select = " root/dynamic-element[@name='headline']/dynamic-content " /> td > tr > < tr > < td > < img > < xsl:attribute name = " src " > < xsl:value - of disable - output - escaping = " yes " select = " root/dynamic-element[@name='image-1']/dynamic-content " /> xsl:attribute > img > td > < td > < xsl:value - of disable - output - escaping = " yes " select = " root/dynamic-element[@name='caption-1']/dynamic-content " /> td > tr > < tr > < td colspan = " 2 " > < xsl:value - of disable - output - escaping = " yes " select = " root/dynamic-element[@name='body-text']/dynamic-content " /> td > tr > < tr > < td > < xsl:value - of disable - output - escaping = " yes " select = " root/dynamic-element[@name='caption-2']/dynamic-content " /> td > < td > < img > < xsl:attribute name = " src " > < xsl:value - of disable - output - escaping = " yes " select = " root/dynamic-element[@name='image-2']/dynamic-content " /> xsl:attribute > img > td > tr > table > xsl:template > xsl:stylesheet > 下面對該文件進行說明:
1 、這里的 @name=’ 名稱 ’ 必須要和第一步中創建 Structure 中的元素名稱一致,頁面格式根據需求使用 HTML 語言定義即可。
2 、對 text 、 text area 類型的元素輸出時的格式如下:
disable-output-escaping="yes" select="root/dynamic-element[@name='caption-2']/dynamic-content"/>
1、 對 image 類型的元素輸出時的格式如下:
disable-output-escaping="yes" select="root/dynamic-element[@name='image-2']/dynamic-content"/>
第三步、創建 Article ,添寫基本信息后,在 Structure 一欄選擇 test ,對應的 Template 一欄也選擇 test 即可,然后在對應的元素域里添入合適的文本或者圖片,點擊預覽即可以看到如下界面,確定無問題后,點擊保存或者保存并發布按鈕即可完成 content 的定制。

通過以上三個步驟,我們就實現了定制content的功能。使用Journal Portlet,我們可以定制任何不同風格的content來展示必要的信息。
]]>
1)下載并安裝 JDK1.5
1、 下載并安裝 Windows Platform J2SE(TM) Development Kit 5.0 Update ,下載網址 http://java.sun.com/j2se/1.5.0/download.jsp
2、 在控制面板 --> 系統 --> 高級選項 --> 環境變量,新增一個用戶變量 JAVA_HOME 并指向 JDK 的安裝目錄
2) 下載并安裝 Liferay Portal
1. 下載并安裝 Liferay Portal Professional 4.0.0 (Bundled with Tomcat and JDK 5.0), 下載網址 http://www.liferay.com/web/guest/download
2. 解壓縮到一個目錄,并確保硬盤上有足夠的空間,我們稱這個目錄為 TOMCAT_HOME
3) 啟動 TOMCAT
到 TOMCAT/bin 目錄下,運行 startup.bat 。
你的 Apache Tomcat server 能夠編譯并運行 Liferay Portal 。默認情況下, portal 使用自帶的 HSQL 數據庫。在瀏覽器中輸入 http://localhost:8080 ,將會看見 portal 首頁。
二、 專業安裝
1) 下載并安裝 JDK1.5
1、 下載并安裝 Windows Platform J2SE(TM) Development Kit 5.0 Update ,下載網址 http://java.sun.com/j2se/1.5.0/download.jsp
2、 在控制面板 --> 系統 --> 高級選項 --> 環境變量,新增一個用戶變量 JAVA_HOME 并指向 JDK 的安裝目錄
2) 下載并安裝 TOMCAT
1、 下載 apache-tomcat-5.5.17.zip 并解壓縮到一個目錄,我們稱這個目錄為 TOMCAT 。
3) 下載并安裝 Liferay Portal
1、 下載 liferay-portal-4.0.0.war, 下載網址 http://www.liferay.com/web/guest/download
2、 解壓縮 liferay-portal-4.0.0.war 到 TOMCAT 目錄下并改名為 liferay ,然后將 liferay/WEB-INF/lib 下除 util-taglib.jar 外的其他 jar 包剪切到 TOMCAT/common/lib/ext 下
3、 在 TOMCAT/conf/Catalina/localhost 目錄下,刪除該目錄下已有的文件,然后新建 ROOT.xml 文件(這里的 ROOT 必須是大寫)
ROOT.xml :
< Context path = "" docBase = " ../liferay " debug = " 0 " reloadable = " true " crossContext = " true " > < Resource name = " jdbc/LiferayPool " auth = " Container " type = " javax.sql.DataSource " driverClassName = " org.hsqldb.jdbcDriver " url = " jdbc:hsqldb:test " username = " sa " password = "" maxActive = " 20 " /> < Resource name = " mail/MailSession " auth = " Container " type = " javax.mail.Session " mail.transport.protocol = " smtp " mail.smtp.host = " localhost " /> < Realm className = " org.apache.catalina.realm.JAASRealm " appName = " PortalRealm " userClassNames = " com.liferay.portal.security.jaas.PortalPrincipal " roleClassNames = " com.liferay.portal.security.jaas.PortalRole " debug = " 99 " useContextClassLoader = " false " /> Context > 4、 在TOMCAT/conf目錄下,新建jaas.config文件
jaas.config :
PortalRealm {
com.liferay.portal.security.jaas.PortalLoginModule required;
};
5、 修改 TOMCAT/conf 目錄下 catalina.properties 文件中的下面一段:
common.loader=${catalina.home}/common/classes,${catalina.home}/common/i18n/*.jar,${catalina.home}/common/endorsed/*.jar,${catalina.home}/common/lib/*.jar,${catalina.home}/common/lib/ext/*.jar
6、 修改 TOMCAT/bin 目錄下 catalina.bat 文件,增加下面內容:
rem ----- Execute The Requested Command ---------------------------------------
set JAVA_OPTS=-Xms128m -Xmx512m -Dfile.encoding=UTF8 -Duser.timezone=GMT+08 -Djava.security.auth.login.config=%CATALINA_HOME%/conf/jaas.config
7、 到 TOMCAT/bin 目錄下,運行 startup.bat 。在瀏覽器中輸入 http://localhost:8080 ,將會看見 portal 首頁。
三、 連接數據庫
1) 連接 HSQLDB
修改 TOMCAT/conf/Catalina/localhost/ROOT.xml 文件并將 SQL SERVER 驅動包 hsql.jar 拷貝到 TOMCAT/common/lib/ext 下
name="jdbc/LiferayPool"
auth="Container"
type="javax.sql.DataSource"
driverClassName="org.hsqldb.jdbcDriver"
url="jdbc:hsqldb:test"
username="sa"
password=""
maxActive="20"
/>
2) 連接 SQL SERVER
修改 TOMCAT/conf/Catalina/localhost/ROOT.xml 文件并將 SQL SERVER 驅動包 jtds-1.2.jar 拷貝到 TOMCAT/common/lib/ext 下
name="jdbc/LiferayPool"
auth="Container"
type="javax.sql.DataSource"
driverClassName="net.sourceforge.jtds.jdbc.Driver"
url="jdbc:jtds:sqlserver://localhost:1433;DatabaseName=lportal4"
username="sa"
password="sa"
maxActive="100"
/>
]]>
]]>
Tomcat 5.5.2 下部署 Liferay 4.4.1
1、 下載Tomcat 5.5.2
2、 下載liferay-portal-tomcat-5.5-jdk5-4.4.1.zip 在www.sourceforge.org 上找
3、 解壓
4、 修改%tomcat_home%"bin"catalina.bat
在rem ----- Execute The Requested Command ---------------------------------------下面加入:
set JAVA_OPTS=%JAVA_OPTS% -Xms128m -Xmx1024m -XX:MaxPermSize=128m -Dfile.encoding=UTF8 -Duser.timezone=GMT -Djava.security.auth.login.config="%CATALINA_HOME%/conf/jaas.config"
5、 拷貝liferay-portal-tomcat-5.5-jdk5-4.4.1"common到%tomcat_home%"下
6、 拷貝liferay-portal-tomcat-5.5-jdk5-4.4.1"conf"Catalina"localhost下的ROOT.xml到%tomcat_home%"conf"Catalina"localhost下
7、 修改%tomcat_home%"conf"catalina.properties在common.loader最后面加上,${catalina.home}/common/lib/ext/*.jar使tomcat啟動時候默認加載common"lib"ext下的jar包
8、 拷貝liferay-portal-tomcat-5.5-jdk5-4.4.1"conf"jaas.config到%tomcat_home%"conf"jaas.config
9、 拷貝D:"Java"liferay-portal-tomcat-5.5-jdk5-4.4.1"server"lib"*.jar到%tomcat_home%"server"bin下
10、 到這里配置完成,可以把liferay-portal-tomcat-5.5-jdk5-4.4.1"webapps下的ROOT拷貝到%tomcat_home%"webapps下,也可以到官方網站上下載liferay-portal-4.4.1.war進行部署
11、 啟動%tomcat_home%"bin"startup.bat
13、 默認用戶名test@liferay.org
14、 默認密碼 test
]]>