maven大家都了解了是個(gè)什么玩意兒,直接上部署過程了。
新建個(gè)目錄mkdir /data/maven, 進(jìn)入該目錄并執(zhí)行如下操作步驟:
maven官網(wǎng)下載包:
| #wget http://mirror.bit.edu.cn/apache/maven/maven-3/3.1.1/binaries/apache-maven-3.1.1-bin.tar.gz |
解壓maven:
| # tar -zxvf apache-maven-3.1.1-bin.tar.gz |
進(jìn)入apache-maven-3.1.1,新建隱藏目錄.m2(mkdir .m2),再在該.m2目錄下創(chuàng)建setting.xml文件,文件內(nèi)容如下:
| <?xml version="1.0" encoding="UTF-8"?> <settings xmlns=http://maven.apache.org/SETTINGS/1.0.0 xmlns:xsi="http://www.w3.org/2001/XMLSchema-instance" xsi:schemaLocation="http://maven.apache.org/SETTINGS/1.0.0 http://maven.apache.org/xsd/settings-1.0.0.xsd"> <!-- 指定jar包存放路徑--> <localRepository>/data/maven/apache-maven-3.1.1/repo/</localRepository> <pluginGroups> </pluginGroups> <!--設(shè)置代理服務(wù)器 --> <proxies> <proxy> <id>my-proxy</id> <active>true</active> <protocol>http</protocol> <host>202.84.17.41</host> <port>8080</port> </proxy> </proxies> <!-- 設(shè)置私服server--> <servers> <server> <id>nexus</id> <username>admin</username> <password>admin</password> </server> </servers> <!-- 配置私服作為鏡像,只允許maven使用私服--> <mirrors> <mirror> <id>nexus</id> <mirrorOf>*</mirrorOf> <url>http://localhost:8081/nexus/content/groups/public</url> </mirror> </mirrors> <profiles> <profile> <id>nexus</id> <repositories> <repository> <id>central</id> <url>http://central</url> <releases><enabled>true</enabled></releases> <snapshots><enabled>true</enabled></snapshots> </repository> </repositories> <pluginRepositories> <pluginRepository> <id>central</id> <url>http://central</url> <releases><enabled>true</enabled></releases> <snapshots><enabled>true</enabled></snapshots> </pluginRepository> </pluginRepositories> </profile> </profiles> <activeProfiles> <activeProfile>nexus</activeProfile> </activeProfiles></settings> |
Nexus所有版本下載地址:http://www.sonatype.org/nexus/archived
nexus官網(wǎng)下載最新的版本.
解壓nexus:
| # tar -zxvf nexus-2.6.4-02-bundle.tar.gz |
啟動(dòng)腳本:
mavenStart.sh
| #!/bin/bash M2_HOME=/data/maven/apache-maven-3.1.1 JAVA_HOME=/usr/local/jdk/bin export M2_HOME PATH=$JAVA_HOME:$PATH:$HOME/bin:$M2_HOME/bin export PATH /data/maven/nexus-2.1.1/bin/jsw/linux-x86-64/nexus start |
停止腳本:
mavenStop.sh
| #!/bin/bash /data/maven/nexus-2.1.1/bin/jsw/linux-x86-64/nexus stop |
正常啟動(dòng)nexus:
| # sh mavenStart.sh **************************************** WARNING - NOT RECOMMENDED TO RUN AS ROOT **************************************** Starting Nexus OSS... Started Nexus OSS. |
錯(cuò)誤1:若出現(xiàn)如下錯(cuò)誤:
***********************************
WARNING - NOT RECOMMENDED TO RUN AS ROOT
****************************************
If you insist running as root, then set the environment variable RUN_AS_USER=root before running this script
解決方式:修改$NEXUS_HOME/jsw/linuxx86-64/nexus文件中RUN_AS_USER=root
錯(cuò)誤2:啟動(dòng)幾秒鐘后,自動(dòng)停止了nexus進(jìn)程,報(bào)錯(cuò)如下:
| Launching a JVM... wrapper | JVM exited while loading the application. jvm 3 | Exception in thread "main" java.lang.UnsupportedClassVersionError: org/sonatype/nexus/bootstrap/jsw/JswLauncher : Unsupported major.minor version 51.0 jvm 3 | at java.lang.ClassLoader.defineClass1(Native Method) jvm 3 | at java.lang.ClassLoader.defineClassCond(ClassLoader.java:632) jvm 3 | at java.lang.ClassLoader.defineClass(ClassLoader.java:616) jvm 3 | at java.security.SecureClassLoader.defineClass(SecureClassLoader.java:141) jvm 3 | at java.net.URLClassLoader.defineClass(URLClassLoader.java:283) jvm 3 | at java.net.URLClassLoader.access$000(URLClassLoader.java:58) jvm 3 | at java.net.URLClassLoader$1.run(URLClassLoader.java:197) jvm 3 | at java.security.AccessController.doPrivileged(Native Method) jvm 3 | at java.net.URLClassLoader.findClass(URLClassLoader.java:190) jvm 3 | at java.lang.ClassLoader.loadClass(ClassLoader.java:307) jvm 3 | at sun.misc.Launcher$AppClassLoader.loadClass(Launcher.java:301) jvm 3 | at java.lang.ClassLoader.loadClass(ClassLoader.java:248) jvm 3 | Could not find the main class: org.sonatype.nexus.bootstrap.jsw.JswLauncher. Program will exit. |
解決方式:可能原因是jdk版本低 沒有去下載jdk1.7,而是下載了nexus-2.1.1-bundle.tar.gz,測試了下,jdk1.6是完全支持滴~
重新修改配置并啟動(dòng):
瀏覽器中輸入:http://IP:8081/nexus
顯示界面如下:

默認(rèn)用戶名和密碼:admin/admin123
點(diǎn)擊左側(cè) Repositories,顯示如下:

將如下三項(xiàng)目中的Configuration中的Download Remote indexs修改為true

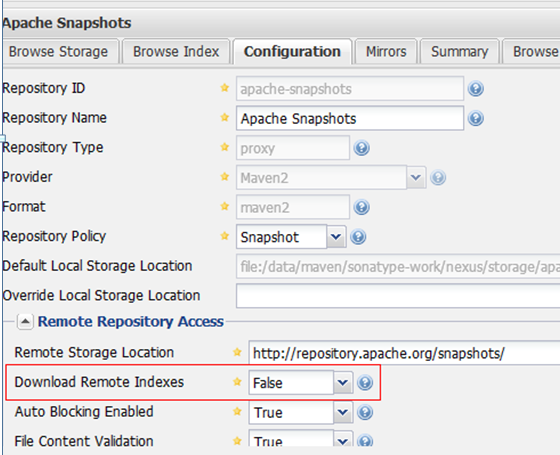
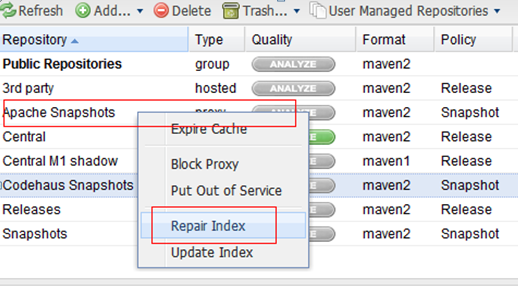
然后,右鍵à選擇Repair Index 讓Nexus遠(yuǎn)程下載索引文件。
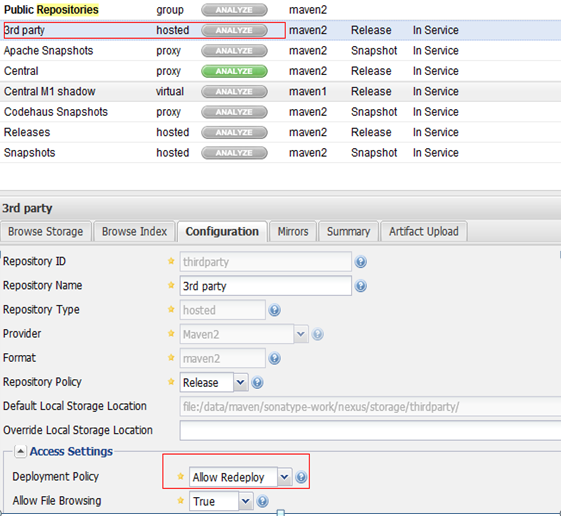
將3rd party 的Configuration中的Deploment Policy修改為Allow Redeploy:
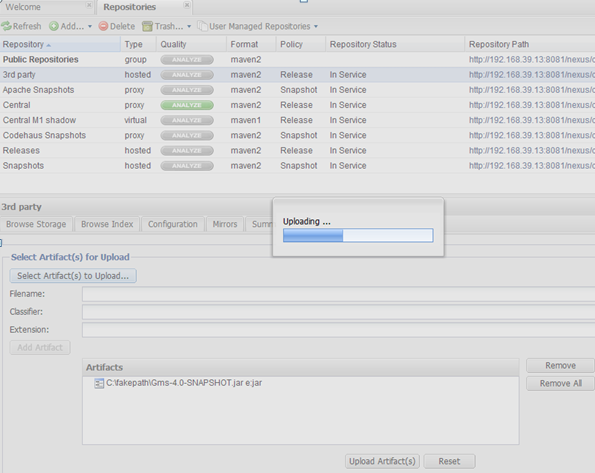
以上就基本已將nexus私服配置完成。
通過選擇Select Artifact(s) for upload,上傳單獨(dú)開發(fā)的jar包方式:
二、 maven插件安裝及nexus私服的使用:
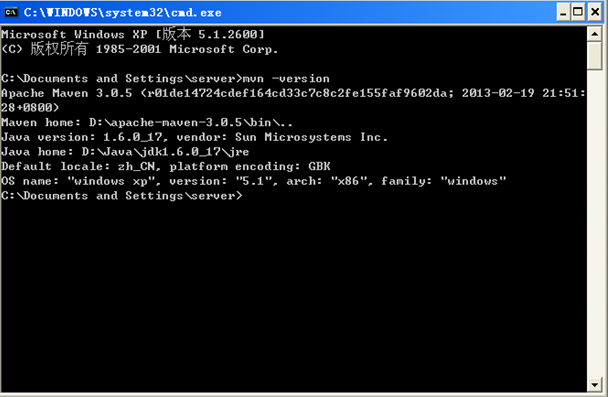
我的電腦中以前已經(jīng)安裝過maven了,在控制臺(tái)下輸入mvn -version可以查看到當(dāng)前maven版本:
修改D:\apache-maven-3.0.5\conf\setting.xml文件中變更maven repository地址。
默認(rèn)是在用戶本地臨時(shí)目錄下,我的是C:\Documents and Settings\server\.m2\repository
配置修改如下:
| <settings xmlns="http://maven.apache.org/SETTINGS/1.0.0" xmlns:xsi="http://www.w3.org/2001/XMLSchema-instance" xsi:schemaLocation="http://maven.apache.org/SETTINGS/1.0.0 http://maven.apache.org/xsd/settings-1.0.0.xsd"> <!-- localRepository | The path to the local repository maven will use to store artifacts. | | Default: ~/.m2/repository <localRepository>/path/to/local/repo</localRepository> --> <localRepository>E:/maven/repo</localRepository> <!-- interactiveMode | This will determine whether maven prompts you when it needs input. If set to false, | maven will use a sensible default value, perhaps based on some other setting, for | the parameter in question. | | Default: true <interactiveMode>true</interactiveMode> --> |
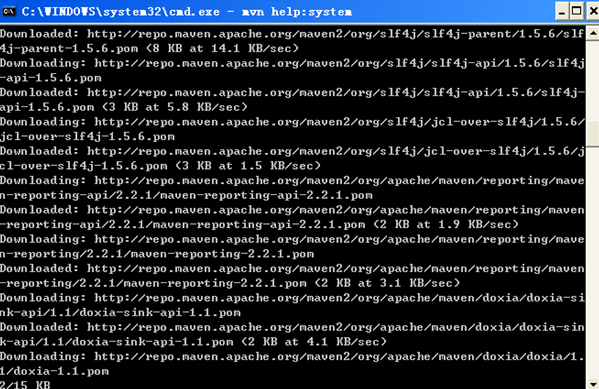
控制臺(tái)下,運(yùn)行mvn help:system, 從遠(yuǎn)程倉庫下載..
eclipse /Myeclipse安裝插件的方式最常見的有兩種:
1. 一種是在線安裝,這,貌似是用的最多的,就是:Help --> Install New Software,然后輸入 HTTP 地址來安裝,但有一個(gè)很明顯的缺點(diǎn),就是慢!
2. 一種是離線安裝,用 link 的方式來安裝,這種方式可拔性更好,可以隨時(shí)將插件插上和拔下,非常方便。
第二中方式可以參考博客:
http://m.tkk7.com/fancydeepin/archive/2012/07/13/382965.html
我比較傾向于使用Myeclipse高度集成化的工具.
安裝成功后,工具中WindowsàPreferences:

安裝maven
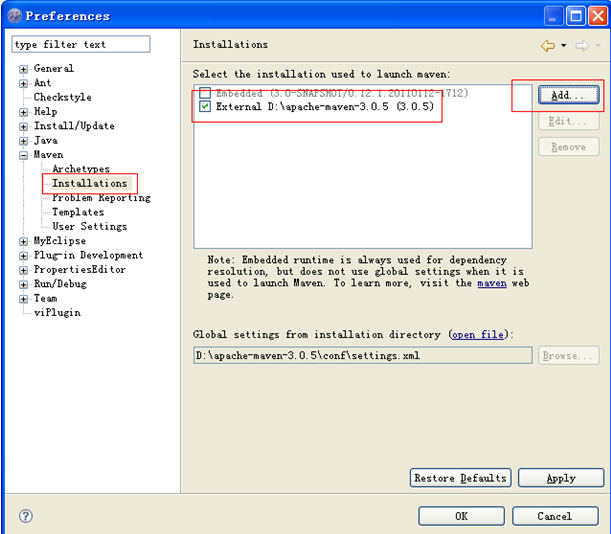
配置setting.xml

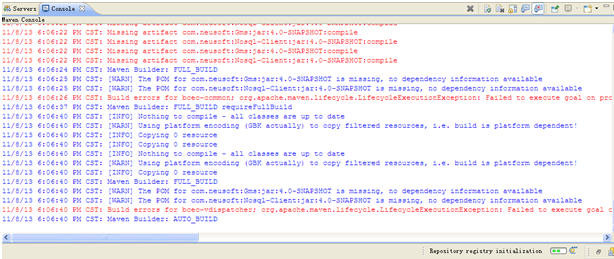
以上配置完成后,現(xiàn)有maven工程pom.xml文件中修改nexus私服地址后,會(huì)自動(dòng)下載依賴的jar,控制臺(tái)中不斷輸出信息:
posted on 2013-11-19 11:48
David1228 閱讀(23743)
評論(1) 編輯 收藏 所屬分類:
JAVA 、
其他