|
|
2013年1月11日
在Spring cloud config出來之前, 自己實(shí)現(xiàn)了基于ZK的配置中心, 杜絕了本地properties配置文件, 原理很簡(jiǎn)單, 只是重載了PropertyPlaceholderConfigurer的mergeProperties(): /**
* 重載合并屬性實(shí)現(xiàn)
* 先加載file properties, 然后并入ZK配置中心讀取的properties
*
* @return 合并后的屬性集合
* @throws IOException 異常
*/
@Override
protected Properties mergeProperties() throws IOException {
Properties result = new Properties();
// 加載父類的配置
Properties mergeProperties = super.mergeProperties();
result.putAll(mergeProperties);
// 加載從zk中讀取到的配置
Map<String, String> configs = loadZkConfigs();
result.putAll(configs);
return result;
} 這個(gè)實(shí)現(xiàn)在spring項(xiàng)目里用起來還是挺順手的, 但是近期部分spring-boot項(xiàng)目里發(fā)現(xiàn)這種placeholder的實(shí)現(xiàn)跟spring boot的@ConfigurationProperties(prefix = "xxx") 不能很好的配合工作, 也就是屬性沒有被resolve處理, 用@Value的方式確可以讀到, 但是@Value配置起來如果屬性多的話還是挺繁瑣的, 還是傾向用@ConfigurationProperties的prefix, 于是看了下spring boot的文檔發(fā)現(xiàn) PropertySource order: * Devtools global settings properties on your home directory (~/.spring-boot-devtools.properties when devtools is active).
* @TestPropertySource annotations on your tests.
* @SpringBootTest#properties annotation attribute on your tests.
* Command line arguments.
* Properties from SPRING_APPLICATION_JSON (inline JSON embedded in an environment variable or system property)
* ServletConfig init parameters.
* ServletContext init parameters.
* JNDI attributes from java:comp/env.
* Java System properties (System.getProperties()).
* OS environment variables.
* A RandomValuePropertySource that only has properties in random.*.
* Profile-specific application properties outside of your packaged jar (application-{profile}.properties and YAML variants)
* Profile-specific application properties packaged inside your jar (application-{profile}.properties and YAML variants)
* Application properties outside of your packaged jar (application.properties and YAML variants).
* Application properties packaged inside your jar (application.properties and YAML variants).
* @PropertySource annotations on your @Configuration classes.
* Default properties (specified using SpringApplication.setDefaultProperties). 不難發(fā)現(xiàn)其會(huì)檢查Java system propeties里的屬性, 也就是說, 只要把mergerProperties讀到的屬性寫入Java system props里即可, 看了下源碼, 找到個(gè)切入點(diǎn) /**
* 重載處理屬性實(shí)現(xiàn)
* 根據(jù)選項(xiàng), 決定是否將合并后的props寫入系統(tǒng)屬性, Spring boot需要
*
* @param beanFactoryToProcess
* @param props 合并后的屬性
* @throws BeansException
*/
@Override
protected void processProperties(ConfigurableListableBeanFactory beanFactoryToProcess, Properties props) throws BeansException {
// 原有邏輯
super.processProperties(beanFactoryToProcess, props);
// 寫入到系統(tǒng)屬性
if (writePropsToSystem) {
// write all properties to system for spring boot
Enumeration<?> propertyNames = props.propertyNames();
while (propertyNames.hasMoreElements()) {
String propertyName = (String) propertyNames.nextElement();
String propertyValue = props.getProperty(propertyName);
System.setProperty(propertyName, propertyValue);
}
}
} 為避免影響過大, 設(shè)置了個(gè)開關(guān), 是否寫入系統(tǒng)屬性, 如果是spring boot的項(xiàng)目, 就開啟, 這樣對(duì)線上非spring boot項(xiàng)目做到影響最小, 然后spring boot的@ConfigurationProperties完美讀到屬性; 具體代碼見: org.springframework.boot.context.properties.ConfigurationPropertiesBindingPostProcessor @Override
public Object postProcessBeforeInitialization(Object bean, String beanName)
throws BeansException {
ConfigurationProperties annotation = AnnotationUtils
.findAnnotation(bean.getClass(), ConfigurationProperties.class);
if (annotation != null) {
postProcessBeforeInitialization(bean, beanName, annotation);
}
annotation = this.beans.findFactoryAnnotation(beanName,
ConfigurationProperties.class);
if (annotation != null) {
postProcessBeforeInitialization(bean, beanName, annotation);
}
return bean;
}
Spring默認(rèn)不允許對(duì)類的變量, 也就是靜態(tài)變量進(jìn)行注入操作, 但是在某些場(chǎng)景比如單元測(cè)試的@AfterClass要訪問注入對(duì)象, 而Junit的這個(gè)方法必須是靜態(tài)的, 也就產(chǎn)生了悖論; 解決思路有兩個(gè): 思路1: 想辦法對(duì)靜態(tài)變量注入, 也就是繞過Spring只能運(yùn)行非靜態(tài)變量才能注入依賴的壁壘 思路2: 想辦法@AfterClass改造為非靜態(tài) 實(shí)現(xiàn)Junit RunListener, 覆蓋testRunFinished方法, 這里去實(shí)現(xiàn)類似@AfterClass的功能, 這個(gè)方法是非靜態(tài)的 不要用Junit, 改用TestNG, TestNG里的AfterClass是非靜態(tài)的 用Spring的TestExecutionListeners, 實(shí)現(xiàn)個(gè)Listener, 里面也有個(gè)類似非靜態(tài)的AfterClass的實(shí)現(xiàn), 覆蓋實(shí)現(xiàn)就行
思路2的幾個(gè)方法都可以實(shí)現(xiàn), 但是單元測(cè)試Runner需要用 而且改用TestNG工程浩大, 只能放棄掉這個(gè)思路 繼續(xù)走思路1, 只能去繞過Spring的依賴注入的static壁壘了, 具體代碼如下: @Autowired private Destination dfsOperationQueue; private static Destination dfsOperationQueueStatic; // static version @Autowired private MessageQueueAPI messageQueueAPI; private static MessageQueueAPI messageQueueAPIStatic; // static version
@PostConstruct public void init() { dfsOperationQueueStatic = this.dfsOperationQueue; messageQueueAPIStatic = this.messageQueueAPI; }
@AfterClass public static void afterClass() { MessageVO messageVO = messageQueueAPIStatic.removeDestination(dfsOperationQueueStatic); System.out.println(messageVO); }
其實(shí)就是用了@PostConstruct 來個(gè)偷梁換柱而已, 多聲明個(gè)靜態(tài)成員指向非靜態(tài)對(duì)象, 兩者其實(shí)是一個(gè)對(duì)象
知道activemq現(xiàn)在已經(jīng)支持了rest api, 但是官方對(duì)這部分的介紹一筆帶過 (http://activemq.apache.org/rest.html),
通過google居然也沒搜到一些有用的, 比如像刪除一個(gè)destination, 都是問的多,然后沒下文. 于是花了一些心思研究了一下:
首先通過rest api獲取當(dāng)前版本所有已支持的協(xié)議 http://172.30.43.206:8161/api/jolokia/list
然后根據(jù)json輸出關(guān)于removeTopic, removeQueue的mbean實(shí)現(xiàn)通過rest api刪除destination的方法, 注意到用GET請(qǐng)求而不是POST,不然會(huì)報(bào)錯(cuò) (官網(wǎng)的例子里用的wget給的靈感, 開始用了POST老報(bào)錯(cuò))
import org.apache.activemq.command.ActiveMQQueue;
import org.apache.activemq.command.ActiveMQTopic;
import org.apache.http.auth.AuthScope;
import org.apache.http.auth.UsernamePasswordCredentials;
import org.apache.http.impl.client.BasicCredentialsProvider;
import org.apache.http.impl.client.DefaultHttpClient;
import org.springframework.http.HttpEntity;
import org.springframework.http.HttpHeaders;
import org.springframework.http.HttpMethod;
import org.springframework.http.MediaType;
import org.springframework.http.ResponseEntity;
import org.springframework.http.client.ClientHttpRequestFactory;
import org.springframework.http.client.HttpComponentsClientHttpRequestFactory;
import org.springframework.web.client.RestTemplate;
import javax.jms.Destination;
import javax.jms.JMSException;
import java.util.Arrays;
public class MessageQueueAdmin {
private static final RestTemplate restTemplate = getRestTemplate("admin", "admin");
private static String brokerHost = "172.30.43.206";
private static String adminConsolePort = "8161";
private static String protocol = "http";
public static void removeDestination(Destination destination) throws JMSException {
String destName, destType;
if (destination instanceof ActiveMQQueue) {
destName = ((ActiveMQQueue) destination).getQueueName();
destType = "Queue";
} else {
destName = ((ActiveMQTopic) destination).getTopicName();
destType = "Topic";
}
// build urls
String url = String.format("%s://%s:%s/api/jolokia/exec/org.apache.activemq:" +
"brokerName=localhost,type=Broker/remove%s/%s", protocol, brokerHost, adminConsolePort, destType, destName);
System.out.println(url);
// do operation
HttpHeaders headers = new HttpHeaders();
headers.setAccept(Arrays.asList(MediaType.APPLICATION_JSON));
HttpEntity<String> entity = new HttpEntity<String>("parameters", headers);
ResponseEntity response = restTemplate.exchange(url, HttpMethod.GET, entity, String.class);
System.out.println(response.getBody());
}
public static void main(String[] args) throws JMSException {
ActiveMQTopic topic = new ActiveMQTopic("test-activemq-topic");
removeDestination(topic);
}
private static RestTemplate getRestTemplate(String user, String password) {
DefaultHttpClient httpClient = new DefaultHttpClient();
BasicCredentialsProvider credentialsProvider = new BasicCredentialsProvider();
credentialsProvider.setCredentials(AuthScope.ANY, new UsernamePasswordCredentials(user, password));
httpClient.setCredentialsProvider(credentialsProvider);
ClientHttpRequestFactory rf = new HttpComponentsClientHttpRequestFactory(httpClient);
return new RestTemplate(rf);
}
}
其他的請(qǐng)求,應(yīng)該都是類似jolokia的exec get request的格式:
https://jolokia.org/reference/html/protocol.html#exec
<base url>/exec/<mbean name>/<operation name>/<arg1>/<arg2>/ . .
用Spring JMS 的JmsTemplate從消息隊(duì)列消費(fèi)消息時(shí)發(fā)現(xiàn),使用了CLIENT_ACKNOWLEDGE模式,消息返回后總是自動(dòng)被ack,也就是被broker "Dequeued" protected Message doReceive(Session session, MessageConsumer consumer) throws JMSException {
try {
// Use transaction timeout (if available).
long timeout = getReceiveTimeout();
JmsResourceHolder resourceHolder =
(JmsResourceHolder) TransactionSynchronizationManager.getResource(getConnectionFactory());
if (resourceHolder != null && resourceHolder.hasTimeout()) {
timeout = Math.min(timeout, resourceHolder.getTimeToLiveInMillis());
}
Message message = doReceive(consumer, timeout);
if (session.getTransacted()) {
// Commit necessary - but avoid commit call within a JTA transaction.
if (isSessionLocallyTransacted(session)) {
// Transacted session created by this template -> commit.
JmsUtils.commitIfNecessary(session);
}
}
else if (isClientAcknowledge(session)) {
// Manually acknowledge message, if any.
if (message != null) {
message.acknowledge();
}
}
return message;
}
finally {
JmsUtils.closeMessageConsumer(consumer);
}
}
但是使用異步listener 就不會(huì)出現(xiàn)這個(gè)情況,搜了下google,發(fā)現(xiàn)果然存在這個(gè)問題 https://jira.spring.io/browse/SPR-12995
https://jira.spring.io/browse/SPR-13255
http://louisling.iteye.com/blog/241073 同步方式拉取消息,暫時(shí)沒找到好的封裝,只能暫時(shí)用這。或者盡量用listener, 這個(gè)問題暫時(shí)標(biāo)記下,或者誰有更好的解決方案可以comment我
默認(rèn)的配置有時(shí)候點(diǎn)不亮顯示器,且分辨率很低,通過tvservice工具不斷調(diào)試,發(fā)現(xiàn)下面的參數(shù)可以完美匹配了
修改 /boot/config.txt的下列參數(shù) disable_overscan=1
hdmi_force_hotplug=1
hdmi_group=1
hdmi_mode=16
hdmi_drive=2
config_hdmi_boost=4
dtparam=audio=on
http://stackoverflow.com/questions/3294423/spring-classpath-prefix-difference
SIMPLE DEFINITION
The classpath*:conf/appContext.xml simply means that all appContext.xml files under conf folders in all your jars on the classpath will be picked up and joined into one big application context.
In contrast, classpath:conf/appContext.xml will load only one such file the first one found on your classpath.
<bean id="propertyConfigurer"
 class="org.springframework.beans.factory.config.PropertyPlaceholderConfigurer">
   <property name="locations">
      <list>
         <value>classpath:*.properties</value>
         <value>classpath*:*.properties</value>
      </list>
   </property>
</bean>
- IDEA_JDK (or IDEA_JDK_64) environment variable
- jre/ (or jre64/) directory in IDEA home
- registry
- JDK_HOME environment variable
- JAVA_HOME environment variable
java里如何修改console的歷史輸出信息呢?如果是當(dāng)前行的修改可以簡(jiǎn)單想到"\r"的方案,但是如果要修改上一行呢? google了下原來還是有方法的,需要用到ansi的control sequences ANSI code用java寫了個(gè)簡(jiǎn)單的例子,例子就是把曾經(jīng)的output修改為其他字符串并恢復(fù)之后的打印,代碼里加了sleep,主要方便理解各種控制序列的含義 //print some test messages
System.out.println("1");
Thread.sleep(1000);
System.out.println("22");
Thread.sleep(1000);
System.out.println("333");
Thread.sleep(1000);
System.out.println("4444");
Thread.sleep(1000);
/**
* modify "333" to "-"
*/
// Move up two lines
int count = 2;
System.out.print(String.format("\033[%dA", count));
Thread.sleep(1000);
// Erase current line content
System.out.print("\033[2K");
Thread.sleep(1000);
// update with new content
System.out.print("-");
Thread.sleep(1000);
// Move down two lines
System.out.print(String.format("\033[%dB", count));
Thread.sleep(1000);
// Move cursor to left beginning
System.out.print(String.format("\033[D", count));
// continue print others
Thread.sleep(1000);
System.out.println("55555");
Thread.sleep(1000);
1. zookeeper basic/fast paxsos 的形象表述 https://www.douban.com/note/208430424/
2. 詳細(xì)介紹 http://blog.csdn.net/xhh198781/article/details/10949697
server.compression.enabled=true
server.compression.mime-types=application/json,application/xml,text/html,text/xml,text/plain
server.compression.min-response-size=4096
第一個(gè)參數(shù)打開壓縮開關(guān),第二個(gè)參數(shù)添加json reponse(尤其是為rest api),第三個(gè)參數(shù)是根據(jù)reponse的大小設(shè)置啟用壓縮的最小值(默認(rèn)是2K,自己根據(jù)實(shí)際情況調(diào)整) 參考 http://docs.spring.io/spring-boot/docs/current-SNAPSHOT/reference/htmlsingle/#how-to-enable-http-response-compression
介紹centos7如何安裝3.0以上的新版本mongodb https://docs.mongodb.org/manual/tutorial/install-mongodb-on-red-hat/
1. 默認(rèn)的3個(gè)classloader: BootstrapClassloader (Native實(shí)現(xiàn)), ExtClassloader, AppClassloader (Java實(shí)現(xiàn)) 2. 3個(gè)加載器并不是真正的父子繼承關(guān)系,而是邏輯上的,JVM啟動(dòng)先創(chuàng)建ExtClassloader instance,然后構(gòu)造AppClassloader的時(shí)候傳入ExtClassloader實(shí)例作為parent Launcher.ExtClassLoader extcl;
try {
extcl = Launcher.ExtClassLoader.getExtClassLoader();
} catch (IOException var10) {
throw new InternalError("Could not create extension class loader", var10);
}
try {
this.loader = Launcher.AppClassLoader.getAppClassLoader(extcl);
} catch (IOException var9) {
throw new InternalError("Could not create application class loader", var9);
} 關(guān)于雙親委派原理: 在加載類的時(shí)候,會(huì)看看parent有沒有設(shè)定,如果設(shè)定了 就調(diào)用parent.loadClass方法,如果沒設(shè)定(==null)也就是parent應(yīng)該是BootstrapClassloader, 會(huì)調(diào)用native的findBootstrapClass來加載類,代碼: try {
if(this.parent != null) {
c = this.parent.loadClass(name, false);
} else {
c = this.findBootstrapClassOrNull(name);
}
} catch (ClassNotFoundException var10) {
;
}
目的是按照一定優(yōu)先級(jí)別裝載系統(tǒng)的lib,系統(tǒng)ext目錄的lib,以及classpath的lib,防止系統(tǒng)的默認(rèn)行為或者類的實(shí)現(xiàn)被修改。 3. java 類的動(dòng)態(tài)加載 Java內(nèi)置的ClassLoader總會(huì)在加載一個(gè)Class之前檢查這個(gè)Class是否已經(jīng)被加載過,已經(jīng)被加載過的Class不會(huì)加載第二次。因此要想重新加載Class,我們需要實(shí)現(xiàn)自己的ClassLoader。
另外一個(gè)問題是,每個(gè)被加載的Class都需要被鏈接(link),這是通過執(zhí)行ClassLoader.resolve()來實(shí)現(xiàn)的,這個(gè)方法是 final的,因此無法重寫。Resove()方法不允許一個(gè)ClassLoader實(shí)例link一個(gè)Class兩次,因此,當(dāng)你需要重新加載一個(gè) Class的時(shí)候,你需要重新New一個(gè)你自己的ClassLoader實(shí)例。
maven-shade-plugin 用來打可執(zhí)行jar包, 可以把所有依賴的三方庫都包括進(jìn)來
exec-maven-plugin 可以執(zhí)行外部命令, 在項(xiàng)目中對(duì)python代碼進(jìn)行編譯, 配合maven-assembly-plugin來生成package
maven-assembly-plugin 用來構(gòu)建項(xiàng)目發(fā)行包, 要配合xml配置文件來組織包的結(jié)構(gòu),基本思路是從build環(huán)境copy到outputDirectory
license-maven-plugin 用來生成項(xiàng)目用到的3方庫的版權(quán)匯總 或者其他的一些用法
maven-dependency-plugin 用來生成項(xiàng)目庫之間的依賴關(guān)系
appassembler-maven-plugin 可以為項(xiàng)目生成優(yōu)雅的啟動(dòng)腳本 支持linux/win
rpm-maven-plugin 用來為項(xiàng)目構(gòu)建rpm安裝包
maven-compiler-plugin 指定項(xiàng)目的jdk的編譯兼容版本以及encoding類別
快捷鍵migrating 持續(xù)更新
發(fā)現(xiàn)一個(gè)不錯(cuò)的介紹shell中冒號(hào)的用法的文章 http://codingstandards.iteye.com/blog/1160298
項(xiàng)目用mvn exec:exec指令來啟動(dòng)server, 工作中需要調(diào)式server初始化的過程, 很容易想到mvnDebug, 但是發(fā)現(xiàn)設(shè)置的斷點(diǎn)都沒有hit, 反復(fù)調(diào)式多次都是如此,折騰了1個(gè)多小時(shí), 突然看到stackoverflow 上有人說exec:exec是獨(dú)立進(jìn)程模式, mvnDebug的一些debug選項(xiàng)都被append到了父進(jìn)程了. idea設(shè)置斷點(diǎn)就然并卵了. 知道了問題所在解決就容易了, 只要修改pom.xml, 然后直接mvn exec:exec就能正常調(diào)式了 <build>
<plugins>
<plugin>
<groupId>org.codehaus.mojo</groupId>
<artifactId>exec-maven-plugin</artifactId>
<version>${mvnexec.version}</version>
<executions>
<execution>
<goals>
<goal>exec</goal>
</goals>
</execution>
</executions>
<configuration>
<includeProjectDependencies>true</includeProjectDependencies>
<executable>java</executable>
<workingDirectory>${basedir}/config/sim</workingDirectory>
<classpathScope>runtime</classpathScope>
<arguments>
<argument>-agentlib:jdwp=transport=dt_socket,server=y,suspend=y,address=4000</argument>
<argument>-classpath</argument>
<classpath/>
<argument>com.ymiao.Main</argument>
<argument>server</argument>
<argument>${basedir}/config/sim/sim.yml</argument>
</arguments>
</configuration>
</plugin>
</plugins>
</build>
總結(jié)就是exec:exec是要獨(dú)立一個(gè)新進(jìn)程來執(zhí)行程序的, exec:java就相反, 其實(shí)用mvnDebug + exec:java也是理論可行的
After Centos 7.1 tobe installed on my t400, my wireless link "Intel 5100 AGN" cannot be managed by NetworkManager, which show in "PCI unknown" state. Googled many pages, most of them introduced how to scan wifi links by command line tool "iw", i tried all steps supplied by the pages but was blocked at the last step to get dynamical ipaddress by dhclient command "sudo dhclient wlp3s0 -v". The dhclient always complain "NO DHCPOFFERS received." (I doubted there should be some tricky to play with dhclient but which i am not faimiar with.. sad.. ) But i think there would be some extending tool for NetworkManager to manager wifi, then i google "NetworkManager wifi", i got "NetwrokManager-wifi plugin" from link https://www.centos.org/forums/viewtopic.php?f=47&t=52810 After following steps , i finally make wifi work well on centos 7.1 - yum install NetworkManager-wifi
- reboot machine (i tried logout and login, not work)
Problem is NetworkManager-wifi is not installed by default on centos 7.1, (would it be my mistake when install OS? strange..)
http://onlywei.github.io/explain-git-with-d3
項(xiàng)目中要用到MBean,于是快速體驗(yàn)下,體驗(yàn)過程中發(fā)現(xiàn)2個(gè)問題: - 自定義的Mbean的普通method能在jconsole的Mbeans里顯示出來,但是涉及到geters/seters就無法顯示了
- 如果MBean注冊(cè)到下面形式創(chuàng)建的MBeanServer在Jconsole上無法顯示的
MBeanServer server = MBeanServerFactory.createMBeanServer();
MBeanServer server = ManagementFactory.getPlatformMBeanServer();
stackoverflow上也有人發(fā)現(xiàn)這個(gè)問題 http://stackoverflow.com/questions/7424009/mbeans-registered-to-mbean-server-not-showing-up-in-jconsole
http://www.ourd3js.com/wordpress/
Two compile issues i got:
One issue is: uuid_gen_unix.c: In function 'axutil_uuid_gen_v1':uuid_gen_unix.c:62:20: error: variable 'tv' set but not used [-Werror=unused-but-set-variable] struct timeval tv; ^cc1: all warnings being treated as errors
Solution is remove "-Werror" in all configure scripts find -type f -name configure -exec sed -i '/CFLAGS/s/-Werror//g' {} \; /usr/bin/ld: test.o: undefined reference to symbol 'axiom_xml_reader_free'
/usr/local/axis2c/lib/libaxis2_parser.so.0: error adding symbols: DSO missing from command line
collect2: error: ld returned 1 exit status
make[4]: *** [test] Error 1
make[4]: Leaving directory `/home/miaoyachun/softwares/test/axis2c-src-1.6.0/neethi/test'
As suggested in https://code.google.com/p/staff/issues/detail?id=198, the solution is disable neethi/test in following files: Finally, you could run "make; sudo make install"" successfully. Last thing should be paid attention to is you may need copy all head files of neethi/include into /usr/local/axis2c/include/axis2-1.6.0/ which needed when you compile customized web service.
Enjoining it!!
http://axis.apache.org/axis2/c/core/docs/axis2c_manual.html#client_api 的hello.c client 編譯命令在我的ubuntu 12.04s上總是報(bào)錯(cuò) gcc -o hello -I$AXIS2C_HOME/include/axis2-1.6.0/ -L$AXIS2C_HOME/lib -laxutil -laxis2_axiom -laxis2_parser -laxis2_engine -lpthread -laxis2_http_sender -laxis2_http_receiver -ldl -Wl,--rpath -Wl,$AXIS2C_HOME/lib hello.c
/tmp/ccCYikFh.o: In function `main':
hello.c:(.text+0x57): undefined reference to `axutil_env_create_all'
hello.c:(.text+0x68): undefined reference to `axis2_options_create'
hello.c:(.text+0x93): undefined reference to `axutil_strcmp'
hello.c:(.text+0xeb): undefined reference to `axis2_endpoint_ref_create'
hello.c:(.text+0x102): undefined reference to `axis2_options_set_to'
hello.c:(.text+0x13d): undefined reference to `axis2_svc_client_create'
hello.c:(.text+0x168): undefined reference to `axutil_error_get_message'
hello.c:(.text+0x193): undefined reference to `axutil_log_impl_log_error'
hello.c:(.text+0x1b1): undefined reference to `axis2_svc_client_set_options'
hello.c:(.text+0x1d6): undefined reference to `axis2_svc_client_send_receive'
hello.c:(.text+0x21d): undefined reference to `axiom_node_free_tree'
hello.c:(.text+0x238): undefined reference to `axutil_error_get_message'
hello.c:(.text+0x266): undefined reference to `axutil_log_impl_log_error'
hello.c:(.text+0x28d): undefined reference to `axis2_svc_client_free'
hello.c:(.text+0x2a8): undefined reference to `axutil_env_free'
/tmp/ccCYikFh.o: In function `build_om_request':
hello.c:(.text+0x2ed): undefined reference to `axiom_element_create'
hello.c:(.text+0x307): undefined reference to `axiom_element_set_text'
/tmp/ccCYikFh.o: In function `process_om_response':
hello.c:(.text+0x337): undefined reference to `axiom_node_get_first_child'
hello.c:(.text+0x351): undefined reference to `axiom_node_get_node_type'
hello.c:(.text+0x367): undefined reference to `axiom_node_get_data_element'
hello.c:(.text+0x381): undefined reference to `axiom_text_get_value'
hello.c:(.text+0x396): undefined reference to `axiom_text_get_value'
collect2: error: ld returned 1 exit status
仔細(xì)檢查了gcc命令,頭文件,庫文件的路徑都是對(duì)的,最后跟同事討論才發(fā)現(xiàn)hello.c的位置的問題。。如果hello.c的位置放到了依賴庫的右面 就會(huì)報(bào)類似錯(cuò)誤。但是官方的例子應(yīng)該是測(cè)試過的,怎么會(huì)有這個(gè)問題呢? 難道我的ubuntu 12.04的gcc比較嚴(yán)格? 修正后的gcc命令如下 gcc -o hello hello.c -I$AXIS2C_HOME/include/axis2-1.6.0/ -L$AXIS2C_HOME/lib -laxutil -laxis2_axiom -laxis2_parser -laxis2_engine -lpthread -laxis2_http_sender -laxis2_http_receiver -ldl -Wl,--rpath -Wl,$AXIS2C_HOME/lib
ubuntu 12.04s每次修改limit.conf文件后,要想讓所有的后繼ssession都能看到修改,一般要么重啟系統(tǒng),要么relogin系統(tǒng)。下面介紹一個(gè)不退出terminal就讓修改立刻生效的方式 1. 修改/etc/pam.d/sudo,添加下面行到文件末尾 session required pam_limits.so
2. 修改 /etc/security/limits.conf, 比如 root soft nofile 65535
root hard nofile 65535
3. 執(zhí)行sudo -i -u root 模擬登錄初始化 另外發(fā)現(xiàn)centos 6系統(tǒng)/etc/pam.d/sudo已經(jīng)默認(rèn)enable pam_limits.so了,直接2,3就可以了。 當(dāng)然如果用ssh重新登錄下可能來的更快。。因?yàn)?etc/pam.d/sshd默認(rèn)enable了pam_limits.so, 多輸入個(gè)密碼而已
ss(shadowsocks) 是基于socks5的,但是android studio sdk manager只支持http代理,導(dǎo)致android studio無法更新sdk tools,解決方法就是polipo,可以將socks5轉(zhuǎn)換為http代理 具體方法見 https://github.com/shadowsocks/shadowsocks/wiki/Convert-Shadowsocks-into-an-HTTP-proxy
ubuntu上ibus經(jīng)常出現(xiàn)不能輸入中文的情況,用下面命令可以臨時(shí)解決問題
ibus-daemon -r &
從jdk7最開始的release version (http://www.oracle.com/technetwork/java/javase/jdk7-relnotes-418459.html)的notes里看到
Area: HotSpot
Synopsis: In JDK 7, interned strings are no longer allocated in the permanent generation of the Java heap, but are instead allocated in the main part of the Java heap (known as the young and old generations), along with the other objects created by the application. This change will result in more data residing in the main Java heap, and less data in the permanent generation, and thus may require heap sizes to be adjusted. Most applications will see only relatively small differences in heap usage due to this change, but larger applications that load many classes or make heavy use of the String.intern() method will see more significant differences.
RFE: 6962931
今天有同事問為什么ubuntu上啟動(dòng)jenkins失敗,我記得之前玩的時(shí)候并沒有出現(xiàn)這種情況,于是跟蹤了下,最終錯(cuò)誤信息是: daemon: fatal: refusing to execute unsafe program: /usr/bin/java (/opt is group and world writable) 根本原因是機(jī)器裝了多個(gè)版本的jdk, jdk所在的/opt父目錄的權(quán)限放的比較大,按照daemon要求的限制到755 chmod -R 755 /opt 問題就解決了。 其實(shí)這個(gè)場(chǎng)景還是蠻常見的,遇到的人應(yīng)該挺多的
latency = client send request time + network trans time (->)+ server receive request time+ reponse time + server send reponse time+ network trans time (<-)+ client receive reponse time
latency = first byte out, last byte in time
以前用centos的chkconfig來管理系統(tǒng)服務(wù),而ubuntu上是沒有這個(gè)工具的,google上提到一個(gè)替代品sysv-rc-conf, apt-get install下就可以直接用了,有個(gè)text console可以使用 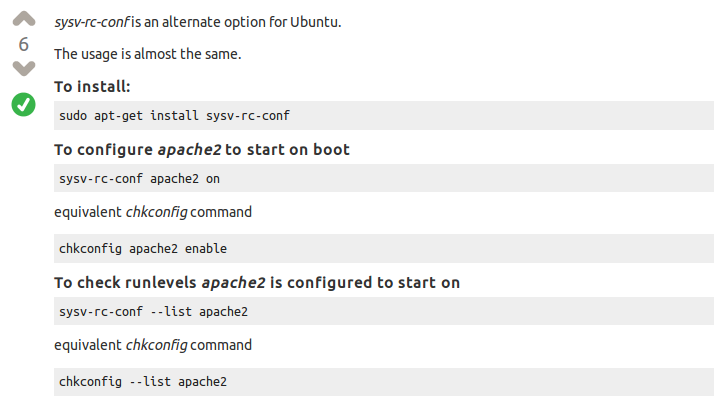
Java程序的memory leak分析也可以用valgrind, 尤其是JNI程序尤其有用: valgrind --error-limit=no --trace-children=yes --smc-check=all --leak-check=full JAVA_CMD 特意寫了個(gè)有l(wèi)eak的jni函數(shù),用valgrind成功檢查出來了 ==31915== 100 bytes in 1 blocks are definitely lost in loss record 447 of 653
==31915== at 0x402CE68: malloc (in /usr/lib/valgrind/vgpreload_memcheck-x86-linux.so)
==31915== by 0x60424F9: Java_MyJNI_hello (MyJNI.c:16)
在老版本valgrind(3.5.0) enable了--trace-children選項(xiàng)后可能出現(xiàn)錯(cuò)誤: Error occurred during initialization of VM
Unknown x64 processor: SSE2 not supported
升級(jí)到最新版可以解決這個(gè)問題,升級(jí)方法:下載src包 解壓后執(zhí)行 ./configure; make; make install
maven項(xiàng)目中有很多本地三方依賴,但是一個(gè)一個(gè)加入dependency + system scope又很麻煩,又貌似沒有搜索到通配符的成功案例,但是從stackoverflow上看到一個(gè)插件addjars-maven-plugin, 可以很好解決這類需求: <build>
<plugins>
<plugin>
<groupId>com.googlecode.addjars-maven-plugin</groupId>
<artifactId>addjars-maven-plugin</artifactId>
<version>1.0.2</version>
<executions>
<execution>
<goals>
<goal>add-jars</goal>
</goals>
<configuration>
<resources>
<resource>
<directory>${basedir}/../lib</directory>
</resource>
</resources>
</configuration>
</execution>
</executions>
</plugin>
<plugin>
<groupId>org.apache.maven.plugins</groupId>
<artifactId>maven-assembly-plugin</artifactId>
<version>${maven.assembly.version}</version>
<configuration>
<descriptorRefs>
<descriptorRef>jar-with-dependencies</descriptorRef>
</descriptorRefs>
<appendAssemblyId>false</appendAssemblyId>
</configuration>
<executions>
<execution>
<phase>package</phase>
<goals>
<goal>single</goal>
</goals>
</execution>
</executions>
</plugin>
</plugins>
</build> 把項(xiàng)目中依賴的三方j(luò)ars全放到lib目錄里,就全部會(huì)打包到release jar里了
#include <stdio.h>
#include <stdlib.h>
#include <string.h>
#include <arpa/inet.h>
#include <inttypes.h>
uint64_t htonll(uint64_t val) {
return (((uint64_t) htonl(val)) << 32) + htonl(val >> 32);
}
uint64_t ntohll(uint64_t val) {
return (((uint64_t) ntohl(val)) << 32) + ntohl(val >> 32);
}
int main() {
uint64_t hll = 0x1122334455667788;
printf("uint64: %"PRIu64"\n", hll);
printf("0x%"PRIX64"\n", hll);
printf("htonll(hll) = 0x%"PRIX64"\n", htonll(hll));
printf("ntohll(htonll(hll)) = 0x%"PRIX64"\n", ntohll(htonll(hll)));
printf("ntohll(hll) = 0x%"PRIX64"\n", ntohll(hll)); // no change
return 1;
}
big endian(network byte order), little endian (host byte order in intel arch)
用jd-eclipse 插件來反編譯java class文件的輸出還是挺nice的,雖然閱讀方便了 但是對(duì)debug確造成一定的困擾,主要問題是line number的不match. Google了下遇到類似問題的真不少。最終找到了解決方案: http://sourceforge.net/projects/realignmentjd/files/
-----------------
1. Download JD-Eclipse and JD-GUI - http://java.decompiler.free.fr/ and install.
2. Put a file realignment.jd.ide.eclipse_1.0.2.jar in eclipse/plugins directory.
To use Realignment feature it is necessary to open the menu Preferences/General/Editors/File Associations and to select "*.class" file type and to choose "Realignment for JD Class File Editor" for Associated editors.
Another possibility is the batch realignment after processing JD-GUI. To work properly you must to switch on the property "Display line numbers" in Help/Preferences of JD-GUI.
To use this feature it is necessary to open the menu Preferences/Java/Decompiler/Batch Realignment and click button "Open dialog". Existing limitation: the realignment is performed only for the methods.
To work properly it is necessary that the property "Display line numbers" in menu "Preferences/Java/Decompiler" was active.
補(bǔ)丁讓優(yōu)雅的debug class 文件成為可能。 如果只是為了閱讀class代碼,建議不要用 realignment 補(bǔ)丁,這樣會(huì)降低代碼的可讀性(會(huì)多出大量的空行)
sudo dpkg -l \*erlang\*
Desired=Unknown/Install/Remove/Purge/Hold
| Status=Not/Inst/Conf-files/Unpacked/halF-conf/Half-inst/trig-aWait/Trig-pend
|/ Err?=(none)/Reinst-required (Status,Err: uppercase=bad)
||/ Name Version Description
+++-=============================-=============================-==========================================================================
ii erlang 1:14.b.4-dfsg-1ubuntu1 Concurrent, real-time, distributed functional language
un erlang-abi-13.a <none> (no description available)
ii erlang-appmon 1:14.b.4-dfsg-1ubuntu1 Erlang/OTP application monitor
ii erlang-asn1 1:14.b.4-dfsg-1ubuntu1 Erlang/OTP modules for ASN.1 support
rc erlang-base 1:14.b.4-dfsg-1ubuntu1 Erlang/OTP virtual machine and base applications
ii erlang-base-hipe 1:14.b.4-dfsg-1ubuntu1 Erlang/OTP HiPE enabled virtual machine and base applications
ii erlang-common-test 1:14.b.4-dfsg-1ubuntu1 Erlang/OTP application for automated testing
ii erlang-corba 1:14.b.4-dfsg-1ubuntu1 Erlang/OTP applications for CORBA support
ii erlang-crypto 1:14.b.4-dfsg-1ubuntu1 Erlang/OTP cryptographic modules
ii erlang-debugger 1:14.b.4-dfsg-1ubuntu1 Erlang/OTP application for debugging and testing
ii erlang-dev 1:14.b.4-dfsg-1ubuntu1 Erlang/OTP development libraries and headers
ii erlang-dialyzer 1:14.b.4-dfsg-1ubuntu1 Erlang/OTP discrepancy analyzer application
ii erlang-diameter 1:14.b.4-dfsg-1ubuntu1 Erlang/OTP implementation of RFC 3588 protocol
ii erlang-doc 1:14.b.4-dfsg-1ubuntu1 Erlang/OTP HTML/PDF documentation
un erlang-doc-html <none> (no description available)
ii erlang-docbuilder 1:14.b.4-dfsg-1ubuntu1 Erlang/OTP application for building HTML documentation
ii erlang-edoc 1:14.b.4-dfsg-1ubuntu1 Erlang/OTP module for generating documentation
ii erlang-erl-docgen 1:14.b.4-dfsg-1ubuntu1 Erlang/OTP documentation stylesheets
ii erlang-et 1:14.b.4-dfsg-1ubuntu1 Erlang/OTP event tracer application
ii erlang-eunit 1:14.b.4-dfsg-1ubuntu1 Erlang/OTP module for unit testing
ii erlang-examples 1:14.b.4-dfsg-1ubuntu1 Erlang/OTP application examples
ii erlang-gs 1:14.b.4-dfsg-1ubuntu1 Erlang/OTP graphics system
ii erlang-ic 1:14.b.4-dfsg-1ubuntu1 Erlang/OTP IDL compiler
ii erlang-ic-java 1:14.b.4-dfsg-1ubuntu1 Erlang/OTP IDL compiler (Java classes)
ii erlang-inets 1:14.b.4-dfsg-1ubuntu1 Erlang/OTP Internet clients and servers
ii erlang-inviso 1:14.b.4-dfsg-1ubuntu1 Erlang/OTP trace tool
ii erlang-jinterface 1:14.b.4-dfsg-1ubuntu1 Java communication tool to Erlang
ii erlang-manpages 1:14.b.4-dfsg-1ubuntu1 Erlang/OTP manual pages
ii erlang-megaco 1:14.b.4-dfsg-1ubuntu1 Erlang/OTP implementation of Megaco/H.248 protocol
ii erlang-mnesia 1:14.b.4-dfsg-1ubuntu1 Erlang/OTP distributed relational/object hybrid database
ii erlang-mode 1:14.b.4-dfsg-1ubuntu1 Erlang major editing mode for Emacs
ii erlang-nox 1:14.b.4-dfsg-1ubuntu1 Erlang/OTP applications that don't require X Window System
ii erlang-observer 1:14.b.4-dfsg-1ubuntu1 Erlang/OTP application for investigating distributed systems
ii erlang-odbc 1:14.b.4-dfsg-1ubuntu1 Erlang/OTP interface to SQL databases
ii erlang-os-mon 1:14.b.4-dfsg-1ubuntu1 Erlang/OTP operating system monitor
ii erlang-parsetools 1:14.b.4-dfsg-1ubuntu1 Erlang/OTP parsing tools
ii erlang-percept 1:14.b.4-dfsg-1ubuntu1 Erlang/OTP concurrency profiling tool
ii erlang-pman 1:14.b.4-dfsg-1ubuntu1 Erlang/OTP process manager
ii erlang-public-key 1:14.b.4-dfsg-1ubuntu1 Erlang/OTP public key infrastructure
ii erlang-reltool 1:14.b.4-dfsg-1ubuntu1 Erlang/OTP release management tool
ii erlang-runtime-tools 1:14.b.4-dfsg-1ubuntu1 Erlang/OTP runtime tracing/debugging tools
ii erlang-snmp 1:14.b.4-dfsg-1ubuntu1 Erlang/OTP SNMP applications
ii erlang-src 1:14.b.4-dfsg-1ubuntu1 Erlang/OTP applications sources
ii erlang-ssh 1:14.b.4-dfsg-1ubuntu1 Erlang/OTP implementation of SSH protocol
ii erlang-ssl 1:14.b.4-dfsg-1ubuntu1 Erlang/OTP implementation of SSL
ii erlang-syntax-tools 1:14.b.4-dfsg-1ubuntu1 Erlang/OTP modules for handling abstract Erlang syntax trees
ii erlang-test-server 1:14.b.4-dfsg-1ubuntu1 Erlang/OTP server for automated application testing
ii erlang-toolbar 1:14.b.4-dfsg-1ubuntu1 Erlang/OTP graphical toolbar
ii erlang-tools 1:14.b.4-dfsg-1ubuntu1 Erlang/OTP various tools
ii erlang-tv 1:14.b.4-dfsg-1ubuntu1 Erlang/OTP table viewer
ii erlang-typer 1:14.b.4-dfsg-1ubuntu1 Erlang/OTP code type annotator
ii erlang-webtool 1:14.b.4-dfsg-1ubuntu1 Erlang/OTP helper for web-based tools
ii erlang-x11 1:14.b.4-dfsg-1ubuntu1 Erlang/OTP applications that require X Window System
ii erlang-xmerl 1:14.b.4-dfsg-1ubuntu1 Erlang/OTP XML tools
erlang-dev包含頭文件,erlang-src包含源代碼,erlang-debugger包含調(diào)試工具,erlang-base包含虛擬機(jī) 還可以根據(jù)package 名字的suffix察看erlang man doc,比如 man 3erl erlang
man 3erl mnesia
man 3erl io
命令行調(diào)試erlang程序報(bào)錯(cuò): 2> c(hello, [debug_info]).
{ok,hello}
3> im().
Call to i:im/0 in application debugger failed.
ok
google之原來是erlang-debugger沒裝 sudo apt-get install erlang-debugger 然后Monitor窗口就出來了。不過用eclipse 的erlide插件調(diào)試也可以。
|