一、系統環境
yum update升級以后的系統版本為
[root@yl-web yl]# cat /etc/redhat-release CentOS Linux release 7.1.1503 (Core)
二、mysql安裝
# wget http://dev.mysql.com/get/mysql-community-release-el7-5.noarch.rpm # rpm -ivh mysql-community-release-el7-5.noarch.rpm # yum install mysql-community-server
安裝成功后重啟mysql服務。
初次安裝mysql,root賬戶沒有密碼。
[root@yl-web yl]# mysql -u root Welcome to the MySQL monitor. Commands end with ; or \g. Your MySQL connection id is 3 Server version: 5.6.26 MySQL Community Server (GPL) Copyright (c) 2000, 2015, Oracle and/or its affiliates. All rights reserved. Oracle is a registered trademark of Oracle Corporation and/or its affiliates. Other names may be trademarks of their respective owners. Type 'help;' or '\h' for help. Type '\c' to clear the current input statement. mysql> show databases; +--------------------+ | Database | +--------------------+ | information_schema | | mysql | | performance_schema | | test | +--------------------+ 4 rows in set (0.01 sec) mysql>
設置密碼
mysql> set password for 'root'@'localhost' =password('password'); Query OK, 0 rows affected (0.00 sec) mysql> 不需要重啟數據庫即可生效。
三、配置mysql
1、編碼
mysql配置文件為/etc/my.cnf
最后加上編碼配置
[mysql] default-character-set =utf8
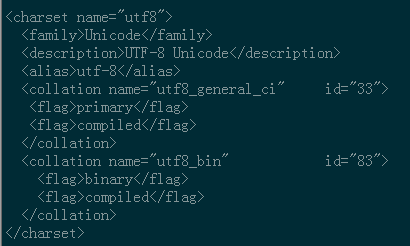
這里的字符編碼必須和/usr/share/mysql/charsets/Index.xml中一致。
2、遠程連接設置
把在所有數據庫的所有表的所有權限賦值給位于所有IP地址的root用戶。
mysql> grant all privileges on *.* to root@'%'identified by 'password';
如果是新用戶而不是root,則要先新建用戶
mysql>create user 'username'@'%' identified by 'password';
此時就可以進行遠程連接了。