Setting up
- Set up the installed JRE in eclipse (Windows -> Preferences -> Java -> Installed JREs)

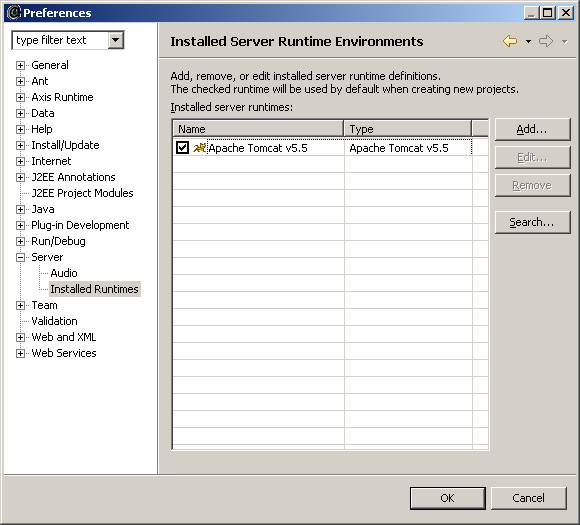
- Set up the installed runtime for server in eclipse (Windows -> Preferences -> Server -> Installed Runtimes)
- Set up the Server view in eclipse (Windows -> Show View -> Other)

- Set up the Tomcat Server by right clicking and selecting New -> Server option from the Server view in eclipse


?span style="font:7.0pt "Times New Roman""> Creating a Web service
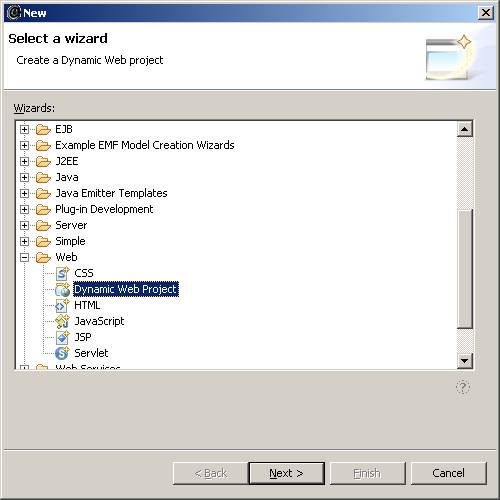
- Create a new Dynamic Web Project in eclipse (File -> New -> Other)
- Enter name as 揥ebServiceTutorial? select project location as 揈:"Test? and select Apache Tomcat v5.5 as the Target server.

- Now create a new Java class from the Project Explorer (Dynamic Web Projects -> Java Source -> New -> Class)

- Enter name as 揌ello?and package as 揷om.tutorial?

- Add a simple method in the 揌ello?class as below.
public String sayHello(String name){
return "Hello " + name;
}

- Save and build the project.
- Create a new Web service in eclipse (File -> New -> Other)

- Select Generate a proxy.
- Select Test the Web service.
- Select Overwrite files without warning.

- Select or enter the Bean name as 揷om.tutorial.Hello? This is the java class that we just now created.

- Continue the wizard by clicking Next and finish.
- On Finish, the Tomcat server starts up and launches the Test client.
- Verify the generated contents. Look for Hello.class and the generated JSPs as below.
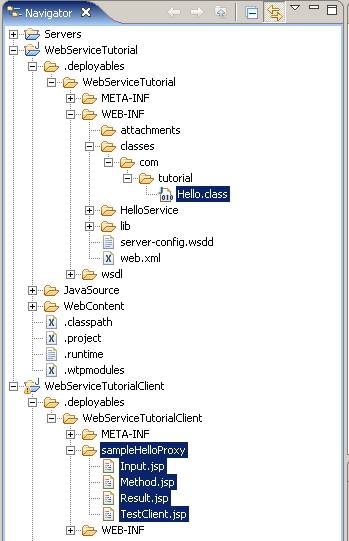
- Verify the Tomcat folder and ensure the newly created web applications ? WebServiceTutorial, WebServiceTutorialClient.

- We can also run the following url from the browser to access/test the Web service.
http://localhost:8080/WebServiceTutorialClient/sampleHelloProxy/TestClient.jsp
- If servlet error 搊rg.eclipse.jst.ws.util.JspUtils cannot be resolved or is not a type?is thrown on the browser, then copy the webserviceutils.jar file from the E:"Eclipse3.1"eclipse"plugins"org.eclipse.jst.ws.consumption_0.7.0 into the WEB-INF"lib folder of the WebServiceTutorialClient application and restart the Tomcat server.
- The browser displays the methods available in the web service.

- Click on the sayHello(..) method, enter your name (for e.g. 揓eeva? in the inputs section and click 揑nvoke?

- The browser greets using the web service.

- The WSDL for the Hello Web service can be found in E:"Test"WebServiceTutorial"WebContent"wsdl"Hello.wsdl. On double-click, the WSDL opens in a graphical editor.

- Right-click on the WSDL file and explore the options to test the web service / publish the WSDL file / generate client / etc.
