
2015年4月14日
1.必須安裝nodejs
2.安裝cnpm用cnpm替代npm
地址:http://npm.taobao.org/
安裝cnpm:
npm install -g cnpm --registry=https://registry.npm.taobao.org
3、用yarn替代npm
yarn的安裝:
第一種方法:參考官方文檔https://yarn.bootcss.com/
第二種方法:cnpm install -g yarn 或者 npm install -g yarn
4、搭建React開(kāi)發(fā)環(huán)境的第一種方法(老-現(xiàn)在推薦):
https://reactjs.org/docs/create-a-new-react-app.html
1、必須要安裝nodejs 注意:安裝nodejs穩(wěn)定版本 教程中的nodejs版本:v8.11.2 教程中的npm版本:v5.6.0
2.安裝腳手架工具 (單文件組件項(xiàng)目生成工具) 只需要安裝一次
npm install -g create-react-app / cnpm install -g create-react-app
3.創(chuàng)建項(xiàng)目 (可能創(chuàng)建多次)
找到項(xiàng)目要?jiǎng)?chuàng)建的目錄:
create-react-app reactdemo
4.cd 到項(xiàng)目里面
cd reactdemo
npm start yarn start運(yùn)行項(xiàng)目
npm run build yarn build 生成項(xiàng)目
5、搭建React的開(kāi)發(fā)環(huán)境的第二種方法(新-未來(lái)推薦):
https://reactjs.org/docs/create-a-new-react-app.html
1、必須要安裝nodejs 注意:安裝nodejs穩(wěn)定版本 教程中的nodejs版本:v8.11.2 教程中的npm版本:v5.6.0
2.安裝腳手架工具并創(chuàng)建項(xiàng)目
找到項(xiàng)目要?jiǎng)?chuàng)建的目錄執(zhí)行:
npx create-react-app reactdemo
4.cd 到項(xiàng)目里面
cd reactdemo
npm start 運(yùn)行項(xiàng)目(調(diào)試)
npm run build 生成項(xiàng)目(發(fā)布)
npx介紹:
npm v5.2.0引入的一條命令(npx),引入這個(gè)命令的目的是為了提升開(kāi)發(fā)者使用包內(nèi)提供的命令行工具的體驗(yàn)。
詳情:
npx create-react-app reactdemo這條命令會(huì)臨時(shí)安裝 create-react-app 包,命令完成后create-react-app 會(huì)刪掉,不會(huì)出現(xiàn)在 global 中。下次再執(zhí)行,還是會(huì)重新臨時(shí)安裝。
npx 會(huì)幫你執(zhí)行依賴包里的二進(jìn)制文件。
再比如 npx http-server 可以一句話幫你開(kāi)啟一個(gè)靜態(tài)服務(wù)器
posted @
2020-04-16 15:25 Terry Zou 閱讀(319) |
評(píng)論 (0) |
編輯 收藏
PostConstruct注釋用于在完成依賴項(xiàng)注入以執(zhí)行任何初始化之后需要執(zhí)行的方法。必須在類(lèi)投入使用之前調(diào)用此方法。
所有支持依賴注入的類(lèi)都必須支持此注釋。即使類(lèi)沒(méi)有請(qǐng)求注入任何資源,也必須調(diào)用使用PostConstruct注釋的方法。
只有一個(gè)方法可以使用此批注進(jìn)行批注。
應(yīng)用PostConstruct注釋的方法必須滿足以下所有條件:除了攔截器之外,方法絕不能有任何參數(shù),在這種情況下它采用Interceptor規(guī)范定義的InvocationContext對(duì)象。
在攔截器類(lèi)上定義的方法必須具有以下簽名之一:
void <METHOD>(InvocationContext)Object <METHOD>(InvocationContext)拋出異常注意:
PostConstruct攔截器方法不能拋出應(yīng)用程序異常,但可以聲明它拋出檢查異常,包括java.lang.Exception,
如果相同的攔截器方法除了生命周期事件之外插入業(yè)務(wù)或超時(shí)方法。
如果PostConstruct攔截器方法返回一個(gè)值,容器將忽略它。
在非攔截器類(lèi)上定義的方法必須具有以下簽名:void <METHOD>()應(yīng)用PostConstruct的方法可以是public,protected,package private或private。
除應(yīng)用程序客戶端外,該方法絕不能是靜態(tài)的。
該方法可能是最終的。如果該方法拋出一個(gè)未經(jīng)檢查的異常,那么該類(lèi)絕不能投入使用,除非EJB可以處理異常甚至從它們恢復(fù)的EJB
然后就會(huì)思考問(wèn)題,這個(gè)注釋是修飾初始化之后需要執(zhí)行的方法,那么它和@Autowired、構(gòu)造函數(shù)的執(zhí)行順序是什么呢?(當(dāng)然注釋中已經(jīng)說(shuō)明了PostConstruct注釋用于在完成依賴項(xiàng)注入之后)
@Service
public class BeanA {
@Autowired
private BeanB beanB;
public BeanA() {
System.out.println("這是Bean A 的構(gòu)造方法");
}
@PostConstruct
private void init() {
System.out.println("這是BeanA的 init 方法");
beanB.testB();
}
}
@Service
public class BeanB {
@PostConstruct
private void init() {
System.out.println("這是BeanB 的init 方法");
}
public BeanB() {
System.out.println("這是Bean B的 構(gòu)造方法");
}
void testB() {
System.out.println("這是Bean B 的 testB 方法");
}
}
啟動(dòng)后輸出:
這是Bean A 的構(gòu)造方法
這是Bean B的 構(gòu)造方法
這是BeanB 的init 方法
這是BeanA的 init 方法
這是Bean B 的 testB 方法

所以得到結(jié)論: 構(gòu)造方法 > @Autowired > @PostConstruct
posted @
2020-04-09 15:29 Terry Zou 閱讀(319) |
評(píng)論 (0) |
編輯 收藏1、ApplicationContext
Spring的核心,Context我們通常解釋為上下文環(huán)境。ApplicationContext則是應(yīng)用的容器。 Spring把Bean(object)放在容器中,需要用就通過(guò)get方法取出來(lái)。在ApplicationContext接口的眾多實(shí)現(xiàn)類(lèi)中,有3個(gè)是我們經(jīng)常用到的(見(jiàn)表1-1),并且使用這3個(gè)實(shí)現(xiàn)類(lèi)也基本能滿足我們Java EE應(yīng)用開(kāi)發(fā)中的絕大部分需求。
表1-1 ApplicationContext接口的常用實(shí)現(xiàn)類(lèi)介紹
2、ApplicationEvent
是個(gè)抽象類(lèi),里面只有一個(gè)構(gòu)造函數(shù)和一個(gè)長(zhǎng)整型的timestamp。其源碼如下
public abstract class ApplicationEvent extends EventObject {
/** use serialVersionUID from Spring 1.2 for interoperability */
private static final long serialVersionUID = 7099057708183571937L;
/** System time when the event happened */
private final long timestamp;
/**
* Create a new ApplicationEvent.
* @param source the object on which the event initially occurred (never {@code null})
*/
public ApplicationEvent(Object source) {
super(source);
this.timestamp = System.currentTimeMillis();
}
/**
* Return the system time in milliseconds when the event happened.
*/
public final long getTimestamp() {
return this.timestamp;
}
}
3、ApplicationListener是一個(gè)接口,里面只有一個(gè)onApplicationEvent方法。如果在上下文中部署一個(gè)實(shí)現(xiàn)了ApplicationListener接口的bean,那么每當(dāng)在一個(gè)ApplicationEvent發(fā)布到 ApplicationContext時(shí),調(diào)用ApplicationContext.publishEvent()方法,這個(gè)bean得到通知。類(lèi)似于Oberver設(shè)計(jì)模式。
其源碼如下:
public interface ApplicationListener<E extends ApplicationEvent> extends EventListener {
/**
* Handle an application event.
* @param event the event to respond to
*/
void onApplicationEvent(E event);
}
下面舉個(gè)例子
自定義事件NotifyEvent:
import org.springframework.context.ApplicationEvent;
public class NotifyEvent extends ApplicationEvent {
private String email;
private String content;
public NotifyEvent(Object source){
super(source);
}
public NotifyEvent(Object source,String email,String content){
super(source);
this.email = email;
this.content = content;
}
public String getEmail() {
return email;
}
public void setEmail(String email) {
this.email = email;
}
public String getContent() {
return content;
}
public void setContent(String content) {
this.content = content;
}
}
定義監(jiān)聽(tīng)器NotifyListener:
import org.springframework.context.ApplicationListener;
import org.springframework.context.annotation.Configuration;
@Configuration
public class NotifyListener implements ApplicationListener<NotifyEvent>{
@Override
public void onApplicationEvent(NotifyEvent event) {
System.out.println("郵件地址:" + event.getEmail());
System.out.println("郵件內(nèi)容:" + event.getContent());
}
}
單元測(cè)試類(lèi)ListenerTest: import org.junit.Test;
import org.junit.runner.RunWith;
import org.springframework.beans.factory.annotation.Autowired;
import org.springframework.boot.test.context.SpringBootTest;
import org.springframework.test.context.junit4.SpringRunner;
import org.springframework.web.context.WebApplicationContext;
@RunWith(SpringRunner.class)
@SpringBootTest(classes = ServerLauncher.class, webEnvironment = SpringBootTest.WebEnvironment.RANDOM_PORT)
public class ListenerTest {
@Autowired
private WebApplicationContext webApplicationContext;
@Test
public void testListener(){
NotifyEvent event = new NotifyEvent("object","abc@qq.com","This is the content");
webApplicationContext.publishEvent(event);
}
}
posted @
2020-04-09 14:47 Terry Zou 閱讀(1295) |
評(píng)論 (0) |
編輯 收藏之前用戶使用的是3個(gè)注解注解他們的main類(lèi)。分別是@Configuration,@EnableAutoConfiguration,@ComponentScan。由于這些注解一般都是一起使用,spring boot提供了一個(gè)統(tǒng)一的注解@SpringBootApplication。
@SpringBootApplication = (默認(rèn)屬性)@Configuration + @EnableAutoConfiguration + @ComponentScan。
@SpringBootApplication
public class ApplicationMain {
public static void main(String[] args) {
SpringApplication.run(Application.class, args);
}
}
分開(kāi)解釋@Configuration,@EnableAutoConfiguration,@ComponentScan。
1、@Configuration:提到@Configuration就要提到他的搭檔@Bean。使用這兩個(gè)注解就可以創(chuàng)建一個(gè)簡(jiǎn)單的spring配置類(lèi),可以用來(lái)替代相應(yīng)的xml配置文件。
<beans>
<bean id = "car" class="com.test.Car">
<property name="wheel" ref = "wheel"></property>
</bean>
<bean id = "wheel" class="com.test.Wheel"></bean>
</beans>
相當(dāng)于:
@Configuration
public class Conf {
@Bean
public Car car() {
Car car = new Car();
car.setWheel(wheel());
return car;
}
@Bean
public Wheel wheel() {
return new Wheel();
}
}
@Configuration的注解類(lèi)標(biāo)識(shí)這個(gè)類(lèi)可以使用Spring IoC容器作為bean定義的來(lái)源。@Bean注解告訴Spring,一個(gè)帶有@Bean的注解方法將返回一個(gè)對(duì)象,該對(duì)象應(yīng)該被注冊(cè)為在Spring應(yīng)用程序上下文中的bean。
2、@EnableAutoConfiguration:能夠自動(dòng)配置spring的上下文,試圖猜測(cè)和配置你想要的bean類(lèi),通常會(huì)自動(dòng)根據(jù)你的類(lèi)路徑和你的bean定義自動(dòng)配置。
3、@ComponentScan:會(huì)自動(dòng)掃描指定包下的全部標(biāo)有@Component的類(lèi),并注冊(cè)成bean,當(dāng)然包括@Component下的子注解@Service,@Repository,@Controller。
posted @
2020-04-09 09:10 Terry Zou 閱讀(136) |
評(píng)論 (0) |
編輯 收藏package com.zhihe.xqsh.utils;
import java.io.File;
import java.io.FileOutputStream;
import java.io.IOException;
import java.io.InputStream;
import java.io.UnsupportedEncodingException;
import java.util.Date;
import java.util.List;
import org.apache.http.HttpEntity;
import org.apache.http.HttpResponse;
import org.apache.http.HttpStatus;
import org.apache.http.HttpVersion;
import org.apache.http.NameValuePair;
import org.apache.http.client.ClientProtocolException;
import org.apache.http.client.HttpClient;
import org.apache.http.client.entity.UrlEncodedFormEntity;
import org.apache.http.client.methods.HttpGet;
import org.apache.http.client.methods.HttpPost;
import org.apache.http.conn.ClientConnectionManager;
import org.apache.http.conn.params.ConnManagerParams;
import org.apache.http.conn.params.ConnRouteParams;
import org.apache.http.conn.scheme.PlainSocketFactory;
import org.apache.http.conn.scheme.Scheme;
import org.apache.http.conn.scheme.SchemeRegistry;
import org.apache.http.conn.ssl.SSLSocketFactory;
import org.apache.http.impl.client.DefaultHttpClient;
import org.apache.http.impl.conn.tsccm.ThreadSafeClientConnManager;
import org.apache.http.impl.cookie.BasicClientCookie;
import org.apache.http.params.BasicHttpParams;
import org.apache.http.params.HttpConnectionParams;
import org.apache.http.params.HttpParams;
import org.apache.http.params.HttpProtocolParams;
import org.apache.http.util.EntityUtils;
import com.zhihe.xqsh.network.ServerErrorException;
import android.accounts.NetworkErrorException;
import android.annotation.SuppressLint;
import android.util.Log;
public class CustomerHttpClient {
private static final String TAG = CustomerHttpClient.class.getSimpleName();
private static DefaultHttpClient customerHttpClient;
private CustomerHttpClient() {
}
public static synchronized HttpClient getHttpClient() {
if (null == customerHttpClient) {
HttpParams params = new BasicHttpParams();
// 設(shè)置????基本參數(shù)
HttpProtocolParams.setVersion(params, HttpVersion.HTTP_1_1);
HttpProtocolParams.setContentCharset(params, "UTF-8");
HttpProtocolParams.setUseExpectContinue(params, true);
HttpProtocolParams.setUserAgent(params, "Mozilla/5.0(Linux;U;Android 2.2.1;en-us;Nexus One Build.FRG83) "
+ "AppleWebKit/553.1(KHTML,like Gecko) Version/4.0 Mobile Safari/533.1");
// 超時(shí)設(shè)置
/* 從連接池中取連接的超時(shí)時(shí)??*/
ConnManagerParams.setTimeout(params, 2000);
ConnManagerParams.setMaxTotalConnections(params, 800);
/* 連接超時(shí) */
HttpConnectionParams.setConnectionTimeout(params, 5000);
/* 請(qǐng)求超時(shí) */
HttpConnectionParams.setSoTimeout(params, 10000);
// 設(shè)置我們的HttpClient支持HTTP和HTTPS兩種模式
SchemeRegistry schReg = new SchemeRegistry();
schReg.register(new Scheme("http", PlainSocketFactory.getSocketFactory(), 80));
schReg.register(new Scheme("https", SSLSocketFactory.getSocketFactory(), 443));
// 使用線程安全的連接管理來(lái)創(chuàng)建HttpClient
ClientConnectionManager conMgr = new ThreadSafeClientConnManager(params, schReg);
// ????連接數(shù):ConnManagerParams.setMaxTotalConnections(params, 50);
customerHttpClient = new DefaultHttpClient(conMgr, params);
}
return customerHttpClient;
}
/**
* 以get方式提交數(shù)據(jù)
*
* @param url 提交地址
* @param params 參數(shù)
* @return 響應(yīng)結(jié)果
* @throws ServerErrorException 請(qǐng)求失敗
* @throws NetworkErrorException 連接失敗
*/
public static String get(String url, String params) throws ServerErrorException, NetworkErrorException {
int tryTimes = 0;
NullPointerException ex;
do {
try {
return tryGet(url, params);
} catch (NullPointerException e) {
ex = e;
tryTimes++;
}
} while (tryTimes < 3);
throw ex;
}
/**
* 以get方式提交數(shù)據(jù)
*
* @param url 提交地址
* @param params 參數(shù)
* @return 響應(yīng)結(jié)果
* @throws ServerErrorException 請(qǐng)求失敗
* @throws NetworkErrorException 連接失敗
*/
public static String tryGet(String url, String params) throws ServerErrorException, NetworkErrorException {
try {
HttpGet request = new HttpGet(url + params);
/*if (LotteryApplication.isCmwap()) {
org.apache.http.HttpHost proxy = new org.apache.http.HttpHost("10.0.0.172", 80, "http");
HttpParams httpParams = new BasicHttpParams();
ConnRouteParams.setDefaultProxy(httpParams, proxy);
request.setParams(httpParams);
}*/
HttpClient client = getHttpClient();
HttpResponse response = client.execute(request);
if (response.getStatusLine().getStatusCode() != HttpStatus.SC_OK) {
throw new ServerErrorException("????????æ???????????");
}
HttpEntity resEntity = response.getEntity();
String result = (resEntity == null) ? null : EntityUtils.toString(resEntity, "UTF-8");
return result;
} catch (UnsupportedEncodingException e) {
logw(e.getMessage());
return null;
} catch (ClientProtocolException e) {
logw(e.getMessage());
return null;
} catch (IOException e) {
throw new NetworkErrorException("??????????????????????", e);
}
}
private static void logw(String string) {
if (string != null) {
Log.w(TAG, string);
}
}
/**
* 以post方式提交數(shù)據(jù)
*
* @param url 提交地址
* @param params 參數(shù)
* @return 響應(yīng)結(jié)果
* @throws ServerErrorException 請(qǐng)求失敗
* @throws NetworkErrorException 連接失敗
*/
public static String post(String url, List<NameValuePair> params) throws ServerErrorException, NetworkErrorException {
return post(url, params, null);
}
/**
* 以post方式提交數(shù)據(jù)
*
* @param url 提交地址
* @param params 參數(shù)
* @param soTimeout 響應(yīng)超時(shí)時(shí)間,單位毫??
* @return 響應(yīng)結(jié)果
* @throws ServerErrorException 請(qǐng)求失敗
* @throws NetworkErrorException 連接失敗
*/
public static String post(String url, List<NameValuePair> params, int soTimeout) throws ServerErrorException,
NetworkErrorException {
HttpParams httpParams;
if (soTimeout <= 0) {
httpParams = null;
} else {
httpParams = new BasicHttpParams();
HttpConnectionParams.setSoTimeout(httpParams, soTimeout);
}
return post(url, params, httpParams);
}
/**
* 以post方式提交數(shù)據(jù)
*
* @param url 提交地址
* @param params 參數(shù)
* @param httpParams http參數(shù)
* @return 響應(yīng)結(jié)果
* @throws ServerErrorException 請(qǐng)求失敗
* @throws NetworkErrorException 連接失敗
*/
public static String post(String url, List<NameValuePair> params, HttpParams httpParams) throws ServerErrorException,
NetworkErrorException {
int tryTimes = 0;
NullPointerException ex;
do {
try {
return tryPost(url, params, httpParams);
} catch (NullPointerException e) {
ex = e;
tryTimes++;
}
} while (tryTimes < 3);
throw ex;
}
/**
* 以post方式提交數(shù)據(jù)
*
* @param url 提交地址
* @param params 參數(shù)
* @param httpParams http參數(shù)
* @return 響應(yīng)結(jié)果
* @throws ServerErrorException 請(qǐng)求失敗
* @throws NetworkErrorException 連接失敗
*/
public static String tryPost(String url, List<NameValuePair> params, HttpParams httpParams) throws ServerErrorException,
NetworkErrorException {
try {
HttpPost request = new HttpPost(url);
if (params != null && params.size() > 0) {
request.setEntity(new UrlEncodedFormEntity(params, "UTF-8"));
}
// if (LotteryApplication.isCmwap()) {
// org.apache.http.HttpHost proxy = new org.apache.http.HttpHost("10.0.0.172", 80, "http");
// if (httpParams == null)
// httpParams = new BasicHttpParams();
// ConnRouteParams.setDefaultProxy(httpParams, proxy);
// }
if (httpParams != null)
request.setParams(httpParams);
//Log.v("CS", params.toString());
HttpClient client = getHttpClient();
HttpResponse response = client.execute(request);
if (response.getStatusLine().getStatusCode() != HttpStatus.SC_OK) {
//Log.v("CS", params.toString());
//Log.v("CS", response.getStatusLine().getStatusCode() + "");
request.abort();
throw new ServerErrorException("????????æ???????????");
}
if (response.getStatusLine ().getStatusCode () != 200) {
request.abort(); //?ж?????,?????????????????????
return null;
}
HttpEntity resEntity = response.getEntity();
String result = (resEntity == null) ? null : EntityUtils.toString(resEntity, "UTF-8");
//Log.v("CS", params.toString() + "||||" + result);
return result;
} catch (UnsupportedEncodingException e) {
logw(e.getMessage());
return null;
} catch (ClientProtocolException e) {
logw(e.getMessage());
return null;
} catch (IOException e) {
throw new NetworkErrorException(e.getMessage(), e);
//throw new NetworkErrorException("連接不成功,請(qǐng)檢查網(wǎng)絡(luò)設(shè)??, e);
}
}
@SuppressLint("SdCardPath")
public static String download(String url) throws ServerErrorException, NetworkErrorException {
try {
//Log.i("http-download", url);
HttpPost request = new HttpPost(url);
HttpClient client = getHttpClient();
HttpResponse response = client.execute(request);
if (response.getStatusLine().getStatusCode() != HttpStatus.SC_OK) {
throw new ServerErrorException("????????æ???????????");
}
HttpEntity entity = response.getEntity();
InputStream is = entity.getContent();
if (is == null)
throw new ServerErrorException("stream is null ");
String fileExt = url.substring(url.lastIndexOf(".") + 1, url.length()).toLowerCase();
String fileName = url.substring(url.lastIndexOf("/") + 1, url.lastIndexOf("."));
File tempFile = new File("/sdcard/" + fileName + "." + fileExt);
if (!tempFile.exists())
tempFile.createNewFile();
FileOutputStream fileOutputStream = new FileOutputStream(tempFile);
byte[] buf = new byte[1024];
int ch;
while ((ch = is.read(buf)) != -1) {
fileOutputStream.write(buf, 0, ch);
}
fileOutputStream.flush();
fileOutputStream.close();
return tempFile.getAbsolutePath();
} catch (UnsupportedEncodingException e) {
logw(e.getMessage());
return null;
} catch (ClientProtocolException e) {
logw(e.getMessage());
return null;
} catch (IOException e) {
throw new NetworkErrorException(e.getMessage(), e);
}
}
/**
* 清空cookie
*/
public static void clearCookie() {
if (customerHttpClient != null)
customerHttpClient.getCookieStore().clear();
}
/**
* 清除指定cookie
*
* @param name cookie名稱
*/
public static void clearCookie(String name) {
if (customerHttpClient == null)
return;
BasicClientCookie expiredCookie = new BasicClientCookie(name, "null");
expiredCookie.setExpiryDate(new Date(System.currentTimeMillis() - 1000));
customerHttpClient.getCookieStore().addCookie(expiredCookie);
}
}
posted @
2015-07-13 22:10 Terry Zou 閱讀(289) |
評(píng)論 (0) |
編輯 收藏
http://yunpan.cn/ccdbTgQaYa4U7
posted @
2015-07-13 11:04 Terry Zou 閱讀(144) |
評(píng)論 (0) |
編輯 收藏private Drawable img_time_filter,img_time_filter_selected ;
//過(guò)濾器TextView中顯示的圖片
img_time_filter = getResources().getDrawable(R.drawable.time_filter);
//調(diào)用setCompoundDrawables時(shí),必須調(diào)用Drawable.setBounds()方法,否則圖片不顯示
img_time_filter.setBounds(0, 0, img_time_filter.getMinimumWidth(), img_time_filter.getMinimumHeight());
img_time_filter_selected = getResources().getDrawable(R.drawable.time_filter_selected);
img_time_filter_selected.setBounds(0, 0, img_time_filter_selected.getMinimumWidth(), img_time_filter_selected.getMinimumHeight());
tv_filterTime.setCompoundDrawables(img_time_filter_selected, null, null, null);
tv_filterTime.setTextColor(getResources().getColor(R.color.white));
rl_filterTime.setBackgroundColor(getResources().getColor(R.color.red));
tv_filterTime.setCompoundDrawables(img_time_filter, null, null, null);
rl_filterTime.setBackgroundColor(getResources().getColor(R.color.white));
lv_filterTime.setVisibility(View.INVISIBLE);
posted @
2015-07-09 00:04 Terry Zou 閱讀(221) |
評(píng)論 (0) |
編輯 收藏<?xml version="1.0" encoding="utf-8"?>
<FrameLayout xmlns:android="http://schemas.android.com/apk/res/android"
android:layout_width="match_parent"
android:layout_height="match_parent"
android:background="@color/white"
android:orientation="vertical" >
<com.baidu.mapapi.map.MapView
android:id="@+id/bmapView_routePlanActivity"
android:layout_width="match_parent"
android:layout_height="match_parent"
android:clickable="true" />
<LinearLayout
android:layout_width="match_parent"
android:layout_height="60dp"
android:background="@drawable/common_title_back"
android:gravity="center"
android:padding="5dp" >
<Button
android:id="@+id/button_transit_routePlan"
android:layout_width="0dp"
android:drawableLeft="@drawable/ic_bus"
android:padding="5dp"
android:background="@drawable/selector_white_gray"
android:layout_height="50dp"
android:layout_weight="1.0"
android:onClick="SearchButtonProcess"
android:text="公交" />
<Button
android:id="@+id/button_drive_routePlan"
android:layout_width="0dp"
android:drawableLeft="@drawable/ic_drive"
android:layout_height="50dp"
android:layout_weight="1.0"
android:padding="5dp"
android:background="@drawable/selector_white_gray"
android:onClick="SearchButtonProcess"
android:text="駕車(chē)" />
<Button
android:id="@+id/button_walk_routePlan"
android:layout_width="0dp"
android:layout_height="50dp"
android:drawableLeft="@drawable/ic_walk"
android:layout_weight="1.0"
android:padding="5dp"
android:background="@drawable/selector_white_gray"
android:onClick="SearchButtonProcess"
android:text="步行" />
</LinearLayout>
<LinearLayout
android:id="@+id/linearLayout_node_routePlan"
android:layout_width="match_parent"
android:layout_height="match_parent"
android:layout_marginBottom="10dip"
android:visibility="gone"
android:gravity="bottom|center_horizontal" >
<Button
android:id="@+id/button_pre_routePlan"
android:layout_width="60dp"
android:layout_height="30dp"
android:layout_marginRight="2dip"
android:background="@drawable/pre_"
android:onClick="nodeClick" />
<Button
android:id="@+id/button_next_routePlan"
android:layout_width="60dp"
android:layout_height="30dp"
android:layout_marginLeft="2dip"
android:background="@drawable/next_"
android:onClick="nodeClick" />
</LinearLayout>
</FrameLayout>
posted @
2015-07-08 23:57 Terry Zou|
編輯 收藏<LinearLayout
android:id="@+id/estate_linear"
android:layout_width="fill_parent"
android:layout_height="35dp"
android:layout_weight="1"
android:background="@drawable/border_rounded_gray_white"
android:layout_gravity="center_vertical"
android:gravity="center_vertical"
android:layout_margin="5dp"
android:orientation="horizontal" >
<ImageButton
android:id="@+id/object_btn_search"
android:layout_width="wrap_content"
android:layout_height="wrap_content"
android:layout_marginLeft="8dp"
android:layout_gravity="center_vertical|right"
android:background="@drawable/btn_search"
android:contentDescription="@null"
android:scaleType="fitXY" />
<RelativeLayout
android:layout_width="1dp"
android:layout_height="33dp"
android:layout_marginLeft="8dp"
android:background="@color/color_line" />
<EditText
android:id="@+id/object_et_content"
style="@style/StringSearchText"
android:layout_gravity="left|center_vertical"
android:layout_marginLeft="2dp"
android:layout_marginRight="8dp"
android:layout_weight="1"
android:background="@null"
android:hint="@string/tip_search_hint"
android:imeOptions="actionSend"
android:singleLine="true"
android:textCursorDrawable="@null"
android:textColorHint="#626463" />
<ImageButton
android:id="@+id/object_btn_del"
android:layout_width="wrap_content"
android:layout_height="wrap_content"
android:layout_gravity="right|center_vertical"
android:layout_marginRight="10dp"
android:background="@drawable/ic_clear" />
</LinearLayout>


border_rounded_gray_white.xml
<?xml version="1.0" encoding="utf-8"?>
<layer-list xmlns:android="http://schemas.android.com/apk/res/android" >
<!-- 連框顏色值 -->
<item>
<shape>
<solid android:color="@color/bg_gray" />
<corners
android:bottomLeftRadius="3dp"
android:bottomRightRadius="3dp"
android:topLeftRadius="3dp"
android:topRightRadius="3dp" />
</shape>
</item>
<!-- 主體背景顏色值 -->
<item
android:bottom="1dp"
android:left="1dp"
android:right="1dp"
android:top="1dp">
<shape>
<solid android:color="@color/white" />
<corners
android:bottomLeftRadius="3dp"
android:bottomRightRadius="3dp"
android:topLeftRadius="3dp"
android:topRightRadius="3dp" />
</shape>
</item>
</layer-list>
<style name="StringSearchText">
<item name="android:textSize">14dp</item>
<item name="android:layout_width">wrap_content</item>
<item name="android:layout_height">wrap_content</item>
<item name="android:textColor">@android:color/black</item>
</style>
btn_search.xml
<?xml version="1.0" encoding="utf-8"?>
<selector xmlns:android="http://schemas.android.com/apk/res/android">
<!-- 沒(méi)有焦點(diǎn)時(shí)的背景圖片 -->
<item android:drawable="@drawable/ic_search_normal" android:state_window_focused="false"/>
<!-- 非觸摸模式下獲得焦點(diǎn)并單擊時(shí)的背景圖片 -->
<item android:drawable="@drawable/ic_search_pressed" android:state_focused="true" android:state_pressed="true"/>
<!-- 觸摸模式下單擊時(shí)的背景圖片 -->
<item android:drawable="@drawable/ic_search_pressed" android:state_focused="false" android:state_pressed="true"/>
<!-- 選中時(shí)的圖片背景 -->
<item android:drawable="@drawable/ic_search_pressed" android:state_selected="true"/>
<!-- 獲得焦點(diǎn)時(shí)的圖片背景 -->
<item android:drawable="@drawable/ic_search_pressed" android:state_focused="true"/>
<!-- 默認(rèn)圖片背景 -->
<item android:drawable="@drawable/ic_search_normal"/>
</selector>
<color name="color_line">#bebebe</color>
private TextWatcher textWatcher = new TextWatcher() {
@Override
public void beforeTextChanged(CharSequence s, int start, int count,
int after) {
}
@Override
public void onTextChanged(CharSequence s, int start, int before,
int count) {
}
@Override
public void afterTextChanged(Editable s) {
mKeywords = tv_keyword.getText().toString();
AgUtils.log(TAG+"mKeywords:"+mKeywords, 4);
if (TextUtils.isEmpty(mKeywords)) {
object_btn_del.setVisibility(View.GONE);
} else {
object_btn_del.setVisibility(View.VISIBLE);
searchIndexListInfo();
}
}
};
tv_keyword.addTextChangedListener(textWatcher);
posted @
2015-07-08 23:55 Terry Zou|
編輯 收藏轉(zhuǎn)載:http://www.cnblogs.com/allenzheng/archive/2013/04/28/3050065.html
當(dāng)應(yīng)用運(yùn)行起來(lái)后就會(huì)開(kāi)啟一條線程,線程中會(huì)運(yùn)行一個(gè)任務(wù)棧,當(dāng)Activity實(shí)例創(chuàng)建后就會(huì)放入任務(wù)棧中。Activity啟動(dòng)模式的設(shè)置在AndroidManifest.xml文件中,通過(guò)配置Activity的屬性android:launchMode=""設(shè)置。
1. Standared模式(默認(rèn))
我們平時(shí)直接創(chuàng)建的Activity都是這種模式的Activity,這種模式的Activity的特點(diǎn)是:只要你創(chuàng)建了Activity實(shí)例,一旦激活該Activity,則會(huì)向任務(wù)棧中加入新創(chuàng)建的實(shí)例,退出Activity則會(huì)在任務(wù)棧中銷(xiāo)毀該實(shí)例。
2. SingleTop模式
這種模式會(huì)考慮當(dāng)前要激活的Activity實(shí)例在任務(wù)棧中是否正處于棧頂,如果處于棧頂則無(wú)需重新創(chuàng)建新的實(shí)例,會(huì)重用已存在的實(shí)例,否則會(huì)在任務(wù)棧中創(chuàng)建新的實(shí)例。
3. SingleTask模式
如果任務(wù)棧中存在該模式的Activity實(shí)例,則把棧中該實(shí)例以上的Activity實(shí)例全部移除,調(diào)用該實(shí)例的newInstance()方法重用該Activity,使該實(shí)例處?kù)稐m斘恢茫駝t就重新創(chuàng)建一個(gè)新的Activity實(shí)例。
4. SingleInstance模式
當(dāng)該模式Activity實(shí)例在任務(wù)棧中創(chuàng)建后,只要該實(shí)例還在任務(wù)棧中,即只要激活的是該類(lèi)型的Activity,都會(huì)通過(guò)調(diào)用實(shí)例的newInstance()方法重用該Activity,此時(shí)使用的都是同一個(gè)Activity實(shí)例,它都會(huì)處于任務(wù)棧的棧頂。此模式一般用于加載較慢的,比較耗性能且不需要每次都重新創(chuàng)建的Activity。
posted @
2015-06-24 18:10 Terry Zou 閱讀(479) |
評(píng)論 (0) |
編輯 收藏
摘要: android中跨進(jìn)程通訊的4種方式
轉(zhuǎn)自:http://www.cnblogs.com/sevenyuan/archive/2013/03/22/2975122.html由于android系統(tǒng)中應(yīng)用程序之間不能共享內(nèi)存。因此,在不同應(yīng)用程序之間交互數(shù)據(jù)(跨進(jìn)程通訊)就稍微麻煩一些。在android SDK中提供了4種用于跨進(jìn)程通訊的方式。這4種方式正好對(duì)應(yīng)于android系統(tǒng)中4種應(yīng)用...
閱讀全文
posted @
2015-06-24 17:28 Terry Zou 閱讀(505) |
評(píng)論 (0) |
編輯 收藏Android 手機(jī)上的應(yīng)用一般情況下都在一個(gè)進(jìn)程中運(yùn)行。
但是,也可以指定Activity或者Service在Remote 進(jìn)程中執(zhí)行。多數(shù)情況下,只有在用戶認(rèn)為應(yīng)用退出后還需要繼續(xù)后臺(tái)長(zhǎng)期運(yùn)行的應(yīng)用,才需要這樣做。此時(shí),該應(yīng)用有兩個(gè)進(jìn)程。
還有一種hack的方式,在apk中通過(guò)調(diào)用命令行來(lái)啟動(dòng)另外的進(jìn)程。此種方式用戶不可見(jiàn),也不安全。不提倡。
posted @
2015-06-24 17:12 Terry Zou 閱讀(557) |
評(píng)論 (0) |
編輯 收藏官網(wǎng)幫助文檔鏈接:
http://developer.android.com/guide/components/fragments.html
主要看兩張圖,和跑代碼
一,F(xiàn)ragment的生命周

二,與Activity生命周期的對(duì)比

場(chǎng)景演示 : 切換到該Fragment
11-29 14:26:35.095: D/AppListFragment(7649): onAttach
11-29 14:26:35.095: D/AppListFragment(7649): onCreate
11-29 14:26:35.095: D/AppListFragment(7649): onCreateView
11-29 14:26:35.100: D/AppListFragment(7649): onActivityCreated
11-29 14:26:35.120: D/AppListFragment(7649): onStart
11-29 14:26:35.120: D/AppListFragment(7649): onResume
屏幕滅掉:
11-29 14:27:35.185: D/AppListFragment(7649): onPause
11-29 14:27:35.205: D/AppListFragment(7649): onSaveInstanceState
11-29 14:27:35.205: D/AppListFragment(7649): onStop
屏幕解鎖
11-29 14:33:13.240: D/AppListFragment(7649): onStart
11-29 14:33:13.275: D/AppListFragment(7649): onResume
切換到其他Fragment:
11-29 14:33:33.655: D/AppListFragment(7649): onPause
11-29 14:33:33.655: D/AppListFragment(7649): onStop
11-29 14:33:33.660: D/AppListFragment(7649): onDestroyView
切換回本身的Fragment:
11-29 14:33:55.820: D/AppListFragment(7649): onCreateView
11-29 14:33:55.825: D/AppListFragment(7649): onActivityCreated
11-29 14:33:55.825: D/AppListFragment(7649): onStart
11-29 14:33:55.825: D/AppListFragment(7649): onResume
回到桌面
11-29 14:34:26.590: D/AppListFragment(7649): onPause
11-29 14:34:26.880: D/AppListFragment(7649): onSaveInstanceState
11-29 14:34:26.880: D/AppListFragment(7649): onStop
回到應(yīng)用
11-29 14:36:51.940: D/AppListFragment(7649): onStart
11-29 14:36:51.940: D/AppListFragment(7649): onResume
退出應(yīng)用
11-29 14:37:03.020: D/AppListFragment(7649): onPause
11-29 14:37:03.155: D/AppListFragment(7649): onStop
11-29 14:37:03.155: D/AppListFragment(7649): onDestroyView
11-29 14:37:03.165: D/AppListFragment(7649): onDestroy
11-29 14:37:03.165: D/AppListFragment(7649): onDetach
比Activity多了一些生命周期,完整和Activity對(duì)接上,大家好好利用。
轉(zhuǎn)載:http://blog.csdn.net/forever_crying/article/details/8238863/
posted @
2015-06-24 16:05 Terry Zou 閱讀(444) |
評(píng)論 (0) |
編輯 收藏ANR(Application Not Responding)
ANR定義:在Android上,如果你的應(yīng)用程序有一段時(shí)間響應(yīng)不夠靈敏,系統(tǒng)會(huì)向用戶顯示一個(gè)對(duì)話框,這個(gè)對(duì)話框稱作應(yīng)用程序無(wú)響應(yīng)對(duì)話框(ANR:Application Not Responding),用戶可以選擇“等待”讓?xiě)?yīng)用程序繼續(xù)運(yùn)行,也可以選擇“強(qiáng)制關(guān)閉”。所以一個(gè)順暢合理的應(yīng)用程序不會(huì)出現(xiàn)ANR,而讓用戶處理這個(gè)對(duì)話框。因此,在程序里對(duì)響應(yīng)性能的設(shè)計(jì)很重要,這樣系統(tǒng)不會(huì)顯示ANR給用戶。
默認(rèn)情況下,Android的Activity執(zhí)行時(shí)間為5s,BroadcastReceiver的最長(zhǎng)執(zhí)行時(shí)間為10s.
第一,什么會(huì)引發(fā)ANR
在Android里,應(yīng)用程序響應(yīng)由Activity Manager和WindowManager系統(tǒng)服務(wù)監(jiān)視的,當(dāng)它監(jiān)聽(tīng)到一下一種情況時(shí),Android就會(huì)針對(duì)特定的應(yīng)用程序顯示ANR:
1).在5秒內(nèi)沒(méi)有響應(yīng)輸入事件(例如,按鍵按下,屏幕觸摸)
2).BroadcastReceiver在10秒內(nèi)沒(méi)有執(zhí)行完畢
造成以上兩點(diǎn)多原因有很多,比如在主線程中做非常耗時(shí)的操作,比如下載,IO異常等。
潛在的耗時(shí)操作,例如網(wǎng)絡(luò)或數(shù)據(jù)庫(kù)操作或者高耗時(shí)的計(jì)算如改變位圖尺寸,這些操作應(yīng)該放在子線程中(或者以數(shù)據(jù)庫(kù)為例,通過(guò)異步請(qǐng)求的方式)來(lái)完成,然而,不是說(shuō)你的主線程阻塞在那里等待子線程來(lái)完成--也不用調(diào)用Thread.wait()或Thread.sleep();替代的方法是主線程需要為子線程提供一個(gè)handler,以便完成時(shí)能夠交給主線程,以這種方式設(shè)計(jì)你的應(yīng)用程序,將能保證你的主線程保持對(duì)輸入的響應(yīng)性并能避免由于5秒輸入事件的超時(shí)引發(fā)的ANR對(duì)話框。
第二,如何避免ANR
1.運(yùn)行在主線程里的任何方法都盡可能少做事情。特別是,Activity應(yīng)該在它的關(guān)鍵生命周期方法(如onCreate()和onResume())里盡可能少的去做創(chuàng)建操作。(可以采用重新開(kāi)啟子線程的方式,然后使用Handler+Message的方式做一些操作,比如更新主線程中的ui等)
2.應(yīng)用程序應(yīng)該避免在BroadcastReceiver里做耗時(shí)的操作或計(jì)算。但不再是在子線程里做這些任務(wù)(因?yàn)?BroadcastReceiver的生命周期短),替代的是,如果響應(yīng)Intent廣播需要執(zhí)行一個(gè)耗時(shí)的動(dòng)作的話,應(yīng)用程序應(yīng)該啟動(dòng)一個(gè) Service。(此處需要注意的是可以在廣播接受者中啟動(dòng)Service,但是卻不可以在Service中啟動(dòng)broadcasereciver,關(guān)于原因后續(xù)會(huì)有介紹,此處不是本文重點(diǎn))
3.避免在Intent Receiver里啟動(dòng)一個(gè)Activity,因?yàn)樗鼤?huì)創(chuàng)建一個(gè)新的畫(huà)面,并從當(dāng)前用戶正在運(yùn)行的程序上搶奪焦點(diǎn)。如果你的應(yīng)用程序在響應(yīng)Intent廣 播時(shí)需要向用戶展示什么,你應(yīng)該使用Notification Manager來(lái)實(shí)現(xiàn)。
總結(jié):anr異常也是在程序中自己經(jīng)常遇到的問(wèn)題,主要的解決辦法自己最常用的就是不要在主線程中做耗時(shí)的操作,而應(yīng)放在子線程中來(lái)實(shí)現(xiàn),比如采用Handler+mesage的方式,或者是有時(shí)候需要做一些和網(wǎng)絡(luò)相互交互的耗時(shí)操作就采用asyntask異步任務(wù)的方式(它的底層其實(shí)Handler+mesage有所區(qū)別的是它是線程池)等,在主線程中更新UI。
posted @
2015-06-24 16:00 Terry Zou 閱讀(313) |
評(píng)論 (0) |
編輯 收藏
摘要: String string="
歡迎你來(lái)到的
jack
的
android
使用技術(shù)總結(jié)
";
TextV
iew info2=(TextView)super.findV
iewById(R.id.info); ...
閱讀全文
posted @
2015-06-15 14:21 Terry Zou 閱讀(226) |
評(píng)論 (0) |
編輯 收藏
摘要: 開(kāi)發(fā)自定義控件的步驟:
1、了解View的工作原理
2、 編寫(xiě)繼承自View的子類(lèi)
3、 為自定義View類(lèi)增加屬性
4、 繪制控件
5、 響應(yīng)用戶消息
6 、自定義回調(diào)函數(shù)
一、View結(jié)構(gòu)原理
Android系統(tǒng)的視圖結(jié)構(gòu)的設(shè)計(jì)也采用了組合模式,即View作為所有圖形的基類(lèi),Viewgroup對(duì)View繼承...
閱讀全文
posted @
2015-05-19 17:29 Terry Zou 閱讀(374) |
評(píng)論 (0) |
編輯 收藏
摘要: Android 管理Fragments
FragmentManager
為了管理Activity中的fragments,需要使...
閱讀全文
posted @
2015-05-18 18:28 Terry Zou 閱讀(432) |
評(píng)論 (0) |
編輯 收藏|
java.version |
Java 運(yùn)行時(shí)環(huán)境版本 |
|
java.vendor |
Java 運(yùn)行時(shí)環(huán)境供應(yīng)商 |
|
java.vendor.url |
Java 供應(yīng)商的 URL |
|
java.home |
Java 安裝目錄 |
|
java.vm.specification.version |
Java 虛擬機(jī)規(guī)范版本 |
|
java.vm.specification.vendor |
Java 虛擬機(jī)規(guī)范供應(yīng)商 |
|
java.vm.specification.name |
Java 虛擬機(jī)規(guī)范名稱 |
|
java.vm.version |
Java 虛擬機(jī)實(shí)現(xiàn)版本 |
|
java.vm.vendor |
Java 虛擬機(jī)實(shí)現(xiàn)供應(yīng)商 |
|
java.vm.name |
Java 虛擬機(jī)實(shí)現(xiàn)名稱 |
|
java.specification.version |
Java 運(yùn)行時(shí)環(huán)境規(guī)范版本 |
|
java.specification.vendor |
Java 運(yùn)行時(shí)環(huán)境規(guī)范供應(yīng)商 |
|
java.specification.name |
Java 運(yùn)行時(shí)環(huán)境規(guī)范名稱 |
|
java.class.version |
Java 類(lèi)格式版本號(hào) |
|
java.class.path |
Java 類(lèi)路徑 |
|
java.library.path |
加載庫(kù)時(shí)搜索的路徑列表 |
|
java.io.tmpdir |
默認(rèn)的臨時(shí)文件路徑 |
|
java.compiler |
要使用的 JIT 編譯器的名稱 |
|
java.ext.dirs |
一個(gè)或多個(gè)擴(kuò)展目錄的路徑 |
|
os.name |
操作系統(tǒng)的名稱 |
|
os.arch |
操作系統(tǒng)的架構(gòu) |
|
os.version |
操作系統(tǒng)的版本 |
|
file.separator |
文件分隔符(在 UNIX 系統(tǒng)中是“/”) |
|
path.separator |
路徑分隔符(在 UNIX 系統(tǒng)中是“:”) |
|
line.separator |
行分隔符(在 UNIX 系統(tǒng)中是“/n”) |
|
user.name |
用戶的賬戶名稱 |
|
user.home |
用戶的主目錄 |
|
user.dir |
用戶的當(dāng)前工作目錄 |
StringBuffer response = new StringBuffer();while ((line = reader.readLine()) != null) { response.append(line).append( System.getProperty("line.separator"));}
public class SystemProperty {
public static void main(String args[]) {
System.out.println("java_vendor:" + System.getProperty("java.vendor"));
System.out.println("java_vendor_url:"
+ System.getProperty("java.vendor.url"));
System.out.println("java_home:" + System.getProperty("java.home"));
System.out.println("java_class_version:"
+ System.getProperty("java.class.version"));
System.out.println("java_class_path:"
+ System.getProperty("java.class.path"));
System.out.println("os_name:" + System.getProperty("os.name"));
System.out.println("os_arch:" + System.getProperty("os.arch"));
System.out.println("os_version:" + System.getProperty("os.version"));
System.out.println("user_name:" + System.getProperty("user.name"));
System.out.println("user_home:" + System.getProperty("user.home"));
System.out.println("user_dir:" + System.getProperty("user.dir"));
System.out.println("java_vm_specification_version:"
+ System.getProperty("java.vm.specification.version"));
System.out.println("java_vm_specification_vendor:"
+ System.getProperty("java.vm.specification.vendor"));
System.out.println("java_vm_specification_name:"
+ System.getProperty("java.vm.specification.name"));
System.out.println("java_vm_version:"
+ System.getProperty("java.vm.version"));
System.out.println("java_vm_vendor:"
+ System.getProperty("java.vm.vendor"));
System.out
.println("java_vm_name:" + System.getProperty("java.vm.name"));
System.out.println("java_ext_dirs:"
+ System.getProperty("java.ext.dirs"));
System.out.println("file_separator:"
+ System.getProperty("file.separator"));
System.out.println("path_separator:"
+ System.getProperty("path.separator"));
System.out.println("line_separator:"
+ System.getProperty("line.separator"));
}
轉(zhuǎn)載:http://blog.csdn.net/kongqz/article/details/3987198
posted @
2015-05-15 09:33 Terry Zou 閱讀(404) |
評(píng)論 (0) |
編輯 收藏
注意上面的雙引號(hào),何為“容易”?言下之意就是該activity還沒(méi)有被銷(xiāo)毀,而僅僅是一種可能性。這種可能性有哪些?通過(guò)重寫(xiě)一個(gè)activity的所有生命周期的onXXX方法,包括onSaveInstanceState和onRestoreInstanceState方法,我們可以清楚地知道當(dāng)某個(gè)activity(假定為activity A)顯示在當(dāng)前task的最上層時(shí),其onSaveInstanceState方法會(huì)在什么時(shí)候被執(zhí)行,有這么幾種情況:
1、當(dāng)用戶按下HOME鍵時(shí)。
這是顯而易見(jiàn)的,系統(tǒng)不知道你按下HOME后要運(yùn)行多少其他的程序,自然也不知道activity A是否會(huì)被銷(xiāo)毀,故系統(tǒng)會(huì)調(diào)用onSaveInstanceState,讓用戶有機(jī)會(huì)保存某些非永久性的數(shù)據(jù)。以下幾種情況的分析都遵循該原則
2、長(zhǎng)按HOME鍵,選擇運(yùn)行其他的程序時(shí)。
3、按下電源按鍵(關(guān)閉屏幕顯示)時(shí)。
4、從activity A中啟動(dòng)一個(gè)新的activity時(shí)。
5、屏幕方向切換時(shí),例如從豎屏切換到橫屏?xí)r。
在屏幕切換之前,系統(tǒng)會(huì)銷(xiāo)毀activity A,在屏幕切換之后系統(tǒng)又會(huì)自動(dòng)地創(chuàng)建activity A,所以onSaveInstanceState一定會(huì)被執(zhí)行。
總而言之,onSaveInstanceState的調(diào)用遵循一個(gè)重要原則,即當(dāng)系統(tǒng)“未經(jīng)你許可”時(shí)銷(xiāo)毀了你的activity,則onSaveInstanceState會(huì)被系統(tǒng)調(diào)用,這是系統(tǒng)的責(zé)任,因?yàn)樗仨氁峁┮粋€(gè)機(jī)會(huì)讓你保存你的數(shù)據(jù)(當(dāng)然你不保存那就隨便你了)。
至于onRestoreInstanceState方法,需要注意的是,onSaveInstanceState方法和onRestoreInstanceState方法“不一定”是成對(duì)的被調(diào)用的,onRestoreInstanceState被調(diào)用的前提是,activity A“確實(shí)”被系統(tǒng)銷(xiāo)毀了,而如果僅僅是停留在有這種可能性的情況下,則該方法不會(huì)被調(diào)用,例如,當(dāng)正在顯示activity A的時(shí)候,用戶按下HOME鍵回到主界面,然后用戶緊接著又返回到activity A,這種情況下activity A一般不會(huì)因?yàn)閮?nèi)存的原因被系統(tǒng)銷(xiāo)毀,故activity A的onRestoreInstanceState方法不會(huì)被執(zhí)行。
另外,onRestoreInstanceState的bundle參數(shù)也會(huì)傳遞到onCreate方法中,你也可以選擇在onCreate方法中做數(shù)據(jù)還原。 轉(zhuǎn)載:http://gundumw100.iteye.com/blog/1115080
posted @
2015-05-11 10:34 Terry Zou 閱讀(350) |
評(píng)論 (0) |
編輯 收藏Android中常常使用shape來(lái)定義控件的一些顯示屬性,今天看了一些shape的使用,對(duì)shape有了大體的了解,稍作總結(jié):
先看下面的代碼:
<shape>
<!-- 實(shí)心 -->
<solid android:color="#ff9d77"/>
<!-- 漸變 -->
<gradient
android:startColor="#ff8c00"
android:endColor="#FFFFFF"
android:angle="270" />
<!-- 描邊 -->
<stroke
android:width="2dp"
android:color="#dcdcdc" />
<!-- 圓角 -->
<corners
android:radius="2dp" />
<padding
android:left="10dp"
android:top="10dp"
android:right="10dp"
android:bottom="10dp" />
</shape>
solid:實(shí)心,就是填充的意思
android:color指定填充的顏色
gradient:漸變
android:startColor和android:endColor分別為起始和結(jié)束顏色,ndroid:angle是漸變角度,必須為45的整數(shù)倍。
另外漸變默認(rèn)的模式為android:type="linear",即線性漸變,可以指定漸變?yōu)閺较驖u變,android:type="radial",徑向漸變需要指定半徑android:gradientRadius="50"。
stroke:描邊
android:width="2dp" 描邊的寬度,android:color 描邊的顏色。
我們還可以把描邊弄成虛線的形式,設(shè)置方式為:
android:dashWidth="5dp"
android:dashGap="3dp"
其中android:dashWidth表示'-'這樣一個(gè)橫線的寬度,android:dashGap表示之間隔開(kāi)的距離。
corners:圓角
android:radius為角的弧度,值越大角越圓。
我們還可以把四個(gè)角設(shè)定成不同的角度,方法為:
<corners
android:topRightRadius="20dp" 右上角
android:bottomLeftRadius="20dp" 右下角
android:topLeftRadius="1dp" 左上角
android:bottomRightRadius="0dp" 左下角
/>
這里有個(gè)地方需要注意,bottomLeftRadius是右下角,而不是左下角,這個(gè)有點(diǎn)郁悶,不過(guò)不影響使用,記得別搞錯(cuò)了就行。
還有網(wǎng)上看到有人說(shuō)設(shè)置成0dp無(wú)效,不過(guò)我在測(cè)試中發(fā)現(xiàn)是可以的,我用的是2.2,可能修復(fù)了這個(gè)問(wèn)題吧,如果無(wú)效的話那就只能設(shè)成1dp了。
padding:間隔
這個(gè)就不用多說(shuō)了,XML布局文件中經(jīng)常用到。
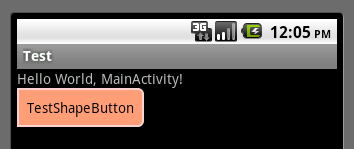
大體的就是這樣,以下是一個(gè)使用的具體示例:用在Selector中作為Button的背景,分別定義了按鈕的一般狀態(tài)、獲得焦點(diǎn)狀態(tài)和按下時(shí)的狀態(tài),具體代碼如下:
main.xml:
<Button
android:layout_width="wrap_content"
android:layout_height="wrap_content"
android:text="TestShapeButton"
android:background="@drawable/button_selector"
/>
button_selector.xml:
<?xml version="1.0" encoding="utf-8"?>
<selector
xmlns:android="http://schemas.android.com/apk/res/android">
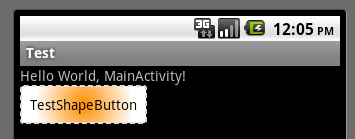
<item android:state_pressed="true" >
<shape>
<!-- 漸變 -->
<gradient
android:startColor="#ff8c00"
android:endColor="#FFFFFF"
android:type="radial"
android:gradientRadius="50" />
<!-- 描邊 -->
<stroke
android:width="2dp"
android:color="#dcdcdc"
android:dashWidth="5dp"
android:dashGap="3dp" />
<!-- 圓角 -->
<corners
android:radius="2dp" />
<padding
android:left="10dp"
android:top="10dp"
android:right="10dp"
android:bottom="10dp" />
</shape>
</item>
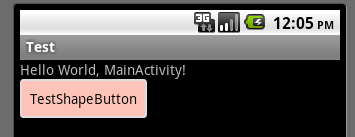
<item android:state_focused="true" >
<shape>
<gradient
android:startColor="#ffc2b7"
android:endColor="#ffc2b7"
android:angle="270" />
<stroke
android:width="2dp"
android:color="#dcdcdc" />
<corners
android:radius="2dp" />
<padding
android:left="10dp"
android:top="10dp"
android:right="10dp"
android:bottom="10dp" />
</shape>
</item>
<item>
<shape>
<solid android:color="#ff9d77"/>
<stroke
android:width="2dp"
android:color="#fad3cf" />
<corners
android:topRightRadius="5dp"
android:bottomLeftRadius="5dp"
android:topLeftRadius="0dp"
android:bottomRightRadius="0dp"
/>
<padding
android:left="10dp"
android:top="10dp"
android:right="10dp"
android:bottom="10dp" />
</shape>
</item>
</selector>
運(yùn)行效果如下圖:
一般狀態(tài):
獲得焦點(diǎn)狀態(tài):
按下?tīng)顟B(tài):
轉(zhuǎn)載:http://kofi1122.blog.51cto.com/2815761/521605/
posted @
2015-04-18 10:41 Terry Zou 閱讀(275) |
評(píng)論 (0) |
編輯 收藏
摘要: 所謂自定義控件(或稱組件)也就是編寫(xiě)自己的控件類(lèi)型,而非Android中提供的標(biāo)準(zhǔn)的控件,如TextView,CheckBox等等.不過(guò)自定義的控件一般也都是從標(biāo)準(zhǔn)控件繼承來(lái)的,或者是多種控件組合,或者是對(duì)標(biāo)準(zhǔn)控件的屬性進(jìn)行改變而得到的自己滿意的控件.
自定義控件可能會(huì)有很多種方法,這里只介紹我要介紹的方法.
&nb...
閱讀全文
posted @
2015-04-14 10:53 Terry Zou 閱讀(333) |
評(píng)論 (0) |
編輯 收藏