在Java IDE世界里,Eclipse和NetBeans是平臺(tái)主導(dǎo)者。無(wú)論是CodeGear的JBuilder 2007,BEA 的Workshop Studio,還是IBM 的Websphere Studio,因?yàn)槎际墙⒌脑贓clipse平臺(tái)基礎(chǔ)上的,所以缺省的構(gòu)建(Build)方式都是Eclipse Native的。同時(shí),Eclipse支持External Tools方式,其中有Ant Build方式。這樣為采用其它IDE建立的項(xiàng)目搭建了一個(gè)溝通的橋梁。
在一個(gè)開發(fā)小組中,本應(yīng)該要統(tǒng)一開發(fā)環(huán)境。但是有時(shí)候,采用NetBeans 平臺(tái)加上EnterPack和Visual Web Pack之后,可以簡(jiǎn)化SOA的Web Services和BPEL以及JSF 2.0的開發(fā)。NetBeans本身完全采用ant 方式管理工程。這樣我們可以建立一個(gè)在NetBeans和Eclipse共享的項(xiàng)目。
步驟如下:
1.在NetBeans下建立項(xiàng)目
首先在NetBeans下建立一個(gè)叫HelloWorld的示例項(xiàng)目。在NetBeans的項(xiàng)目視圖和文件視圖如圖1和圖所示。
在NetBeans的項(xiàng)目中一般至少包含了Source Packages,Test Packages,Libraries和Test Libraries四個(gè)目錄。其結(jié)構(gòu)圖如如圖1。
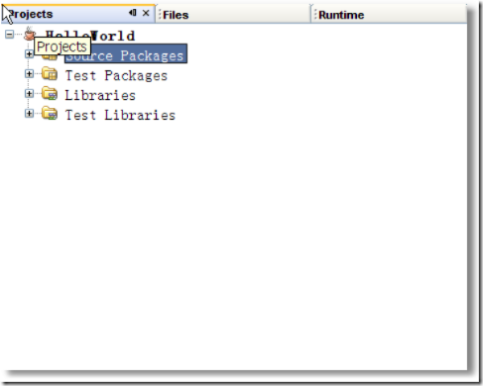
圖1 NetBeans項(xiàng)目結(jié)構(gòu)圖
在NetBeans的文件結(jié)構(gòu)至少包含nbproject, src和test三個(gè)子目錄。文件結(jié)構(gòu)圖如圖2所示。
在項(xiàng)目的文件夾下面有ant的標(biāo)準(zhǔn)構(gòu)建文件build.xml,其內(nèi)容如表所示。
<?
xml?version="1.0"?encoding="UTF-8"
?>
<!--
?You?may?freely?edit?this?file.?See?commented?blocks?below?for?
-->
<!--
?some?examples?of?how?to?customize?the?build.?
-->
<!--
?(If?you?delete?it?and?reopen?the?project?it?will?be?recreated.)?
-->
<
project?
name
="HelloWorld"
?default
="default"
?basedir
="."
>
????
<
description
>
Builds,?tests,?and?runs?the?project?HelloWorld.
</
description
>
????
<
import?
file
="nbproject/build-impl.xml"
/>
????
<!--
????There?exist?several?targets?which?are?by?default?empty?and?which?can?be?
????used?for?execution?of?your?tasks.?These?targets?are?usually?executed?
????before?and?after?some?main?targets.?They?are:?
??????-pre-init:?????????????????called?before?initialization?of?project?properties
??????-post-init:????????????????called?after?initialization?of?project?properties
??????-pre-compile:??????????????called?before?javac?compilation
??????-post-compile:?????????????called?after?javac?compilation
??????-pre-compile-single:???????called?before?javac?compilation?of?single?file
??????-post-compile-single:??????called?after?javac?compilation?of?single?file
??????-pre-compile-test:?????????called?before?javac?compilation?of?JUnit?tests
??????-post-compile-test:????????called?after?javac?compilation?of?JUnit?tests
??????-pre-compile-test-single:??called?before?javac?compilation?of?single?JUnit?test
??????-post-compile-test-single:?called?after?javac?compilation?of?single?JUunit?test
??????-pre-jar:??????????????????called?before?JAR?building
??????-post-jar:?????????????????called?after?JAR?building
??????-post-clean:???????????????called?after?cleaning?build?products
????(Targets?beginning?with?'-'?are?not?intended?to?be?called?on?their?own.)
????Example?of?inserting?an?obfuscator?after?compilation?could?look?like?this:
????????<target?name="-post-compile">
????????????<obfuscate>
????????????????<fileset?dir="${build.classes.dir}"/>
????????????</obfuscate>
????????</target>
????For?list?of?available?properties?check?the?imported?
????nbproject/build-impl.xml?file.?
????Another?way?to?customize?the?build?is?by?overriding?existing?main?targets.
????The?targets?of?interest?are:?
??????-init-macrodef-javac:?????defines?macro?for?javac?compilation
??????-init-macrodef-junit:?????defines?macro?for?junit?execution
??????-init-macrodef-debug:?????defines?macro?for?class?debugging
??????-init-macrodef-java:??????defines?macro?for?class?execution
??????-do-jar-with-manifest:????JAR?building?(if?you?are?using?a?manifest)
??????-do-jar-without-manifest:?JAR?building?(if?you?are?not?using?a?manifest)
??????run:??????????????????????execution?of?project?
??????-javadoc-build:???????????Javadoc?generation
??????test-report:??????????????JUnit?report?generation
????An?example?of?overriding?the?target?for?project?execution?could?look?like?this:
????????<target?name="run"?depends="HelloWorld-impl.jar">
????????????<exec?dir="bin"?executable="launcher.exe">
????????????????<arg?file="${dist.jar}"/>
????????????</exec>
????????</target>
????Notice?that?the?overridden?target?depends?on?the?jar?target?and?not?only?on?
????the?compile?target?as?the?regular?run?target?does.?Again,?for?a?list?of?available?
????properties?which?you?can?use,?check?the?target?you?are?overriding?in?the
????nbproject/build-impl.xml?file.?
????
-->
</
project
>
?
在列表中可以看出,有這樣的描述
 import?file="nbproject/build-impl.xml"/
主要的內(nèi)容實(shí)際上在nbproject/build-impl.xml里。
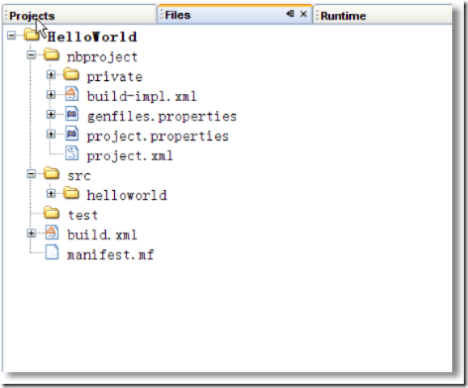
圖2 NetBeans文件結(jié)構(gòu)圖
那么構(gòu)建過(guò)后的class文件和jar到底放置在什么地方。
切換到project視圖,點(diǎn)擊右鍵,在彈出菜單選擇“Build Project”(如圖3所示),對(duì)項(xiàng)目進(jìn)行構(gòu)建。
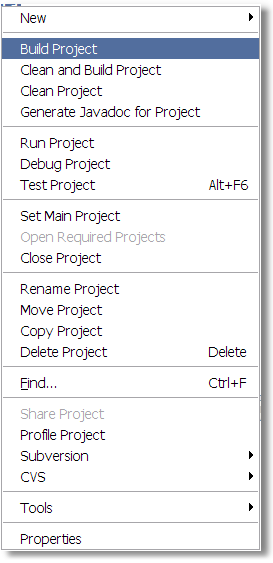
圖3
再切換到File視圖,將會(huì)發(fā)現(xiàn)多出了build和dist及其子文件夾。如圖4所示。
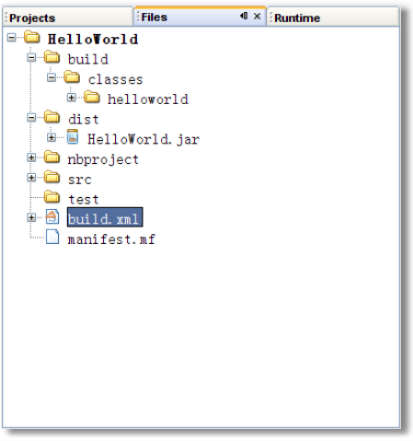
圖4
原來(lái),NetBeans構(gòu)建過(guò)后,將產(chǎn)生的類放置到了build文件夾的classes下面,將生成的jar包放置到了dist下面。
通過(guò)搜索,build.classes.dir屬性和dist.dir是在project.properties文件里定義的。為了將項(xiàng)目引入到eclipse作準(zhǔn)備,修改為:
build.classes.dir=${build.dir}/
dist.dir=bin
自此,在HelloWorld項(xiàng)目在NetBeans下已經(jīng)完工。
2.將HelloWorld Project 引入到Eclipse
打開Eclipse,從菜單"File->New"選擇,將彈出項(xiàng)目向?qū)АT谙驅(qū)е羞x擇"Java 項(xiàng)目"。如圖5所示。
?
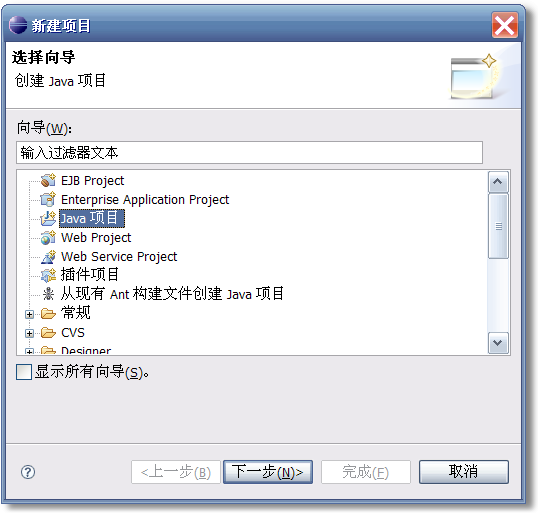
圖5
點(diǎn)擊下一步,在新的向?qū)ы?yè)中,選擇"從現(xiàn)有資源創(chuàng)建項(xiàng)目"選項(xiàng),然后再點(diǎn)擊“下一步”。如圖6所示。
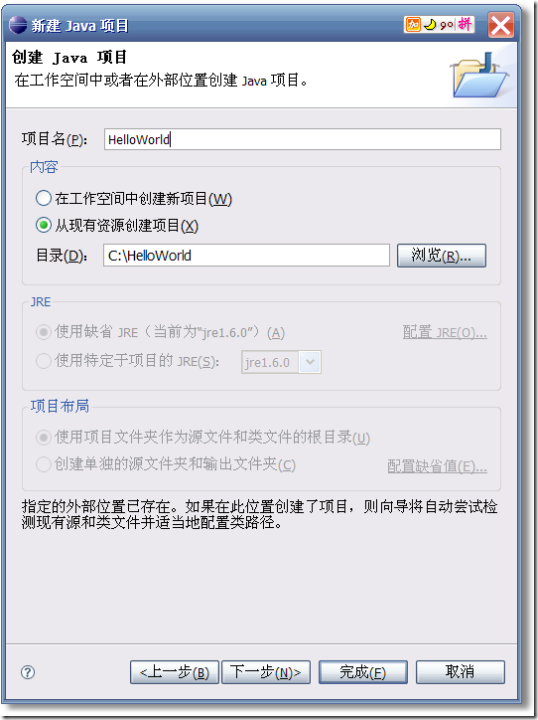
圖6
這時(shí),調(diào)整缺省輸出目錄,然后點(diǎn)擊“完成”按鈕。
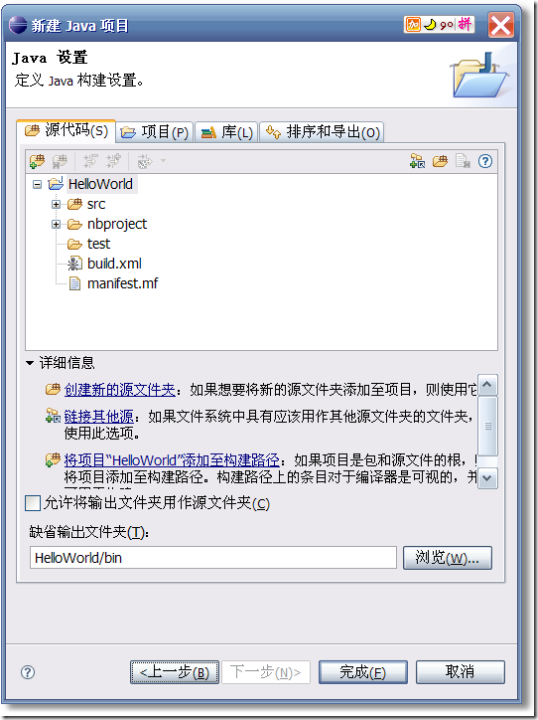
圖7
至此,NetBeans下的項(xiàng)目完整地引入到了Eclipse平臺(tái)里。像其它的Eclipse項(xiàng)目一樣進(jìn)行操作了。